
Learning how to use sewing machine opens up a world of creativity. Whether you want to hem clothes, craft bags, or quilt, the first step is understanding your machine. This guide covers everything from winding a bobbin to mastering straight stitches. Grab your machine and let’s get started.
Understanding Your Sewing Machine’s Anatomy

Before you sew a stitch, familiarize yourself with the main parts. The spool pin holds your thread, the handwheel raises the needle, and the foot pedal controls speed. Locate the stitch selector, reverse lever, and bobbin winder. Knowing these components makes threading the machine much easier.
The presser foot holds fabric flat while the feed dogs move it along. Look for the stitch plate with seam allowance markings. The needle clamp secures the needle. Understanding each part’s function prevents common mistakes. You’ll feel more confident once you can identify all the key elements.
How to Wind a Bobbin Correctly

Brother XM3700 Sewing Machine
Check PriceWinding a bobbin is the first hands-on step. Place an empty bobbin on the winder spindle and push it to the right. Loop thread around the bobbin winder tension disc. Hold the thread tail and start the machine slowly. Wind until the bobbin is full, then cut the thread.
Always use a bobbin designed for your machine model. A poorly wound bobbin causes uneven stitches and snarls. Make sure the thread lies smoothly and evenly. Insert the wound bobbin into the case following the arrow direction. This simple step prevents many bobbin thread tension problems later.
Threading the Upper Thread Path

Brother CS5055 Computerized Sewing Machine
Check PriceProper upper threading is critical. Raise the presser foot and turn the handwheel to lift the take-up lever. Follow the numbered guides printed on most machines. Pass the thread through the tension discs and down to the needle. Then, thread the needle from front to back.
Always thread with the presser foot up so the tension discs open. Miss one guide and you’ll get thread nests underneath. Pull about six inches of thread through the needle. Leave the tail toward the back of the machine. This neat setup sets you up for smooth sewing.
Selecting the Proper Needle and Thread

StitchMaster Pro Sewing Machine
Check PriceNeedle size and type matter. Use a universal needle size 80/12 for medium-weight cotton. Finer fabrics need size 70/10, while denim requires 90/14 or 100/16. Match thread weight to the needle. All-purpose polyester thread works for most projects. Check the needle for burrs or bends before starting.
Replace your needle after every eight hours of sewing. A dull needle causes skipped stitches and fabric pulls. Thread should pass smoothly through the eye. Also, choose quality thread that doesn’t lint. This small investment makes a big difference in stitch quality. Good tools keep frustration away.
Adjusting Thread Tension for Perfect Stitches

Brother FB1757X Mechanical Sewing Machine
Check PriceTension might seem mysterious, but it’s just the balance between top and bottom threads. The default setting around 4 works for most fabrics. Test on a scrap piece first. If the bobbin thread shows on top, tighten the upper tension slightly. If loops appear underneath, loosen it a bit.
Only adjust the upper tension dial in small increments. Clean lint from between the tension discs regularly. Balanced stitches look identical on both sides. Never adjust bobbin tension unless you’re experienced. A simple upper tension tweak solves most problems. Learn this skill early for frustration-free sewing.
Mastering the Straight Stitch

Rxmeili Portable 12-Stitch Sewing Machine
Check PriceThe straight stitch is your workhorse. Set the stitch length to 2.5 mm for general sewing. Place fabric under the presser foot and lower the lever. Hold the thread tails for the first few stitches. Press the foot pedal gently, guiding the fabric but not pushing it. Let the feed dogs do the work.
Maintain a steady speed for uniform stitches. Look at the seam guide, not the needle. Sewing a straight line requires practice. Use a piece of lined paper without thread first to build muscle memory. Soon, stitching straight will feel natural. Start with scrap fabric every time you sit down.
The Backstitch and Locking Seams
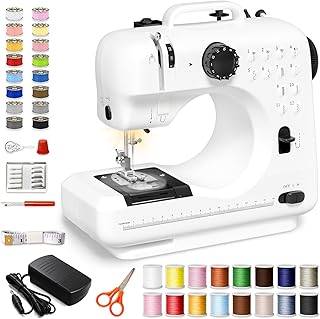
Portable Tabletop Beginner Mini Sewing Machine
Check PriceBackstitching locks your seam so it doesn’t unravel. At the beginning of a seam, sew forward three stitches. Press and hold the reverse lever to stitch backward over those stitches. Then continue forward. Repeat at the end of the seam. This secures everything in place.
On delicate fabrics, you can reduce stitch length instead of backstitching. The tiny stitches lock themselves. Always test reverse on a scrap. Some machines have an automatic lock stitch button. Check your manual for specifics. This quick step adds durability to every project.
Pivoting and Turning Corners Smoothly

Vaspow Portable Sewing Machine
Check PriceTurning a corner is all about needle position. Sew until you reach the corner point. Stop with the needle down in the fabric. Lift the presser foot, pivot the fabric around the needle, and lower the foot. Continue sewing in the new direction. This gives a crisp, accurate corner.
Practice on paper first to get the motion down. For boxy projects like tote bags, pivoting is essential. Always keep the needle down when adjusting fabric. The needle acts as a pivot pin. You’ll achieve professional-looking results with this simple technique. Soon it becomes second nature.
Sewing Curved Seams with Ease

SINGER MX60 Sewing Machine
Check PriceCurves require a slower pace and slight adjustments. For gentle curves, guide the fabric smoothly while the machine runs. On tight curves, stop with the needle down more frequently. Pivot slightly, take a few stitches, and repeat. This prevents puckering and uneven seams.
Shorter stitch length helps navigate curves. Set it to 1.8 to 2.0 mm. Keep your eyes on the seam guide line. Hands should gently steer, not force, the fabric. Practice on circles drawn on fabric. Mastering curves opens up garment sewing and craft projects. You’ll love the control.
Finishing Raw Edges with a Zigzag Stitch

SINGER M1500 Sewing Machine
Check PriceRaw fabric edges fray over time. A zigzag stitch encases them and prevents fraying. Set your machine to a medium width and length zigzag. Place the edge under the center of the foot. Sew so the needle goes off the fabric edge on one side. This wraps the raw threads.
Alternatively, use an overcast foot for easier guiding. This finish is essential for woven fabrics that unravel. It’s not as polished as a serger, but it works well. Test the stitch on a scrap to find the right width. Protecting edges makes your projects last much longer.
How to Sew a Consistent Seam Allowance

Janome Arctic Crystal Sewing Machine
Check PriceMost patterns use a 5/8 inch seam allowance. Use the markings on the stitch plate to keep the fabric edge aligned. Some people place a piece of masking tape as a guide. Watch that guide, not the needle. Consistent seam allowance ensures pieces fit together later.
A seam guide magnet or screw-on guide can help. Match your cutting to the seam allowance precisely. Uneven seams cause puckers and mismatched notches. Practice sewing along a drawn line without thread. Build the habit of looking ahead. Accuracy here is a game changer.
Troubleshooting Common Sewing Problems

Brother SM1400 Sewing Machine
Check PriceThread bunching underneath usually means the upper threading is wrong. Rethread completely with the presser foot up. Needle breaks often happen from pulling fabric or using a bent needle. Skipped stitches? Check needle type and whether it’s fully inserted. Most issues have simple fixes.
Uneven tension might be lint buildup. Remove the bobbin case and clean with the brush. If the machine won’t feed fabric, check the feed dogs are raised. Keep your manual handy for reference. Learn what your machine sounds like when healthy. Early detection prevents bigger repairs.
Cleaning and Oiling Your Machine

Stoigeld Portable Sewing Machine
Check PriceRegular cleaning keeps your machine running smoothly. Unplug it first. Remove the needle plate and brush out all lint using the included brush. Add one drop of sewing machine oil to the hook race as instructed. Never use too much oil. Wipe away any excess with a soft cloth.
Consult your manual for oiling points. Some machines are self-lubricating and need no oil. Sew a few stitches on scrap fabric after oiling to absorb residue. Cover your machine when not in use. This prevents dust from settling inside. A clean machine stitches quietly and accurately. It’s a ritual that pays off.
Learning how to use a sewing machine is a journey that rewards patience. Start with small projects, like a beginner tote bag. Gradually tackle more complex techniques. The key is consistent practice. Soon, you’ll sew with confidence and joy.
For a deeper dive into machine mechanics, check out this detailed explanation of how sewing machines work. Understanding the internal magic helps troubleshoot and appreciate your tool. Keep your machine maintained and your curiosity alive. Happy stitching!