The answer is yes! Professional sharpening services typically cost between $7-20 (£6-15) and only need to be done once every few years. However, expert opinions vary, with some recommending sharpening twice a year, while others suggest at least once annually.
Dull scissors force you to exert more pressure when cutting, which significantly increases strain on your hands and wrists. Importantly, knowing the correct sharpening angle matters—fabric shears larger than 7 inches should be sharpened at 125-130 degrees, and some scissors have different angles for the thumb blade versus the finger blade. Fortunately, with proper knowledge about how to sharpen sewing scissors at home, you can maintain your valuable cutting tools between professional sharpenings. In this guide, we’ll explore everything you need to know about keeping your fabric scissors in perfect cutting condition.
Why Sharp Sewing Scissors Matter
Sharp sewing scissors fundamentally change your fabric cutting experience. I’ve found that investing in quality scissors—and keeping them sharp—makes all the difference in my sewing projects. Let’s explore exactly why maintaining sharp blades matters so much.
Clean and accurate fabric cuts
The moment you place sharp scissors against fabric, the difference is immediate. Instead of struggling, sharp blades effortlessly glide through material, creating crisp, clean cuts. This precision becomes particularly important for achieving accurate seam allowances and perfectly aligned patterns.
The quality of your cuts directly impacts your finished product. When scissors are dull, they tend to chew rather than slice through fabric, often resulting in jagged edges that can affect how your pieces fit together. Furthermore, clean cuts prevent unwanted fraying and ensure that your pattern pieces maintain their exact intended dimensions.
Less strain on hands and wrists
One of the most compelling reasons to maintain sharp scissors is the physical impact on your body. Dull scissors force you to exert significantly more pressure when cutting, increasing strain on your hands and wrists. This additional effort can lead to discomfort during lengthy sewing sessions and potentially contribute to repetitive strain injuries over time.
Sharp scissors, conversely, require minimal force to cut effectively. This reduced effort allows me to work on projects for extended periods without the hand fatigue that often accompanies dull tools. Additionally, certain ergonomic techniques, such as keeping your pointer finger loose instead of inside the handle, can further reduce strain.
Better control for detailed work
Precision work demands sharp scissors. Making notches, snips, and navigating curved cuts becomes remarkably easier with properly sharpened blades. With sharp scissors, I can confidently make these detailed cuts without worrying about unintentional fraying or tearing.
Due to the reduced effort needed, my control over the cutting process improves dramatically. This enhanced precision proves essential for complex patterns or delicate fabrics that require meticulous handling.
Longer lifespan of your scissors
Perhaps surprisingly, regular sharpening actually extends the life of your scissors rather than wearing them down. Properly maintained scissors can serve you faithfully for years—possibly even decades. This longevity makes investing in quality scissors and their maintenance genuinely worthwhile.
By preserving their sharpness, you’ll save money on frequent replacements while enjoying a consistently superior cutting experience. Because of this extended lifespan, many sewers consider quality scissors as heirloom tools worthy of passing down to future generations.
Can You Sharpen Sewing Scissors at Home?
The question of home sharpening often comes up when favorite fabric scissors start to dull. Though it’s possible to sharpen sewing scissors yourself, there’s more to consider than simply running blades across a sharpening stone.
Why sharpening angle matters
Sharpening angles significantly impact cutting performance. The most common angle for industrial scissors is 35°, which manufacturers typically print directly on the blade for reference. Different scissors require different angles—fabric and tailor shears 7″ and longer typically need angles between 35-40°.
Most importantly, using the wrong angle can permanently damage your scissors. Various manufacturers design their scissors with specific angles, and these aren’t standardized across brands. Consequently, generic sharpening tools often fail to match these precise requirements.
Risks of damaging the blade hollow
Professional scissor experts unanimously caution against DIY sharpening for one critical reason: the risk of flattening the blade’s hollow. This “blade set” or subtle hollow inside the blades is deliberately engineered into quality scissors.
When amateurs attempt sharpening, they often eliminate this crucial feature. As one expert from Ernest Wright explains, many home sharpening methods “would flatten some of the hollow we’ve put into the inside blades”. Once this hollow is removed, the scissors cannot be easily restored to their original performance.
Common mistakes with DIY sharpening
Numerous rookie mistakes plague home sharpening attempts. Among these, using aluminum foil tends to round the cutting edge, while sandpaper can permanently alter blade structure. Another prevalent error is treating scissor sharpening like knife sharpening—the techniques differ substantially.
Generally, without specialized training, you might sharpen at incorrect angles, accidentally nick the blades, or overtighten scissors, causing the blades to “crunch” into each other. These mistakes typically require removing more metal to fix, shortening your scissors’ lifespan.
When at-home sharpening is okay
Despite these cautions, light maintenance between professional sharpenings remains reasonable. For minor touch-ups on scissors that aren’t horribly dull, carefully cutting through fine sandpaper (180-220 grit) can help.
For optimal scissors care, aim for professional sharpening every few years, though some experts recommend more frequent maintenance—approximately twice yearly. Between these professional services, gentle at-home methods can maintain adequate performance without risking permanent damage to your valuable sewing tools.
Best Ways to Sharpen Sewing Scissors
Several methods exist for restoring your dull sewing scissors to their former glory. Whether you prefer DIY approaches or professional help, knowing which technique works best for your scissors ensures they’ll keep cutting cleanly for years.
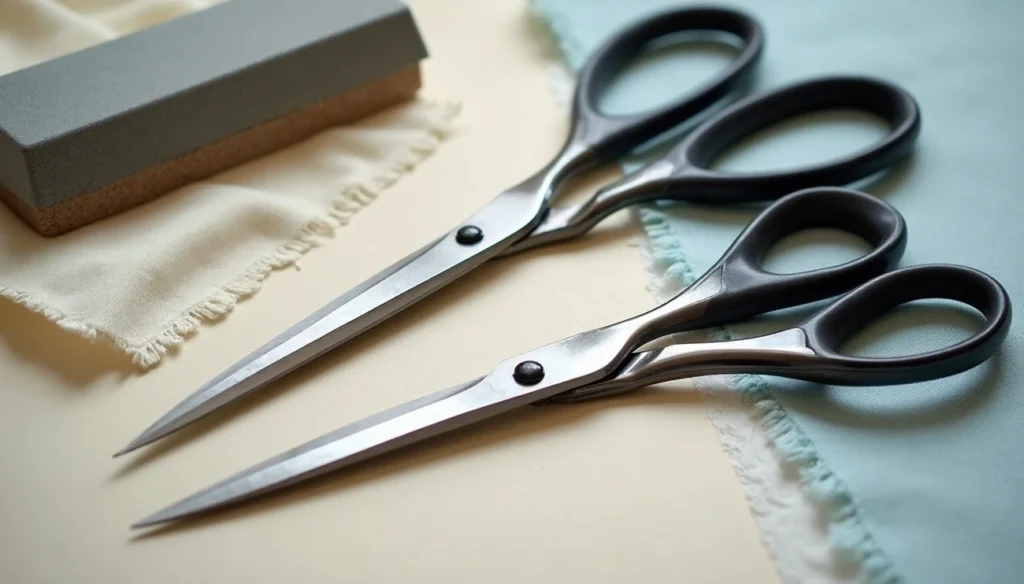
Using a sharpening stone
Sharpening stones (whetstones) offer excellent results but require careful technique. First, lubricate the stone with water or honing oil. For best results, disassemble your scissors to sharpen each blade individually. Begin with the coarse grit side using light pressure, then finish with the fine grit to remove imperfections. Always maintain the original bevel angle of your scissors, typically between 0-10 degrees for most fabric scissors.
Cutting through sandpaper or foil
For a quick fix, fold fine-grit sandpaper (150-200 grit) with the abrasive side facing out. Make 15-20 complete cuts through the folded sandpaper, starting from where the blades meet and cutting to the tips. Aluminum foil works similarly—fold it several times and cut through it repeatedly. Afterward, wipe the blades clean with a damp cloth to remove residue.
Using a knife sharpener: pros and cons
Knife sharpeners can work on scissors in a pinch. Each blade can be sharpened separately or while adjoined, using about ten passes with a dragging motion. The downside? Many scissors have specific bevel angles different from knives, making this method risky for expensive shears.
When to use a sewing scissor sharpener
Specialized scissors sharpeners like Fiskars Universal automatically adjust to different blade grinds, making them safer than generic tools. These compact devices are perfect for routine maintenance between professional sharpenings. Nevertheless, they’re not suitable for pinking shears or serrated blades.
Sharpening pinking shears: what to know
Pinking shears require special care—never sharpen between the teeth! Instead, mark the flat tops of the teeth with a marker and sharpen only this surface. Most pinking shears have a 0-10 degree angle. Importantly, about 30% of brand-new pinking shears fail even with proper sharpening.
Professional sharpening services
Professional services typically charge $7-8 per pair, much less than replacement costs. Mail-in services like Simply Sharper or Sharpen By Mail offer specialized equipment and certified technicians. Professional sharpening typically takes 1-2 weeks but results in scissors that cut better than when new.
How to Know When Your Scissors Need Sharpening
Knowing exactly when your fabric scissors need attention saves you from struggling with dull blades. Let’s explore how to identify when it’s sharpening time and what you need to know about the process.
Signs of dull blades
Your scissors will practically tell you when they need sharpening through several clear signals. Blunt cuts are an immediate red flag—if you’re experiencing fabric snags or uneven edges while cutting, your scissors likely need attention. Increased effort required to cut is another obvious indicator; when you find yourself exerting more force than usual, your blades have lost their edge.
Moreover, listen for the sound—sharp scissors produce a satisfying, clean-cutting sound, whereas dull ones make a muffled thud. Other telltale signs include frayed fabric edges, uneven cutting lines, and visible nicks or dents on the blade edges from accidentally dropping them or cutting hard materials.
How often to sharpen sewing scissors
The consensus among experts is that sewing scissors should be sharpened at least once a year, even if they’re not showing obvious signs of dullness. For regular use, many professionals recommend sharpening twice annually. Initially, this might seem excessive, but routine maintenance ensures optimal performance and prolongs the lifespan of your valuable tools.
Naturally, frequency depends on several factors—how often you use your scissors, what materials you cut, and your cutting techniques all affect how quickly blades dull.
What angle to sharpen scissors
The correct sharpening angle dramatically affects performance. Most industrial scissors use a 35° angle, which manufacturers typically print directly on the blade for reference. Fabric and tailor shears longer than 7 inches generally require angles between 35-40°.
Sharpening angles are measured differently across traditions—the German method measures from the inside edge (0° for kids’ scissors), while the Japanese tradition considers that 90°.
Can you sharpen scissors with a knife sharpener?
Yes, a knife sharpener can indeed be used on scissors. The process involves carefully dragging each blade across the sharpener approximately ten times. Alternatively, for better results, disassemble the scissors and sharpen each blade individually.
Regardless, this approach requires caution—the brute force of an electric sharpener can potentially damage scissor blades, especially professional ones with fragile cutting edges.
Conclusion
Sharp sewing scissors truly make all the difference between frustration and enjoyment in your sewing projects. Throughout this guide, we’ve seen how proper maintenance extends the life of your valuable cutting tools while protecting your hands from unnecessary strain.
Maintaining the correct sharpening angle matters significantly, especially since different scissors require specific angles. Professional sharpening services remain the safest option for most sewers, costing between $7-20 and only needed once or twice yearly. Though DIY methods exist, they come with risks – particularly the danger of flattening the crucial blade hollow that manufacturers carefully engineer into quality scissors.
Your scissors will tell you when they need attention through signs like frayed fabric edges, increased cutting effort, and uneven cutting lines. Most importantly, remember that regular maintenance prevents you from struggling with increasingly dull blades that damage your fabrics and your hands.