If you’ve ever reached for your favorite spool of thread only to find it unraveled into a knotted mess, you’re not alone. Learning how to keep thread on the spool is a small but critical skill for sewers of all levels, saving you time, money, and frustration when you’re in the middle of a project. Loose thread not only wastes expensive materials but can also jam your sewing machine if stray strands get caught in the bobbin case or tension discs.
Why Thread Slips Off Spools: Common Root Causes
Before diving into fixes, it helps to understand why thread slips off spools in the first place. In my 12 years of sewing and teaching beginner classes, I’ve found most unraveling issues stem from 4 core issues:
Loose Spool Winding Tension
Thread is wound onto spools at factories using industrial winders that apply consistent tension. However, budget thread brands often cut corners here, leaving spools with loosely wound strands that shift and slip over time. If you rewind thread onto empty spools at home, uneven tension from hand-winding or a miscalibrated bobbin winder can cause the same problem.
Improper Spool Storage
Tossing spools into a fabric bin or drawer where they roll around freely is a recipe for loose thread. When spools bump into each other or hard surfaces, the impact can loosen the outer layer of thread, letting strands slip off the rim. Stacking heavy spools on top of lighter ones presses thread down, flattening the wind and making it easier for tails to pop out.
Low-Quality Spool Construction
Cheap plastic spools often have smooth, untextured rims that don’t grip thread well. Wooden spools are better for grip, but if the notch designed to hold the thread tail is chipped or missing, there’s nothing to secure the end of the thread. Cracked or warped spools also lose their shape, leaving gaps where thread can slide off.
Rough Handling During Projects
Yanking thread off the spool too quickly, or pulling the thread at a sharp angle instead of straight off the spool pin, can loosen the wind over time. If you leave the thread tail dangling instead of securing it before putting your project down, a brush of your hand or a gust of wind can pull the tail out, unraveling several feet of thread in seconds.
Investing in high-quality, tightly wound sewing thread reduces the risk of loose strands slipping off the spool in the first place. These threads are wound with consistent tension and use textured spools designed to grip fibers securely.
7 Proven Methods to Keep Thread on the Spool
These methods work for both standard plastic spools and vintage wooden spools, and are ranked by how easy they are to implement for beginners:
1. Use a Spool Cap or Spool Pin Felt
Spool caps are small plastic or rubber discs that slide onto your sewing machine’s spool pin before you add the thread spool. They press against the side of the spool to hold it in place, preventing the spool from wobbling and loosening thread. Spool pin felt is a thin foam pad that sits between the spool and the machine, adding grip for smooth spools.
- Always match your spool cap size to the spool’s center hole diameter to prevent wobbling.
- Replace worn spool pin felt every 6 months if you sew daily, as flattened felt loses grip.
- Keep a set of assorted spool cap sizes in your sewing kit to fit standard, jumbo, and mini spools.
2. Apply a Small Piece of Tape to the Thread Tail
Once you’ve pulled the thread tail out to start sewing, tear a ½-inch piece of clear tape or washi tape and press it over the tail where it meets the spool. This holds the tail in place even if the spool gets bumped. Avoid using duct tape or heavy glue, as these can leave residue on the thread that transfers to your fabric.
3. Wrap Thread Around the Spool Notch
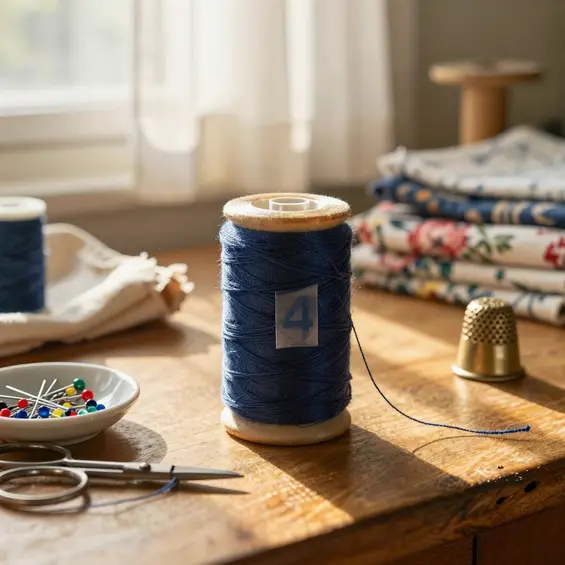
Most modern spools have a small notch molded into the rim, specifically designed to hold the thread tail. After pulling out the length of thread you need, wrap the tail around the spool once, then tuck the end firmly into the notch. This is the simplest method for securing thread when you’re done sewing for the day.
If you’re unsure what tools keep spools stable during sewing, read our guide on parts that hold thread spools securely for a full breakdown of spool pins, caps, and stands.
4. Store Spools Upright in Airtight Containers
Never store spools lying flat or stacked. Use clear plastic bins with dividers to keep each spool standing upright, so gravity doesn’t pull thread down toward the rim. Airtight containers also protect thread from dust, moisture, and pests like silverfish that eat natural fiber threads.
For long-term storage, follow professional thread storage best practices to protect spools from UV damage and humidity, which can weaken thread fibers and loosen the spool wind.
5. Use Thread Nets for Slippery or Loose Thread
Thread nets are stretchy, fine mesh sleeves that slide over the entire spool. They grip the thread lightly to prevent strands from slipping off, making them ideal for slippery threads like polyester, rayon, or metallic embroidery thread. Trim any excess mesh above the spool rim with scissors so it doesn’t get caught in your machine.
6. Avoid Overwinding Thread Onto Spools
Each spool has a maximum thread capacity marked on the rim or packaging. Overwinding pushes thread over the edges of the spool, where it’s easy for strands to slip off. If you’re rewinding thread onto empty spools, stop when you’re ⅛ inch from the rim to leave room for the thread to settle.
7. Use a Thread Spool Holder or Stand
Free-standing spool holders keep multiple spools upright on your sewing table, preventing them from rolling around when not in use. Some holders have individual pegs for each spool, while others have tension discs to hold the thread tail in place. This is especially useful for sewers who work with many thread colors at once.
How to Fix a Spool That’s Already Unraveled
If you find a spool with loose, unraveled thread, don’t throw it away. You can fix most minor unraveling in minutes:
Rewind the Thread by Hand
Hold the spool firmly in one hand, and use the other hand to wind the loose thread back onto the spool in even, tight layers. Keep tension on the thread as you wind to avoid creating new loose spots. If the thread is knotted, gently work the knot out with a seam ripper before rewinding.
Use a Thread Winder Tool
Manual thread winders are small, handheld tools that clamp onto your table. You slide the spool onto the winder’s peg, turn the crank, and the tool rewinds the thread evenly with consistent tension. You can also use your sewing machine’s bobbin winder to rewind thread back onto the spool, just set the machine to bobbin winding mode and guide the thread evenly.
Check for Spool Damage Before Reusing
After rewinding, inspect the spool for cracks, chips, or warped edges. If the spool is damaged, the thread will just unravel again. Transfer the rewound thread to a new spool to avoid future issues.
Common Mistakes to Avoid When Storing Thread Spools
Even if you use the methods above, these common storage mistakes can undo your hard work:
Stacking Spools on Top of Each Other
The weight of upper spools presses down on the thread of lower spools, flattening the wind and forcing strands out over the rim. Always store spools side by side, never stacked.
Leaving Spools in Direct Sunlight
UV rays fade thread color and break down synthetic fibers over time, making them brittle and more likely to slip off the spool. Store spools in a dark cupboard or opaque bin if possible.
Storing Spools in Humid Areas
Cotton, linen, and wool threads absorb moisture from the air, swelling and then shrinking as humidity changes. This constant expansion and contraction loosens the thread wind on the spool. Keep spools in a climate-controlled room, away from bathrooms, laundry rooms, or basements.
Frequently Asked Questions
Can I use a rubber band to keep thread on a spool?
Rubber bands can work as a temporary fix, but they’re not ideal for long-term use. Rubber degrades over time, leaving sticky residue on the spool and thread that can stain your fabric. Rubber bands also lose elasticity when exposed to heat, so they’ll stop gripping the spool after a few weeks of sewing room use. Stick to spool caps or tape for permanent solutions.
Do thread nets work for all spool sizes?
Most thread nets are made of stretchy nylon mesh that fits standard spools (60-100 yards) and jumbo cones (500+ yards). For mini spools (under 50 yards), you may need to trim the net to size with scissors. Avoid using thread nets on spools with irregular shapes, as the mesh won’t grip evenly.
How often should I check my thread spools for looseness?
Check your active thread spools every time you start a new sewing session by giving the thread tail a gentle tug. If the thread slips or feels loose, rewind the outer layer before starting your project. For stored spools, check them every 3 months for signs of unraveling, especially if you live in a humid climate.
Can humidity make thread slip off spools faster?
Yes, high humidity is one of the biggest contributors to loose thread on spools. Natural fiber threads like cotton absorb moisture, swell, and then shrink as the air dries, loosening the tight wind on the spool. Synthetic threads are less affected by humidity, but still benefit from airtight storage containers with silica gel packets to absorb excess moisture.
Are plastic or wooden spools better for keeping thread in place?
Wooden spools have a naturally textured surface that grips thread better than smooth plastic spools, making them less likely to let thread slip off. However, high-quality plastic spools with textured rims or rubberized coatings work just as well. Avoid cheap, glossy plastic spools, which are the most prone to thread slippage.
Final Tips for Keeping Thread on Spools
Mastering how to keep thread on the spool takes just a few minutes of prep, but saves hours of frustration down the line. Start with the simplest methods: tucking the thread tail into the spool notch, or adding a small piece of tape. Invest in spool caps and thread nets for slippery threads, and store all your spools upright in airtight containers.
Remember, most thread unraveling is preventable with small habits: secure the thread tail every time you stop sewing, avoid yanking thread off the spool, and inspect spools regularly for damage. With these tips, you’ll never have to untangle a knotted spool of thread again.