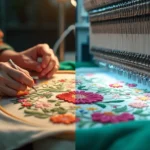
Embroidery puckers when the fabric shifts during stitching due to poor stabilization, incorrect tension, or unsuitable fabric choice. Using the wrong hoop size or failing to secure the fabric tightly can also cause distortion. Proper hooping, stabilizers, and tension settings prevent puckering.
Throughout this guide, I’ll share expert solutions on how to fix puckered embroidery and specifically address why machine embroidery puckers with different fabric types. From slippery nylon to stretchy knits and delicate linen, each material requires specific approaches to keep embroidery from puckering and ensure professional-looking results.
Recommended Products to Prevent Embroidery Puckering
Embroidery puckering can ruin even the most beautiful designs, but the right tools make all the difference. From stabilizers to quality threads, these products help keep your fabric smooth, your stitches even, and your finished embroidery looking perfectly professional. Whether you’re working on cotton, knits, or delicate materials, these essentials will help you achieve flawless, flat results every time.
1. Tear-Away Embroidery Stabilizer Roll

New brothread Tear Away Machine Embroidery Stabilizer Backing 12″ x 50 Yd
Check PriceProvides extra fabric support to keep stitches flat and smooth. Perfect for light to medium-weight fabrics.
2. Cut-Away Stabilizer Sheets

New brothread Cut Away Machine Embroidery Stabilizer Backing 10″x12″ – 100 Precut Sheets
Check PriceIdeal for stretchy or delicate materials, prevents distortion and keeps embroidery crisp after washing.
3. Sulky Temporary Spray Adhesive

Sulky 4.23-Ounce Temporary Spray Adhesive
Check PriceHolds fabric and stabilizer together securely without leaving residue, reducing shifting during stitching.
4. Madeira Rayon Embroidery Thread Set

Threadart 120 Color Polyester Embroidery Machine Thread Set
Check PriceSmooth, high-quality threads that glide evenly through the machine and minimize fabric pulling.
5. Singer Embroidery Machine Needles (Assorted Sizes)
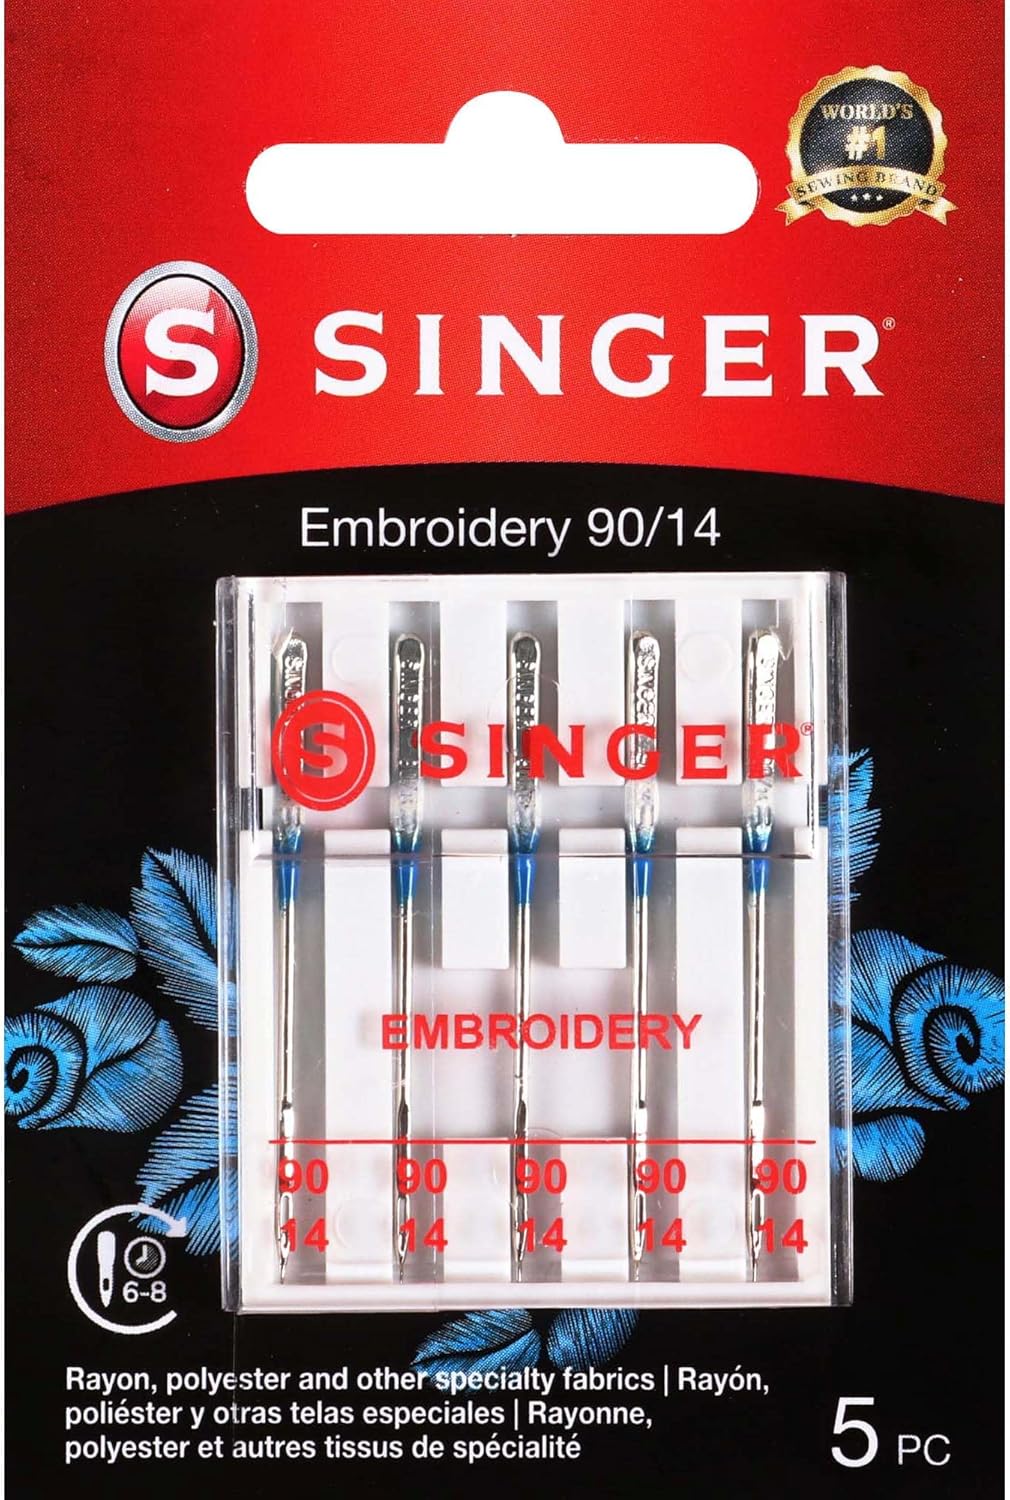
SINGER 04728 Universal Embroidery Sewing Machine Needles
Check PriceSharp, precision needles that prevent snagging and ensure consistent tension on all types of fabric.
What is embroidery puckering and why it happens
The wrinkled, bunched-up fabric around your embroidery design isn’t just an esthetic issue, it’s a common problem that can ruin hours of work. Embroidery puckering happens when the fabric surrounding your stitches gathers or bunches up, causing the fabric to become distorted and appear uneven. Let’s explore what causes this frustrating issue and how to identify it before it ruins your projects.
Understanding puckering in embroidery
Puckering occurs when your fabric moves during the embroidery process.Think of it like shoelaces pulling both sides of your shoe toward the center, embroidery threads work similarly, tugging on your fabric. When tension is correct, threads lie flat without distorting the fabric. However, if stitches become too tight or irregular, puckering develops.
There are actually three distinct types of puckering. First, the bunching pucker happens when fabric gets trapped in an area as the needle foot pushes it forward. Second, the stretching pucker occurs when fabric is pulled too tight during hooping and snaps back when removed. Finally, the density pucker results from overly dense designs where the fill stitches contract the fabric.
Common signs of puckered embroidery
You’ll recognize puckered embroidery when your fabric no longer lies flat after stitching. Instead, you’ll notice folds in the fabric and a bumpy appearance around the embroidered area. Additionally, the fabric may appear distorted or wrinkled, particularly around the edges of your design.
In severe cases, the fabric completely pulls away from both front and back, making the project unusable. Another telltale sign occurs after washing, if your embroidery puckers after washing, it indicates either tension issues or fabric shrinking at a different rate than the thread.
Why does my machine embroidery pucker?
Several factors contribute to why embroidery puckers. Primarily, inadequate stabilization ranks as the most common cause. When your fabric lacks proper support, it moves during stitching. Furthermore, incorrect hooping technique creates problems, if you stretch fabric when hooping, it appears fine while hooped but puckers when removed as unstabilized areas relax.
Thread tension also plays a crucial role. If thread tension is too tight, it pulls on the fabric excessively. According to experts, the lower your thread tension, the better your results. In fact, for optimal results, aim for a ratio where the reverse side shows 1/3 bobbin thread and 2/3 top thread.
The fabric itself often contributes to puckering problems. Slippery fabrics like nylon and satin frequently pucker because they slide around on the stabilizer. Similarly, stretchy knits and lightweight textiles like linen and broadcloth bunch easily during embroidery. Machine speed matters too, faster speeds increase thread tension and consequently, puckering.
Top causes of embroidery puckering
Understanding the root causes of puckering is crucial for consistently successful embroidery projects. Let’s examine the five main culprits behind this common frustration.
Incorrect stabilizer use
Choosing the wrong stabilizer ranks among the top reasons embroidery puckers. Each project requires specific stabilizer types; cut-away, tear-away, or water-soluble, each with unique advantages. For instance, using tear-away when a design demands cut-away can result in distorted designs after repeated washing. Lightweight fabrics need delicate stabilizers to prevent puckering, whereas heavier materials like denim require sturdier options. Remember that inadequate stabilization is the most frequent cause of puckering, as it fails to prevent fabric movement during stitching.
Poor hooping technique
When fabric isn’t properly tensioned in the hoop, puckering becomes inevitable. The ideal hooping creates a taut, tambourine-like surface without stretching your fabric. Overstretching freezes the fabric in an extended state under the stitches, once removed from the hoop, the unstabilized areas relax and create puckers. For slippery materials, consider the “window method” where you cut a window in a piece of backing larger than your hoop, then sandwich the fabric between this and complete stabilizer.
Thread tension issues
Improper thread tension creates excessive pull on stitches, causing distortion. If tension is too tight, you’ll notice more bobbin thread on the embroidery’s underside or experience thread breakage. Conversely, if too loose, loops form on the fabric surface. For optimal results, tensions should reveal 1/3 bobbin and 2/3 top thread color underneath the embroidery. Moreover, machine speed affects tension, faster speeds increase thread tension, subsequently raising puckering risk.
Fabric type and preparation
Different fabrics react uniquely to embroidery. Slippery fabrics like satin slide around on stabilizers, while stretchy knits distort without proper support. Lightweight fabrics such as linen bunch easily due to their thin nature. Tightly woven fabrics provide less space for embroidery threads, causing displacement as threads push fabric fibers apart, this “thread displacement” creates puckering as fabric must go somewhere.
Design density and digitizing problems
Overly dense designs contract fabric and stabilizer, creating puckers between stitched areas. Poor digitizing can result in stitch patterns unsuitable for your fabric type. Without proper underlay stitches, designs lack a solid foundation, causing registration issues and puckering. For lightweight materials, choose light, open designs without densely filled areas to prevent rippling.
How to fix puckered embroidery mid-project
When you spot puckering happening during your embroidery project, don’t panic! There are practical steps you can take to rescue your work without starting over.
Add extra stabilizer while stitching
Fortunately, adding stabilizer mid-project is one of the most effective ways to stop puckering in its tracks. If you notice fabric bunching as your design progresses, simply:
- Stop your machine immediately
- Carefully remove the hoop without disturbing your positioning
- Secure an additional layer of tear-away stabilizer to the back of your work
- Replace the hoop and resume stitching
This extra support layer works particularly well when you’re working on areas with dense stitching. Since the needle punches thousands of tiny holes in a concentrated area, these sections require more support to prevent fabric from puckering. For designs with varying densities, you can strategically add stabilizer only to the areas that need additional backing.
Pause and adjust hoop tension
Improper hooping often leads to embroidery puckering after washing or even during the stitching process. If you notice your fabric becoming wavy, temporarily pause your project and check hoop tension. Your fabric should be drum-taut but not stretched beyond its natural state.
Remember that fabric naturally loosens during embroidery, so regularly check and adjust as needed throughout your project. Nevertheless, be cautious about over-tightening as this freezes fabric in an extended state, causing it to pucker once released from the hoop.
Use ironing to reduce puckering after stitching
Although ironing isn’t a permanent fix for embroidery that puckers, it can minimize existing puckering once you’ve completed your project. For best results:
- Iron from the back of the design, placing it over a soft towel
- Use gentle steam for natural fibers (cotton, linen)
- Apply low heat for synthetic materials
- Press rather than slide the iron to avoid distorting stitches
Above all, understand that ironing merely masks symptoms rather than addressing root causes. Professional embroiderers emphasize that proper stabilization from the beginning yields better results than trying to correct puckering afterward.
Fabric-specific solutions to prevent puckering
Different fabrics present unique embroidery challenges, requiring tailored approaches to prevent puckering. Let’s explore specific solutions for various fabric types that will help you achieve professional results.
Slippery fabrics like satin and nylon
Slippery fabrics are notorious for puckering because they slide around on stabilizers during stitching. For materials like nylon windbreakers or satin ribbons, proper hooping is essential rather than floating the fabric. Hooping helps prevent slippage, particularly with windbreakers that typically have both lining and top layers.
Firstly, when working with slippery fabrics:
- Use a cutaway stabilizer when hooping both layers to keep them from shifting
- Stitch with a new, sharp needle to prevent snagging that causes bunching
- Apply a water-soluble topper to help maintain stitch quality
- Avoid basting stitches as they may leave permanent holes in tightly woven fabrics
Stretchy fabrics like knits
Stretchy fabrics require a completely different approach than slippery materials. Primarily, avoid hooping knits too tightly as this stretches them during stitching, causing bunching when released.
Instead, try this method:
- Place fusible poly mesh on the wrong side of the fabric beneath the design area
- Hoop tear-away stabilizer separately, then float the knit fabric on top
- Secure the fabric to the stabilizer using spray adhesive or self-adhesive tear-away
- Float a water-soluble topper over the design area
Notably, use a stretch needle rather than regular needles, as stretch needles push fabric fibers aside instead of breaking them. Pre-wash fusible poly mesh before use to prevent shrinkage that could cause puckering later.
Lightweight fabrics like linen and broadcloth
Lightweight fabrics like linen often pucker because their loose weave cannot support embroidery without help. The secret is temporarily giving these delicate fabrics more stability.
For linen and similar materials:
- Apply heavy starch before embroidering to add temporary body
- Use at least one layer of tear-away stabilizer (two layers recommended)
- Consider applying Pellon Shape Flex SF101 to the back of your fabric
- Embroider with a smaller, very sharp needle to minimize fabric displacement
Indeed, Shape Flex adds body without stiffening the fabric, transforming lightweight fabrics into more stable mediums for embroidery while maintaining their natural drape.
Tips for embroidery puckering after washing
Certainly, even perfectly executed embroidery can pucker after washing if not properly stabilized. To prevent this common issue:
- Always pre-wash fabrics before embroidering to eliminate potential shrinkage
- Use cutaway stabilizers for items that will be washed frequently
- Avoid direct heat when ironing – cover stitching with a cloth and use low heat
- Store embroidered items flat or hanging to prevent creases that distort stitches
Remember that ironing is merely a temporary fix for puckering, not a solution to the underlying problem. Proper stabilization from the beginning ensures your embroidery will withstand multiple washes without distortion.
FAQs About Embroidery Puckering
What Causes Embroidery Puckering?
Embroidery puckering happens when fabric, thread tension, and stabilizer aren’t properly balanced. Stretching the fabric too tightly in the hoop or using the wrong stabilizer can also distort your design.
How Can I Stop Fabric from Puckering When Embroidering?
Use the right stabilizer, hoop your fabric snugly but not stretched, and adjust upper thread tension to match your material. Always test your design before stitching the final piece.
Does Fabric Type Affect Puckering?
Yes, lightweight, stretchy, or thin fabrics are more prone to puckering. Choose stabilizers that support your fabric type and help it stay flat during stitching.
Can Thread Quality Cause Puckering?
Absolutely. Cheap or uneven thread often creates uneven tension, which pulls fabric too tightly. Use high-quality embroidery thread for smoother, more consistent results.
What’s the Best Stabilizer to Prevent Puckering?
For woven fabrics, go with a tear-away stabilizer. For knit or stretch materials, a cut-away stabilizer gives better support and prevents your design from wrinkling over time.
Conclusion
Embroidery puckering certainly presents a frustrating challenge, though we’ve seen throughout this guide that most issues stem from identifiable and fixable causes. Consequently, your embroidery projects can remain smooth and professional with the right knowledge and techniques.
Understanding the role of proper stabilization stands as your first defense against puckering. Additionally, mastering hooping techniques ensures your fabric maintains appropriate tension without stretching. Thread tension, while often overlooked, plays a crucial role in preventing those unwanted fabric folds.
Different fabrics demand different approaches. Slippery fabrics need secure hooping, stretchy knits require careful tension management, and lightweight materials benefit from temporary stiffening agents. Therefore, adapting your technique to match your material makes all the difference between puckered disappointment and flawless results.