When clothes dryer is not heating? Common causes include a blown thermal fuse, faulty heating element, clogged lint filter or vent, or a tripped circuit breaker. First, reset the breaker and clean the vent. Then, inspect the thermal fuse, heating element, and thermostat. If unresolved, consult a technician.
Check the Basics First
Before diving into complex troubleshooting, let’s tackle the obvious culprits first. In many cases, your clothes dryer not heating has a straightforward solution that doesn’t require tools or technical expertise.
1. Is the dryer set to ‘Air Fluff’ or ‘Cool’ mode?
The simplest explanation for a dryer not getting hot is an incorrect setting. I’ve seen countless “repair calls” that ended with a simple push of a button!
First, check if your dryer is set to:
- ‘Air Fluff’ – This setting uses room temperature air and no heat
- ‘Eco’ mode – Employs lower heat to save energy
- ‘Cool’ setting – Specifically designed to tumble without heating
If you’ve accidentally selected one of these options, your dryer is actually working perfectly—just not providing heat. Switch to a standard or high-heat setting and run another cycle to see if that resolves the issue.
2. Has the circuit breaker tripped?
For electric dryers, power supply issues are frequently behind heating problems. Unlike gas dryers, electric models require a substantial 240-volt power supply to operate properly.
Here’s what makes electric dryers unique:
- They use a 2-pole circuit breaker (occupying two spaces in your electrical panel)
- The dryer needs both poles working to heat properly
- One pole powers the motor (making the drum spin), while the other operates the heating element
Interestingly, if only one pole of the breaker trips, your dryer will still turn on and tumble—creating the illusion that it’s working—but won’t produce any heat. This partial power situation (120V instead of 240V) is a common source of confusion.
To check if this is your issue:
- Locate your electrical panel
- Find the double breaker labeled for your dryer
- If it appears partially tripped, turn it fully OFF then back to ON
- Unplug your dryer before resetting the breakers, then plug it back in
Additionally, overloaded circuits can cause breakers to trip repeatedly. If you notice lights flickering when you turn on appliances alongside your dryer not heating up, this might indicate an electrical system overload.
3. Is the gas valve open (for gas dryers)?
Gas dryers present their own unique set of challenges. Although many symptoms are similar (the drum turns but no heat is produced), the causes differ from electric models.
For gas dryers, first check:
- Is your gas supply active? (Confirm you’ve paid your gas bill)
- Is the gas valve to the dryer open?
To verify if the gas valve is open:
- Locate the supply pipe connected to your dryer
- Find the small valve handle on this pipe
- The valve is OPEN when the handle is parallel to the pipe
- The valve is CLOSED if the handle is positioned at a 90-degree angle to the pipe
If the valve is closed, the dryer drum will still rotate normally, but the unit cannot generate heat. Simply turn the valve handle so it aligns parallel with the pipe to restore gas flow.
Clean Out Airflow Blockers
If you’ve checked the basic settings and power supply but your dryer still isn’t heating, airflow problems are likely the culprit. Restricted airflow is among the most common causes of heating issues—and thankfully, these blockages are usually fixable without professional help.
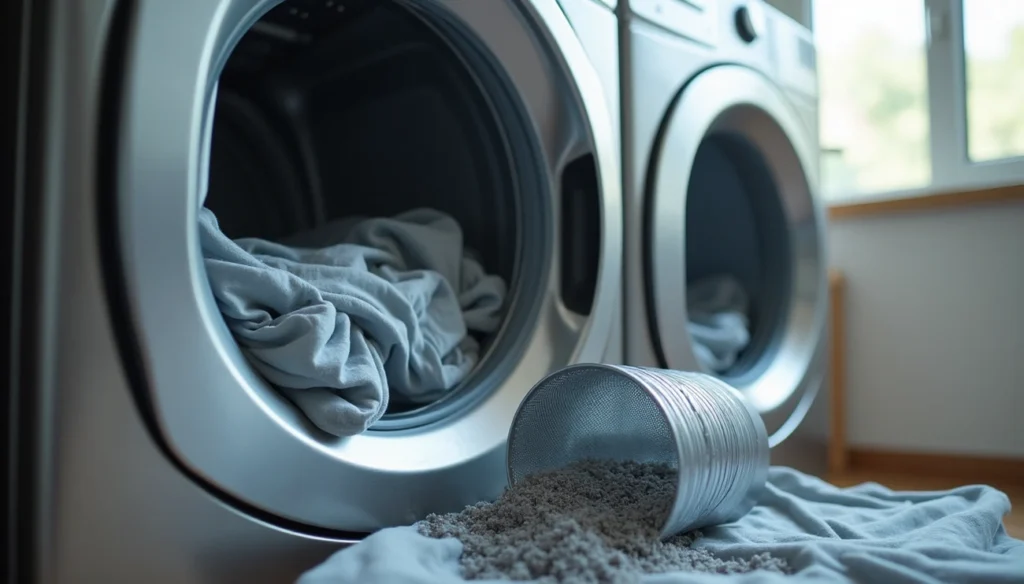
1. Lint screen is clogged
The lint screen is your first line of defense against heating problems. Despite seeming obvious, many people underestimate how significantly a clogged lint screen impacts performance.
A full lint trap can dramatically increase drying time by restricting airflow. Furthermore, when airflow is limited, your dryer works harder, consuming more energy and potentially overheating. According to the U.S. Fire Administration, failure to clean lint traps contributes to approximately 2,900 dryer fires annually, causing about 5 deaths, 100 injuries, and $35 million in property damage.
To properly maintain your lint screen:
- Remove and clean the lint screen after every load—not just when it looks full
- Check the lint trap housing (where the screen sits) monthly for accumulated lint
- Deep clean your lint screen every six months to remove invisible residue
For deep cleaning, soak the screen in hot water with dish soap, then gently scrub with a soft brush to remove fabric softener buildup that ordinary lint removal doesn’t address.
2. Dryer vent is blocked
Even with a pristine lint screen, lint inevitably escapes and collects within your vent system. Over time, this accumulation creates a fire hazard and prevents hot, moist air from exiting properly.
Telltale signs your dryer vent needs cleaning include:
- Clothes taking longer than normal to dry
- Dryer exterior feels unusually hot during operation
- Burning smell in the laundry room
- Excessive heat or humidity when the dryer runs
- Visible lint around the exterior vent opening
To check if your vent is blocked, run your dryer and then examine the outside exhaust vent. If you feel little or no warm air coming out, your vent likely needs cleaning.
For a DIY cleaning approach:
- Disconnect the dryer from power
- Pull the dryer away from the wall
- Detach the vent hose from the back of the dryer
- Remove visible lint by hand or vacuum the hose thoroughly
- Reconnect everything properly
Experts recommend cleaning your dryer vent at least once per year—more frequently for large households or if you run multiple loads daily.
3. Outside exhaust flap is stuck
The final piece of the airflow puzzle is the exterior vent flap—that small covering on the outside of your home where dryer air exits. This component often gets overlooked yet plays a crucial role in your dryer’s heating ability.
This flap should open when the dryer runs and close when it’s off, preventing cold air or animals from entering your home. Nevertheless, the flap can become stuck due to:
- Lint accumulation around the edges
- Dirt or debris blocking the mechanism
- Damage from external elements
- Animals nesting near or in the vent
To verify if this is causing your heating issues, inspect the flap during a dryer cycle. It should open fully, allowing air to exit freely. If it’s partially open or completely stuck, clear away any visible debris and check for damage.
In colder climates, the flap sometimes freezes shut during winter. Gently thawing it can restore proper airflow immediately. Additionally, installing a dryer vent draft blocker can help maintain proper airflow while preventing cold air from entering your home.
Inspect Internal Components
After ruling out simple fixes and airflow issues, it’s time to look deeper into your dryer’s internal components. These parts require more technical knowledge to diagnose, yet understanding them can save you money on unnecessary service calls.
1. Heating element may be broken
The heating element is the coil that generates heat in electric dryers. This component typically lasts about 15 years but can fail earlier due to poor airflow or physical damage. Initially, you might notice your dryer running but not getting hot at all.
To test your heating element:
- Unplug the dryer and access the back panel
- Locate the heating element (a coil enclosed in a metal chamber)
- Using a multimeter set to Rx1, check for continuity between terminals
- A reading of 8-9 ohms typically indicates a working element, while infinity means it’s broken
A broken heating element can’t be repaired and must be replaced entirely. Attempting to fix a broken element by wrapping the ends together is extremely dangerous and could cause electrocution or fire.
2. Thermal fuse could be blown
The thermal fuse is a crucial safety device that prevents overheating. Once blown, it cannot be reset or reused. Moreover, a blown thermal fuse often indicates another underlying problem such as restricted airflow.
Signs of a blown thermal fuse include:
- Dryer tumbles but produces no heat
- Dryer doesn’t start at all (in some models)
The most common cause of blown thermal fuses is failure to clean lint traps regularly, which creates an ideal environment for fires to start. Always address the root cause before replacing the fuse, otherwise the new one will likely blow again soon after installation.
3. Thermostat might be faulty
The thermostat regulates temperature inside your dryer drum. Similarly to other components, a malfunctioning thermostat can prevent heating or cause overheating. Located typically on the blower housing, this small device can be tested with a multimeter.
At room temperature, a properly working thermostat should show continuity (near zero ohms). If your test shows an open circuit (infinity reading), the thermostat needs replacement. Remember that overheating issues might indicate a thermostat that’s stuck in the “on” position, causing the heating element to run continuously.
4. Timer or control board failure
Finally, even if all heating components are working properly, your dryer’s timer or control board could prevent proper heating. The timer controls when heat is applied during cycles, while the control board manages all electronic functions.
A defective timer motor can get stuck in one position, preventing the cycle from advancing properly. Testing requires checking for 2,000-3,000 ohms of resistance using a multimeter. For dryers with electronic control boards, a thermistor (temperature sensor) might replace traditional thermostats, requiring specialized testing procedures.
In electric dryers with a failed timer, the heating element may never activate, resulting in clothes that remain damp regardless of how long they tumble.
Other Appliances Could Be the Problem
Sometimes what appears to be a dryer heating problem actually originates elsewhere in your laundry process. Before spending money on dryer repairs, take a look at these often-overlooked culprits that might be masquerading as heating issues.
1. Washer not spinning clothes dry enough
Sopping wet clothes from your washer can make it seem like your dryer isn’t heating properly. Unlike damp clothes, excessively wet items create too much moisture for your dryer to handle efficiently.
Common washer issues that lead to this problem include:
- Drain hose problems: A clogged, kinked, or improperly positioned drain hose prevents water from exiting properly, leaving clothes waterlogged
- Faulty drain pump: When the drain pump malfunctions, water recirculates back into the drum rather than draining out
- Unbalanced loads: If your washer detects an unbalanced load, it may reduce spin speed or stop spinning altogether
- Stretched drive belt: A worn belt can slip during the spin cycle, preventing the washer from reaching proper speeds
To determine if this is your issue, check your clothes’ wetness by hand before transferring them to the dryer. If they’re dripping or feel unusually heavy, run another spin-only cycle in your washer first. For items like wet towels or bathing suits, consider wringing them out by hand before drying.
2. Overloading or mixing fabric types
Even with a perfectly functioning dryer, improper loading practices can mimic heating problems. Notably, cramming too many clothes into the dryer creates several issues:
- Restricts airflow and prevents proper tumbling
- Forces the dryer to work harder, increasing strain on components
- Extends drying times dramatically
- Creates uneven drying results
For optimal results, fill the drum only about halfway – this gives clothes room to tumble freely. Remember that overloading puts excessive stress on mechanical systems and leads to poor performance or even failure.
Equally important is sorting your laundry properly. Mixing lightweight fabrics with heavy items (like towels with t-shirts) results in inefficient drying because:
- Different fabrics require varying drying times and temperatures
- Heavier items stay wet longer while lighter items overdry
- Some fabrics should never go in a high-heat dryer at all
Group similar fabrics together and dry them separately, particularly for loads containing delicate items. This practice ensures even drying while protecting your clothes from damage.
When to Call a Professional
While DIY troubleshooting can resolve many dryer heating problems, recognizing when to seek professional help is equally crucial. Attempting complex repairs without proper knowledge could lead to further damage or safety hazards.
1. You’ve tried all basic fixes
Ultimately, if you’ve worked through all the troubleshooting steps in previous sections without success, it’s time to call a professional. Signs that indicate you’ve reached the DIY limit include:
- You’ve cleaned the lint screen, vent, and exterior flap thoroughly
- You’ve checked and reset circuit breakers
- You’ve verified the dryer settings are correct
- You’ve ensured proper loading practices
- The dryer still refuses to heat or heats inconsistently
Swift action is necessary to diagnose and fix these persistent problems efficiently. Professional technicians have the tools and experience to identify issues that might not be apparent to homeowners.
2. You suspect electrical or gas issues
Electrical and gas systems require specialized knowledge and can be dangerous to work with. Undeniably, these components present genuine safety hazards that shouldn’t be underestimated.
For electrical issues:
- Power supply problems can be seriously hazardous and require professional attention
- If you notice sparking or smell burning wire insulation, stop using the dryer immediately and call a professional
- Call an electrician if you’re not comfortable working with electricity
- Faulty outlets should be replaced by qualified professionals
For gas dryers:
- If you suspect gas-related problems, seek professional help promptly
- Gas valve issues typically require expert diagnosis
- Any unusual gas odor demands immediate professional attention
Power cords and gas connections should never be modified by untrained individuals, as improper handling could result in fire, electrical shock, or gas leaks.
3. You’re unsure how to test components
Testing internal dryer components requires specific tools and technical knowledge. A multimeter—a versatile tool that measures electrical resistance—is essential for diagnosing many dryer problems.
Consider calling a professional when:
- You don’t own a multimeter or aren’t comfortable using one
- You’ve identified a component that needs testing but aren’t sure how to access it
- You don’t understand the expected resistance readings (ideally 20-50 ohms for dryer elements)
- You’ve found a faulty component but don’t know how to replace it safely
Professional technicians can conduct thorough inspections, replace damaged parts, and ensure your dryer operates safely. For complex issues like control board failures or motor problems, their expertise becomes especially valuable.
Conclusion
Dealing with a dryer that won’t heat certainly feels frustrating at first. Throughout this guide, we’ve explored several common causes—from simple setting errors to complex component failures.
Remember, most heating issues stem from one of four areas: incorrect settings, airflow blockages, faulty internal components, or external factors like overloaded washers. Before calling a repair service, check your dryer settings, examine circuit breakers, and ensure proper airflow through the lint screen and vents. These quick fixes often solve the problem without any expense.
Regular maintenance undoubtedly prevents many heating issues. Clean your lint screen after every load and schedule annual vent cleanings to maintain optimal performance. This simple habit not only keeps your dryer working efficiently but also significantly reduces fire risks.