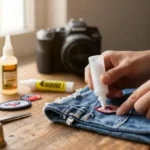

Attaching patches to your favorite jacket or backpack does not have to involve a needle and thread. Fabric glue offers a fast, convenient, and durable alternative for personalizing your gear. Whether you are mending a hole or adding a decorative badge, learning how to use fabric glue for patches can save you time. This guide walks you through the entire process with expert tips to ensure a lasting bond.
What Is Fabric Glue and How Does It Work?

Fabric glue is a specialized adhesive designed to create a flexible, permanent bond between textiles and other materials. It works by penetrating the fibers of the fabric and curing into a strong, waterproof polymer matrix. Unlike standard craft glues, fabric glue remains pliable after drying so the patch moves naturally with the garment. This flexibility prevents cracking or peeling even after repeated wear and washing.
Many formulas are water based and nontoxic, making them safe for home use. They dry clear and resist yellowing over time, which is essential for visible patches. The bond strength often rivals traditional stitching when applied correctly. Understanding the chemistry behind fabric glue helps you achieve professional results on any project.
Choosing the Right Fabric Glue for Patches

FITTDYHE Fabric Glue Permanent 60 ML
Check PriceSelecting the best adhesive makes all the difference in how your patch performs. Look for a formula labeled as permanent, washable, and suitable for the fabric types you plan to bond. A thicker gel consistency often works better than runny liquid glue because it stays in place on the patch backing. For heavy patches or stretchy materials, choose a high strength formula with added flexibility. For more options, check out our roundup of the best fabric glue for patches to compare top picks.
You should also consider the curing time and the nozzle design. Fine tip applicators give you precise control to avoid messy edges, while brush on bottles cover larger areas smoothly. Avoid temporary or repositionable adhesives, as they will not survive regular laundering. A quality fabric glue creates a bond that can withstand machine washing and daily wear for years.
Preparing Your Patch and Garment

120ML No Sew Clear Clothes Adhesive
Check PriceProper preparation is the secret to a strong, lasting bond. Start by washing and drying the garment to remove any fabric softeners or sizing that can block adhesion. Lay the item on a flat, hard surface and iron the area where the patch will go to eliminate wrinkles. Clean the patch backing with a lint roller or a slightly damp cloth to ensure no dust or oils interfere with the glue. If you prefer a sewn finish, learn how to sew on scout patches for a traditional technique.
For patches with iron on backing, you can still use fabric glue, but it helps to rough up the slick surface with fine sandpaper first. This gives the glue more texture to grip. Always test a small, hidden area of the fabric with the glue to check for any adverse reaction or discoloration. A few minutes of prep work can prevent your patch from peeling off after the first wash.
How to Use Fabric Glue for Patches: Step by Step

Fabric Glue Permanent (10 ML x 8)
Check PriceThis simple, no sew process works for almost any peel and stick or plain fabric patch. Begin by laying the garment flat and marking the exact position with a fabric pencil or tailor’s chalk. Next, apply a thin, even layer of fabric glue to the entire back of the patch, keeping a small margin from the edge to prevent squeeze out. Do not over saturate, as too much glue can seep through the fabric and create a stiff, shiny spot.
Carefully place the patch on the marked spot and press it down firmly from the center outward. This motion pushes out any air bubbles and ensures full contact with the fabric. Check the alignment quickly before the glue starts to set, because repositioning can weaken the bond. Once satisfied, you are ready to lock the patch in place with proper pressure and time. For additional techniques, consult this guide on wikiHow.
Applying Glue to the Patch Backing

Aleene’s Fabric Fusion Glue 4 oz
Check PriceGetting the glue application right is critical for both strength and a clean appearance. Use a small brush or the tip of the bottle to spread an even coat, making sure to reach the very edges of the patch. A zigzag or spiral pattern works well because it covers the surface without excess. Let the glue become slightly tacky for about 30 to 60 seconds before placing the patch, which improves grab and prevents slipping.
If your patch has a delicate fabric topping, protect it by applying the glue only to the backing material. For thick embroidered patches, you may need a little more adhesive to fill the textured surface. Avoid any pooling in the center, as this can create a hard lump you can feel through the clothing. A consistent, thin layer yields the most flexible and long lasting hold.
Positioning and Pressing the Patch

Gorilla Waterproof Fabric Glue 2.5 oz
Check PriceOnce the patch touches the fabric, you have only a brief window to make adjustments. Press down gently at first to confirm the placement, then use firm, even pressure with your fingers for at least one minute. Concentrate on the edges, as these are the most likely to lift over time. For the best adhesion, place a clean cloth over the patch and press with a warm, dry iron on a low setting for 15 to 20 seconds.
Do not use steam during this heat setting step, as moisture can interfere with the curing process. Let the patch cool completely before moving the garment. This combination of manual pressure and gentle heat seals the glue deep into the fabric fibers. Proper pressing is what transforms a temporary stick into a permanent attachment.
Curing Time and Clamping Techniques

Extra Strong Clear Washable Clothing Glue
Check PriceMost fabric glues require a full 24 hours to reach their maximum strength, so patience is essential. Keep the garment flat and undisturbed during this curing window. To apply continuous pressure, cover the patch with a piece of wax paper and pile a few heavy books on top. This clamping effect mimics a professional press and prevents air pockets.
If you are working with a curved area like a knee or elbow, stuff the inside with a rolled towel to maintain shape while the glue cures. Avoid hanging the clothing item during this period, as gravity can pull the patch out of alignment. A solid, overnight cure ensures the adhesive fully crosslinks and locks onto the fibers. Rushing this step is the most common reason patches fail prematurely.
Washing and Care for Glued Patches

Liquid Stitch Fabric Adhesive 2 oz
Check PriceAfter the full cure, your glued patch is ready for the laundry, but it still needs gentle care. Turn the garment inside out before washing to protect the patch from direct agitation. Select a cold or warm water cycle, never hot, as high temperatures can soften the adhesive. A mild detergent is sufficient, and you should always skip fabric softener and bleach, which degrade the bond over time.
Air drying is the safest method, though a low heat dryer cycle is usually acceptable if the glue label approves. Check the patch after the first wash and re press any lifted edges with a warm iron. With proper care, a well glued patch can endure dozens of wash cycles. This simple routine keeps your customizations looking fresh and securely attached.
Fabric Glue vs Sewing for Patches

60ml No-Sew Repair Kit with 20LB Pull
Check PriceEach method has its own strengths, and the best choice depends on your project. Gluing is much faster and requires no special skills, making it perfect for beginners or quick fixes. Sewing, on the other hand, creates a mechanical lock that is nearly indestructible and allows for easy removal later. For high stress areas like elbows or knees, a combination of both techniques offers ultimate durability.
Fabric glue excels on delicate materials that a needle might damage, such as thin nylon or waterproof membranes. It also creates a flat, invisible finish that does not alter the patch’s appearance. Sewing adds a decorative border and works better on extremely thick, dense patches. Consider the fabric type and intended use when deciding between a liquid bond and traditional thread.
Common Mistakes When Using Fabric Glue for Patches

Self Adhesive Furniture Repair Patch
Check PriceEven a great adhesive can fail if a few key steps are skipped. The most frequent error is applying too much glue, which causes seepage, stiffness, and a weak bond. Another common pitfall is not cleaning the fabric beforehand, leaving residues that block adhesion. Ignoring the recommended cure time and washing the item too soon almost guarantees the patch will peel off.
Using the wrong type of glue is another recipe for disaster. Standard school glue or super glue can damage textiles and crack when flexed. Also, avoid stretching the fabric while the glue is wet, as this creates tension that pulls the patch loose. Learning these pitfalls upfront helps you avoid frustration and wasted materials.
How to Remove Fabric Glue from Fabric

120 ML Fabric Glue Permanent for Clothing Repair
Check PriceMistakes happen, but dried fabric glue can often be removed with patience. Start by scraping off any excess with a dull knife or the edge of a spoon. Then apply a small amount of acetone or nail polish remover with a cotton swab, testing on an inconspicuous area first. Rub gently to break down the adhesive, then rinse thoroughly with cool water.
For water based glues, soaking the stain in warm soapy water for several hours may be enough to soften it. Avoid using a hot iron on a glue spill, as heat can set the stain permanently. Commercial adhesive removers designed for fabrics are also a safe option. Always launder the garment immediately after treatment to remove chemical residues.
Troubleshooting Fabric Glue Not Sticking
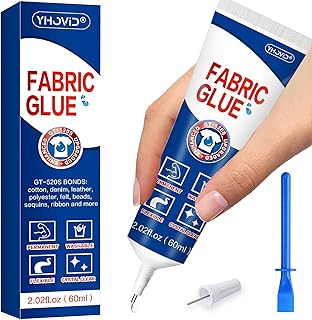
60ML Liquid Stitch Fabric Glue Permanent
Check PriceIf the patch lifts at the edges after curing, the bond was likely compromised by one of several factors. Check that the fabric was completely dry and free of silicone based fabric softeners before application. Some synthetic fabrics have a water repellent coating that rejects adhesives, requiring a specialized primer or a different glue formula. Applying insufficient pressure during the setting stage is another frequent culprit.
You can rescue a failing patch by carefully applying a tiny amount of fresh glue under the lifted edge with a toothpick. Re clamp the area and allow another 24 hours to cure. In extreme cases, reinforcing the patch with a few discreet stitches provides an invisible safety net. This hybrid approach guarantees your decoration stays put no matter what.
Creative Patch Projects Using Fabric Glue

75 ML Fabric Glue Permanent Washable
Check PriceBeyond simple clothing repair, fabric glue opens up a world of creative possibilities. Transform a plain denim jacket into a statement piece by arranging a collage of band and art patches. You can also adhere patches to canvas sneakers, tote bags, or even the back pockets of jeans for a custom look. The quick application makes it easy to experiment with layouts before committing.
Mix and match patches of different sizes, shapes, and textures for a boho, layered effect. Because the glue dries clear, you can even attach delicate lace motifs or letter patches to sheer fabrics. This no sew method is ideal for scrapbooking fabric albums or decorating throw pillows. Let your imagination run wild, and enjoy the instant gratification of glue based customization.
Frequently Asked Questions About Using Fabric Glue for Patches
Can I use fabric glue on iron on patches?
Absolutely. Fabric glue works well over the existing heat activated backing, especially if you scuff the surface gently first. It provides extra insurance against peeling and keeps the edges firmly sealed.
Is fabric glue permanent?
Yes, when applied correctly most fabric glues create a permanent, machine washable bond. The adhesive is designed to remain flexible and withstand repeated laundering without breaking down.
How long does fabric glue take to dry?
It becomes dry to the touch within a few hours, but full cure strength requires at least 24 hours. Avoid washing or stressing the bond during this waiting period for the best outcome.
Will fabric glue hold up on stretchy fabric?
Many formulas include flexible polymers that stretch with the material. However, for highly elastic garments like activewear, choose a glue specifically labeled for stretch fabrics to prevent cracking.
Can I remove a patch glued with fabric glue?
It is possible but can be challenging. Applying heat with a hair dryer and slowly peeling the patch often works, followed by adhesive remover to clean any residue. The fabric may show slight damage depending on the material.
Final Thoughts on Gluing Patches
Mastering how to use fabric glue for patches gives you a powerful, time saving skill for DIY fashion and repairs. The key is choosing a high quality adhesive, preparing surfaces thoroughly, and respecting the full curing time. When you follow these proven steps, you can create a bond that rivals traditional stitching in both strength and longevity. Embrace this modern method and give your wardrobe a lasting, personalized upgrade.