Sew on Scout patches by pinning the patch in place, threading a needle with strong polyester thread, and stitching around the edge with small, tight whipstitches. Use a thimble for thick fabric, match thread color to the patch border, and tie knots securely to prevent loosening after repeated washing.
Why Proper Patch Attachment Matters More Than You Think
Every scout patch tells a story. From that first Tiger rank to the coveted Eagle Scout badge, these emblems represent hours of dedication, skill development, and personal growth. Yet many parents and scouts struggle with the seemingly simple task of attaching these achievements to uniforms.
The truth is, poorly attached patches can fall off during activities, create an unprofessional appearance at ceremonies, and even affect a scout’s confidence. According to scout leaders across the country, properly sewn patches last the entire scouting journey – often becoming treasured keepsakes that survive decades.
Essential Supplies You’ll Need Before Starting
Before diving into the sewing process, gathering the right materials makes the difference between frustration and success. Here’s what experienced scout parents recommend having on hand:
Basic Sewing Kit:
- Sharp needles (size 7-9 work best for most patches)
- Thread matching the patch border color
- Small, sharp scissors
- Straight pins (at least 4-6)
- Thimble (optional but helpful for thick patches)
- Good lighting source or magnifying glass
Preparation Materials:
- Scout uniform (clean and pressed)
- Official BSA patch placement guide
- Ruler or measuring tape
- Fabric pencil or disappearing ink marker
- Small piece of cardboard (to prevent sewing through both layers)
Understanding Scout Patch Placement: Getting It Right the First Time
Proper placement follows specific BSA guidelines that have evolved over the years. The 2025 program update brought some changes that parents should know about.
Left Sleeve Placement
The left sleeve hosts some of the most important patches. The council patch sits at the top of the shoulder, followed by the unit number below it. The Patrol patch should be centered on the left sleeve, 4 inches below the shoulder seam. This precise measurement ensures uniformity across the troop.
Right Sleeve and Pocket Areas
The right sleeve typically displays the American flag at the shoulder seam, with the den or patrol emblem positioned below. Journey to Excellence patches and other temporary recognitions find their home here as well.
Shirt Front Placement
Religious knots indicating a Cub Scout has earned the Religious Emblem for their religion are worn centered above the left pocket. Rank badges sit on the left pocket itself, while The Recruiter Patch, awarded for recruiting new Scouts, is centered directly below the right pocket.
The Whip Stitch Method: Your Go-To Technique for Hand Sewing
The whip stitch remains the most popular method among scout parents for good reason – it’s secure, relatively quick, and creates a clean finish. Here’s how to master this essential technique:
Step 1: Prepare Your Workspace
Place a piece of cardboard inside the shirt behind where you’ll be sewing. This prevents accidentally stitching through to the back layer of the uniform. Position your patch using the official placement guidelines and secure with straight pins at the corners.
Step 2: Thread and Knot Your Needle
Cut approximately 24 inches of thread (arm’s length prevents tangling). Thread your needle and tie a secure double knot at the end. Choose thread that matches the patch border for the most professional appearance.
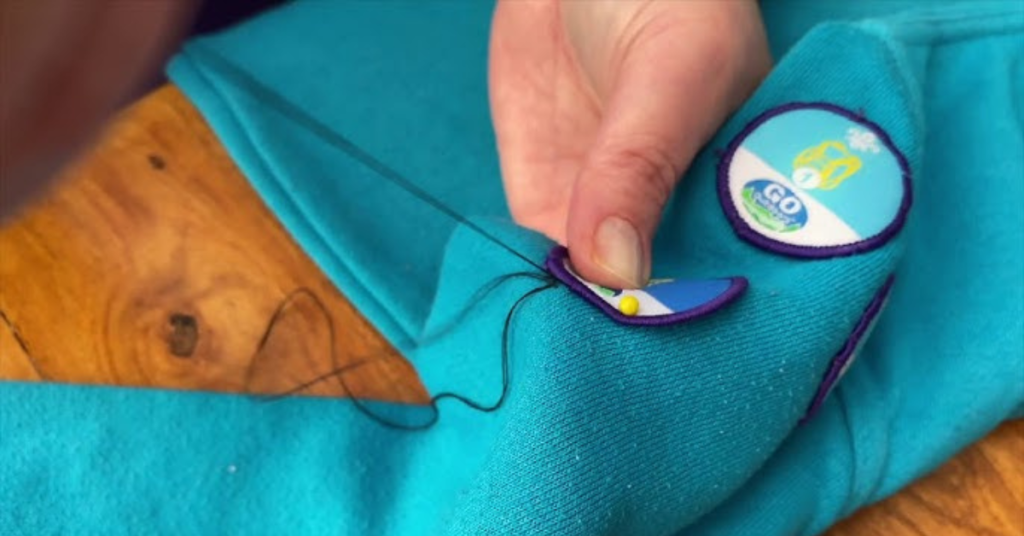
Step 3: Begin From Behind
Sew from the rear of the sash so that knots are not visible. Push your needle up through the fabric and catch just the edge of the patch. This initial stitch anchors everything in place.
Step 4: Create the Whip Stitch Pattern
Insert the needle back into the base garment, about 1/8″ over from the exit of the “back tack.” Start each stitch as close as you can get to the edge of the patch. The needle should go down through the uniform fabric and come back up catching the patch edge, creating a diagonal stitch that “whips” over the edge.
Step 5: Maintain Consistency
Keep your stitches short and even, and slowly rotate the patch until you’re able to stitch the entire circumference. Consistency in stitch length creates a professional appearance that holds up to active scouting.
Step 6: Handle Corners with Care
Square and triangular patches require special attention at corners. When you reach a corner, make an extra stitch in the same spot to reinforce it before pivoting to continue along the next edge.
Step 7: Finish Securely
When you’ve sewn completely around the patch, make your final stitch overlap with your first. Pass the needle to the back of the fabric and tie off with a double knot. Trim excess thread to about 1/4 inch.
Machine Sewing Scout Patches: When Speed Matters
For parents with multiple scouts or those preparing entire troops, machine sewing offers efficiency without sacrificing quality. However, this method requires careful preparation and the right settings.
Machine Setup for Success
Set your machine to a medium-width zigzag stitch (about 3mm wide). The stitch length should be relatively short (about 2mm) to ensure good coverage. Use a thread color that matches the patch border, and consider using a clear or open-toe presser foot for better visibility.
Positioning and Pinning
Unlike hand sewing, machine sewing requires more strategic pin placement. Pin from the center of the patch outward, removing pins as you approach them while sewing. Never sew over pins as this can damage your machine needle.
The Sewing Process
Start at a straight edge rather than a corner when possible. Lower your presser foot with the needle positioned just over the patch edge. Sew slowly, guiding the fabric to keep the needle riding along the patch border. Put the machine in reverse and sew backward for 1/4 inch to secure the stitches.
Navigating Corners
When approaching corners, stop with the needle down in the fabric. Lift the presser foot, pivot the fabric 90 degrees, lower the foot, and continue sewing. This creates sharp, professional corners.
Alternative Attachment Methods: Modern Solutions for Busy Parents
While traditional sewing remains the gold standard, modern alternatives can serve specific needs, especially for temporary patches or scouts who frequently change units.
Badge Magic and Fabric Adhesives
Fabric glue can be a convenient alternative to sewing, especially for temporary patches. These adhesive sheets create a permanent bond when activated by heat from an iron. They work particularly well for activity patches that won’t see heavy washing.
Iron-On Backing
Some patches come with iron-on backing, but experienced leaders recommend reinforcing these with stitching around the edges. The heat-activated adhesive can fail over time, especially with frequent washing.
Velcro Solutions
For patches that change frequently, such as patrol positions or temporary emblems, velcro offers flexibility. Sew the soft side to the uniform and the hook side to the patch. This method works best for informal uniforms or practice shirts.
Troubleshooting Common Patch Sewing Problems
Even experienced sewers encounter challenges with scout patches. Understanding these common issues and their solutions saves time and frustration.
Problem: Patch Puckering
When the uniform fabric bunches up around the patch, it’s usually due to tension issues. The solution involves loosening your stitches slightly and ensuring you’re not pulling the thread too tight. Using a hoop can help maintain even tension, though it requires careful positioning to avoid hoop marks.
Problem: Crooked Placement
Prevention beats correction here. Always measure twice and pin carefully before making your first stitch. If you discover a crooked patch mid-sewing, it’s better to stop, remove the stitches carefully with a seam ripper, and start over rather than trying to adjust as you go.
Problem: Thread Showing on Patch Face
Visible stitches on the patch surface usually result from catching too much of the patch with each stitch. Stay in the rolled outer edge to best hide stitches in the “lip” of the embroidery. The thread should primarily show on the uniform fabric, not the patch itself.
Problem: Patches Coming Loose
If patches start lifting at the edges, it typically means stitches are too far apart or the thread tension was too loose. Reinforcing with additional stitches, especially at stress points like corners, prevents this issue.
Special Considerations for Different Patch Types
Not all scout patches are created equal. Different types require adjusted techniques for optimal results.
Rank Advancement Patches
These crucial patches deserve extra care since they’re worn prominently and changed as scouts advance. Use smaller, tighter stitches for these high-visibility badges. Consider double-stitching for added security.
Temporary and Event Patches
Temporary patches can be worn on the right pocket. Since these change frequently, consider using longer stitches that are easier to remove, or explore velcro options for patches that will only be worn briefly.
Merit Badge Sashes
The Merit Badge Sash is not a part of the uniform itself, but it’s often worn over the uniform at a Court of Honor. When attaching merit badges to sashes, maintain consistent spacing (typically three badges across) and ensure straight rows for a professional appearance.
Special Recognition Patches
Awards like the Order of the Arrow or religious emblems often have specific placement requirements and may use different attachment methods. Always consult current BSA guidelines for these special recognitions.
Caring for Sewn Patches: Maintenance Tips
Proper maintenance extends the life of both patches and uniforms, preserving these important scouting memories.
Washing Guidelines
Turn uniforms inside out before washing to protect patches. Use cold water and gentle cycle settings. Avoid bleach or fabric softeners, which can damage patch adhesives and threads. Air drying prevents heat damage and shrinkage that could stress patch attachments.
Storage Best Practices
Store uniforms on padded hangers to maintain shape and prevent stress on patch stitching. Keep uniforms in breathable garment bags rather than plastic, which can trap moisture. For long-term storage, consider acid-free boxes to prevent yellowing.
Regular Inspection
Check patches before each scouting event. Look for loose threads, lifting edges, or signs of wear. Address minor issues immediately before they become major problems. Keep a small sewing kit in your scout’s gear for emergency repairs.
Time-Saving Tips from Veteran Scout Parents
Years of experience have taught scout parents valuable shortcuts and strategies that make patch attachment less daunting.
Batch Processing
Instead of sewing patches as they’re earned, many parents designate quarterly “patch nights.” This approach allows for efficient setup and cleanup while making the task feel less overwhelming.
Create a Patch Station
Dedicate a small box or basket with all patch-sewing supplies. Include pre-cut thread lengths, the official placement guide, and a inventory list of patches awaiting attachment. This organization eliminates the hunt for supplies when sewing time arrives.
Photography for Reference
Before removing old patches or starting new placements, photograph the uniform. These images serve as references for placement and create a visual record of your scout’s journey.
Involve Your Scout
Teaching scouts to sew their own patches builds life skills and investment in their achievements. Start with simple patches and gradually increase responsibility as skills develop.
Understanding the Updated 2025 Uniform Standards
The BSA’s 2025 program updates brought changes that affect patch placement and uniform standards. Staying current with these guidelines ensures your scout’s uniform meets official requirements.
The new guidelines emphasize consistency across all scouting programs while allowing for some personalization through temporary patches. Council patches and unit numbers remain in traditional positions, but some advancement patches have shifted slightly to accommodate new program elements.
Leaders recommend checking with your local council for the most current placement guides, as some regions have specific traditions or requirements that supplement national standards.
Making Patch Attachment a Meaningful Experience
Beyond the practical aspects, attaching scout patches offers opportunities for connection and celebration. Many families create traditions around patch sewing, turning a chore into a cherished ritual.
Some parents host “patch parties” where scouts gather to attach recent awards while sharing stories of how they earned them. Others use patch-sewing time for one-on-one conversations about scouting experiences and future goals.
Consider creating a “patch ceremony” at home where each new addition to the uniform receives proper recognition. This practice reinforces the value of each achievement and builds anticipation for future accomplishments.
Preserving Scout Legacy: Beyond the Active Years
Scout uniforms laden with patches eventually retire, but their significance endures. Many families transform old uniforms into meaningful keepsakes.
Popular preservation methods include shadow boxes displaying complete uniforms, patch blankets incorporating badges from multiple years, or memory books combining patches with photos and journal entries from scouting adventures.
Some scouts donate retired uniforms to councils for scouts who need them, ensuring patches continue inspiring future generations. Others keep uniforms intact as family heirlooms, complete with stories of each patch’s significance.
Conclusion
Sewing scout patches might seem like a simple task, but it represents something much greater. Each stitch connects a scout to their achievements, their troop, and the broader scouting community. Whether you choose the traditional whip stitch, embrace modern adhesive methods, or teach your scout to handle their own patches, the key lies in recognizing the importance of these symbols.
The patches on a scout uniform create a unique tapestry of experiences, skills, and values. Taking time to attach them properly honors the effort your scout invested in earning them. With the techniques and tips outlined in this guide, you’re equipped to ensure those patches stay secure through every camping trip, service project, and ceremony.
Remember, there’s no single “perfect” way to attach scout patches. The best method is the one that works for your family while maintaining the dignity and tradition these emblems represent. Whether you’re sewing your first Tiger badge or adding the final touches to an Eagle Scout uniform, each patch attached with care becomes part of a story worth preserving.