To sew a blind hem stitch by hand, first prepare your fabric by pressing it and marking the desired hemline. Use a sharp needle and matching thread. Fold the hem, pin it, and take small bites to catch a few threads from the fabric. Keep stitches evenly spaced for a smooth finish. Press the hem to set your stitches. For best results, guarantee a good match with thread color and evenness. More tips await to perfect your technique!
Understanding the Blind Hem Stitch
The blind hem stitch is a valuable technique for achieving a nearly invisible hem on garments, making it perfect for finishing the edges of skirts, pants, and other clothing items. One of the main blind hem benefits is that it maintains the fabric’s original look, allowing you to wear your creations with confidence.
To start, fold your hem and press it flat. Then, use a needle and thread to create small, even stitches on the folded edge, catching only a few threads of the main fabric. Experiment with stitch variations, like adjusting the spacing between stitches, to find what works best for your project. With practice, you’ll master this technique, enhancing the quality and appearance of your sewing.
Materials Needed for Hand Sewing
Gathering the right materials is essential for successfully hand sewing a blind hem stitch. You’ll need a few specific items to make your task easier, regardless of the fabric types you’re working with. Here’s what you should gather:
- Needles: Choose a sharp needle suitable for your fabric type, like a universal or ballpoint needle.
- Thread: Opt for a thread that matches your fabric color and is strong enough for hand sewing.
- Fabric: Select the fabric type you’re hemming, whether it’s lightweight cotton or heavier denim.
- Scissors: A sharp pair of fabric scissors will help you cut threads and fabric neatly.
With these materials on hand, you’ll be ready to tackle your blind hem stitch with confidence!
Preparing Your Fabric
Before you start sewing, it’s essential to choose the right fabric for your project, as this will affect the hem’s appearance and durability. Measure and cut your fabric accurately to guarantee a clean finish, and don’t forget to press it well to remove any creases. Preparing your fabric properly sets the foundation for a successful blind hem stitch.
Choose Appropriate Fabric
Choosing the right fabric is essential for achieving a clean and professional-looking blind hem stitch. The fabric types and weights you select can greatly affect your results. Here are some tips to help you choose wisely:
- Lightweight fabrics: Opt for chiffon or silk for delicate hems.
- Medium-weight fabrics: Cotton or linen works well for everyday garments.
- Heavyweight fabrics: Use denim or canvas for sturdier items, but adjust your technique accordingly.
- Stretch fabrics: Knits require special care; make sure you use a stretchable thread.
Always consider the fabric’s weight and drape, as this will influence how the hem lays and moves. Choosing appropriately will make your sewing project more enjoyable and successful.
Measure and Cut
To achieve a perfect blind hem stitch, you’ll need to measure and cut your fabric accurately. Start by laying your fabric flat on a smooth surface. Use a measuring tape to measure the length and width you need for your hem, adding an extra inch for seam allowance.
Mark your measurements clearly with tailor’s chalk or a fabric marker. Once you’ve got your marks, it’s time to cut fabric. Use sharp fabric scissors for a clean edge, cutting along the marked lines. Be sure to cut straight to avoid uneven hems. After cutting, double-check your measurements to verify everything is correct before moving on to the next steps. This precision will set you up for a successful blind hem stitch!
Press and Prepare
Once you’ve cut your fabric, it’s vital to press and prepare it properly for the blind hem stitch. Proper fabric preparation helps guarantee your hem lays flat and looks professional. Here are some pressing techniques to take into account:
- Use a steam iron: It helps remove wrinkles and shape the fabric.
- Press seams open: This allows for a smoother finish when you fold the fabric for hemming.
- Test your iron temperature: Different fabrics require different heat settings, so be cautious to avoid damage.
- Let the fabric cool: After pressing, allow it to cool before handling to set the shape.
Marking the Hemline
Marking the hemline is an essential step in achieving a clean and professional finish on your garment. Start by deciding how long you want your hem to be.
Use a measuring tape to measure from the bottom of the fabric, guaranteeing proper fabric alignment. Once you’ve determined the desired length, use fabric chalk or a fabric marker to make your hem marking, creating a clear line. It’s best to mark your hem on the inside of the garment to keep it hidden.
For added accuracy, you can use a ruler or straight edge. After marking, double-check your measurements before cutting or pinning the hem to guarantee everything is even. This attention to detail will help you achieve a polished look.
Threading the Needle
Before you start sewing, it’s essential to choose the right thread that matches your fabric for a seamless finish. Once you’ve selected your thread, prepare your needle by trimming the end of the thread at an angle to make threading easier. Finally, use a simple technique of folding the thread slightly to guide it through the needle’s eye for a smooth start.
Choosing the Right Thread
How do you choose the right thread for your blind hem stitch? First, consider the thread types available. You’ll want to select one that complements the fabric you’re working with. Here are some practical tips:
- Weight: Match the thread weight to your fabric for a seamless look.
- Material: For most fabrics, cotton or polyester threads work best; choose based on durability and flexibility.
- Color matching: Use a thread color that closely matches your fabric to make the stitches less visible.
- Finish: A matte finish often blends better than a shiny one, especially for delicate fabrics.
Needle Preparation Steps
To guarantee your blind hem stitch is executed flawlessly, it’s essential to prepare your needle properly by threading it correctly. Start by choosing the right needle type for your fabric and thread choice. A universal needle works well for most fabrics, while a ballpoint needle is ideal for knits.
| Needle Types | Best Thread Choice |
|---|---|
| Universal Needle | Polyester or Cotton Thread |
| Ballpoint Needle | Cotton or Stretch Thread |
| Denim Needle | Heavyweight Polyester Thread |
Cut the thread to about three times the length of the hem. Insert it through the needle’s eye, ensuring you leave a tail for easy handling. This preparation sets you up for smooth stitching and a professional finish.
Threading Techniques Explained
One effective technique for threading your needle involves a simple yet essential step: guaranteeing you have enough thread to work with. Depending on the thread types and needle sizes you’re using, the threading process can vary slightly. Follow these tips for a smooth experience:
- Cut the Thread at an Angle: This creates a pointed tip, making it easier to insert through the needle’s eye.
- Moisten the Thread End: A little saliva can help the fibers stick together, preventing fraying.
- Use a Needle Threader: If you struggle, a needle threader can simplify the task.
- Choose the Right Needle Size: Confirm it matches your thread type for ideal results.
With these techniques, threading your needle will become a breeze!
Starting the Stitch
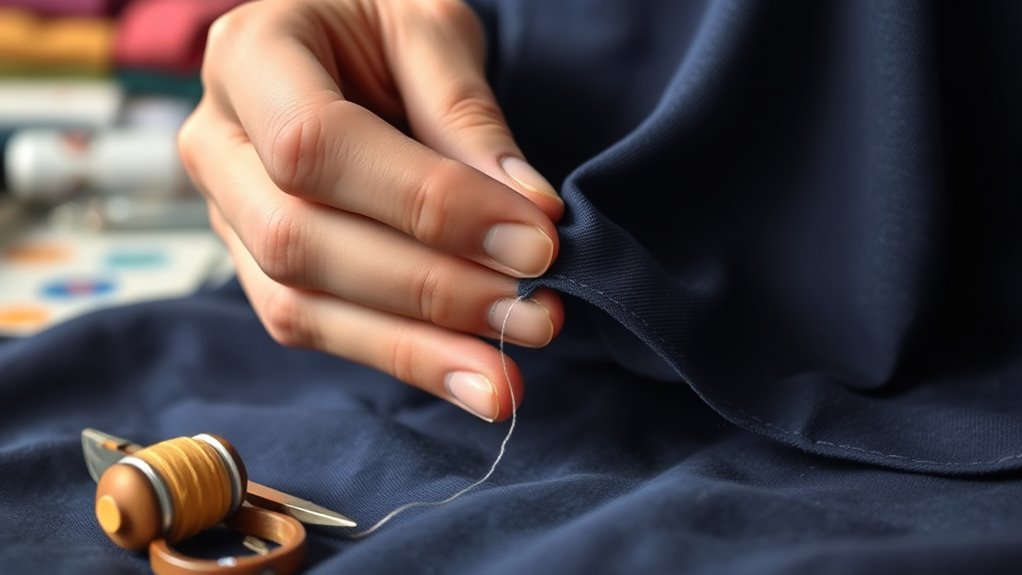
Starting your blind hem stitch requires a few simple steps to guarantee a neat finish. First, fold your fabric so that the hem is tucked under, exposing only a small edge. Pin it in place to keep the layers aligned. Next, grab your needle and thread, ensuring you’ve chosen a thread that matches your fabric for a seamless look.
Begin by making a small knot at the end of your thread. As you start hand sewing, pick up only a few threads from the main fabric, then catch a tiny bit of the folded hem. This subtlety is key in effective stitching techniques. Keep your stitches small and evenly spaced for a polished appearance. Now you’re ready to continue sewing!
Creating the Blind Hem Stitch
Creating a blind hem stitch involves a careful technique that allows your hem to remain nearly invisible. Start by folding your fabric and pinning it in place. Use the following blind hem techniques for best results:
- Choose the right needle and thread: Pick a needle that matches your fabric and a thread that blends well.
- Take small bites: Only catch a few threads from the hem to keep it discreet.
- Space your stitches evenly: This guarantees consistency and a professional finish.
- Maintain tension: Don’t pull too tightly; the stitches should lie flat.
These hand sewing tips will help you achieve a clean look while securing your hem effectively. With practice, you’ll master this essential sewing skill!
Finishing the Hem
Once you’ve completed your blind hem stitch, finishing the hem is the next step to guarantee a polished look. Start by carefully pressing the hem with an iron to set the stitches and smooth the fabric. Use a pressing cloth to avoid any damage, especially on delicate materials.
Next, consider applying hem finishing techniques like pinking shears or a zigzag stitch along the fabric edge to prevent fraying, securing durability. If you’re working with lightweight fabric, serging the edge can provide a clean finish. Finally, double-check your stitches for any loose threads and trim them neatly. This attention to detail will ensure your hem looks professional and withstands wear, enhancing the overall appearance of your garment.
Tips for a Perfect Blind Hem
Achieving a perfect blind hem requires attention to detail and a few handy tips to guarantee your stitches are nearly invisible. Here are some suggestions to help you:
Achieving a flawless blind hem demands precision and helpful techniques to ensure your stitches remain hidden.
- Choose the right fabric: Lightweight fabrics work best for a blind hem, as they allow the stitches to hide more easily.
- Use matching thread: Make sure your thread color matches your fabric to enhance the blind hem benefits.
- Practice your stitch spacing: Keep stitches evenly spaced; too close can cause puckering, while too far apart can make them visible—common mistakes to avoid.
- Press your hem: A good press after sewing will help the hem lay flat, ensuring a seamless finish.
With these tips, you’ll achieve a well-executed blind hem every time!
Frequently Asked Questions
Can I Use a Blind Hem Stitch on Stretchy Fabrics?
Yes, you can use a blind hem stitch on stretchy fabrics. In fact, nearly 70% of sewing enthusiasts prefer this method for hems, as it maintains fabric elasticity while providing a clean finish. Just adjust your tension!
How Do I Remove a Blind Hem Stitch if Needed?
To remove a blind hem stitch, gently pull the thread from the fabric’s backside. Use a seam ripper for stubborn threads, ensuring you don’t damage fabric compatibility. Take your time to avoid any unintended tears.
What Type of Needle Is Best for Hand Sewing?
For hand sewing, a universal needle’s your best bet, as 80% of crafters prefer it for versatility. Choose the right size based on fabric thickness, ensuring smooth stitching and minimizing fabric damage.
Can This Technique Be Used for Curtains or Drapes?
Yes, you can definitely use this technique for curtains or drapes. Just guarantee you choose the right needle and thread for your curtain fabrics and consider drape styles to achieve a polished finish.
How Do I Ensure the Hem Is Even Throughout?
To guarantee an even hem, think of measuring a path with a measuring tape. Use fabric pins to secure your hem, checking distances regularly, so it’s straight and uniform throughout the entire length of fabric.