Read sewing patterns by first reviewing the envelope for size, fabric, and notion requirements. Study the layout diagrams to see how pieces fit on fabric, then follow the symbols and cutting lines for your size. Use the instruction sheet step-by-step, matching pattern markings to your fabric for accurate assembly.
What is a Sewing Pattern and How It Works
Sewing patterns serve as the foundation for all handmade garments, acting as templates that guide you from raw fabric to finished piece. I find that understanding what a pattern is and how it functions is crucial before diving into more complex aspects of sewing.
Definition and purpose of a sewing pattern
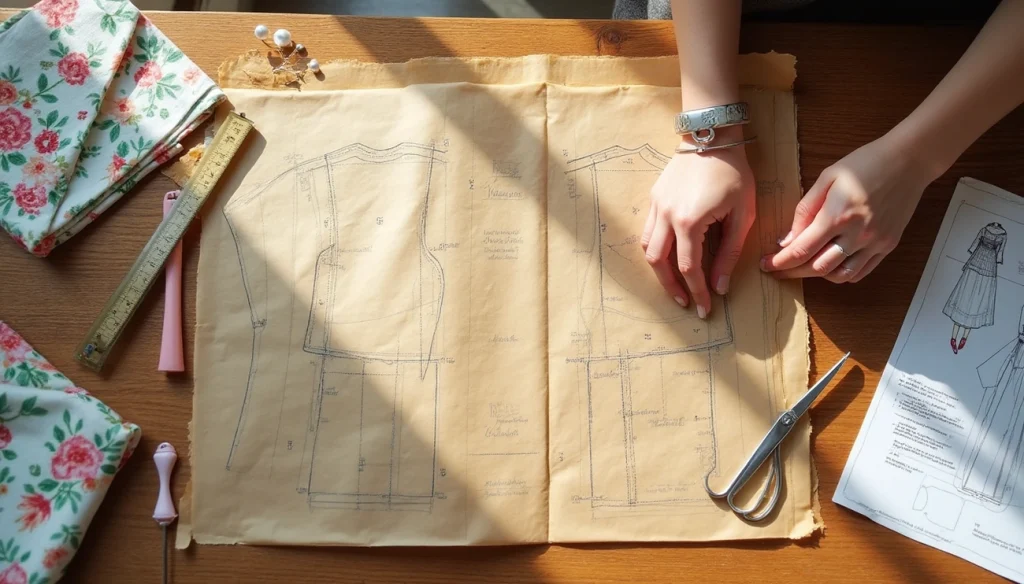
A sewing pattern is essentially a template from which the parts of a garment are traced onto fabric before being cut out and assembled. Think of it as a blueprint that shows you exactly what pieces you need and how they fit together. Most patterns include multiple pieces representing different parts of the garment—for example, a simple t-shirt pattern typically includes front and back bodice pieces, sleeves, and perhaps a neckband.
The primary purpose of a sewing pattern is to provide precise measurements and shapes needed to create properly fitting garments. Without patterns, creating consistent, well-fitting clothing would be significantly more challenging. Furthermore, patterns include vital markings that indicate where pieces join together, where darts should be placed, and other construction details necessary for assembly.
Types of sewing patterns: commercial vs indie
Sewing patterns generally fall into two main categories, each offering distinct advantages for sewists of different skill levels:
Commercial patterns are produced by well-established brands like McCall’s, Simplicity, Butterick, Vogue, and Kwik Sew. These patterns have been developed and refined over decades, offering several benefits:
- Multi-size options in one package
- Extensive range of designs
- Detailed instructions with line drawing diagrams
- Typically more affordable than indie patterns
Indie patterns come from smaller, independent designers who often bring fresh perspectives to pattern making. These patterns have gained popularity because they:
- Often include more detailed instructions and extensive tutorials
- Sometimes provide color photos rather than just line drawings
- Frequently offer sew-along videos and community support
- Tend to be more fashion-forward with modern styling
Notably, many beginners gravitate toward indie patterns despite their higher price point. This preference stems from their more comprehensive instructions and supportive resources. Commercial patterns, on the other hand, require a base level of knowledge about sewing techniques and fabrics.
Paper vs PDF patterns
The format of sewing patterns has evolved significantly with technology, giving sewists more options:
Paper patterns are the traditional format, typically printed on tissue paper and packaged in envelopes. They include printed instructions and are ready to use immediately after purchase. The paper envelope usually displays the design, sizing information, and recommended fabrics.
PDF patterns are digital files that you download and either print at home or have printed at a copy shop. They’ve revolutionized the sewing world by offering:
- Instant access upon purchase
- Printable layers allowing you to select only the size you need
- The ability to reprint if a pattern piece gets damaged
- No physical storage requirements
Both formats have their merits. Paper patterns are straightforward to use but take up physical storage space and can be damaged easily. Once cut, you can’t reclaim other sizes without tracing. Conversely, PDF patterns offer flexibility but require additional steps—printing, assembling, and taping pages together, which can be time-consuming for larger patterns.
Some modern PDF patterns even offer projector files, allowing you to project the pattern directly onto fabric—eliminating paper entirely. This innovation represents the newest evolution in sewing pattern technology.
Understanding these fundamentals provides a solid foundation as we move forward to explore the symbols and markings that make patterns work.
Understanding Pattern Symbols and Markings
Pattern symbols might initially seem like mysterious hieroglyphics scattered across your sewing pattern pieces. To read sewing patterns effectively, understanding these markings is essential—they’re the key to accurately cutting and assembling your garment.
Cutting lines and sizes
Most modern patterns are multi-sized, with all sizes printed on the same piece of pattern tissue or paper. Each size is typically represented by different line styles—dotted, dashed, or solid—allowing you to identify and cut your chosen size. For clearer visibility, you can trace or highlight your size before cutting. Remember that you’ll need to cut along these lines and possibly grade between sizes as needed for a better fit.
Grainline and fold line
The grainline appears as a double-ended arrow on pattern pieces and indicates how to position the pattern on your fabric. This line must remain parallel to the selvage (finished edge) of your fabric. To ensure proper alignment, measure from each end of the arrow to the selvage—these measurements should be equal at several points.
The fold line is marked with a bent double-ended arrow pointing to the edge that should be placed directly on a folded fabric edge. This eliminates the need for a seam and ensures perfect symmetry in pieces like center backs of garments or collar pieces.
Notches, darts, and pleats
Notches are small triangles or lines along the cutting edge that help you match pieces correctly during construction. Interestingly, single notches traditionally indicate the front of a garment, while double notches mark the back. You can mark these on your fabric by making small snips or using tailor’s chalk.
Darts appear as triangular or diamond-shaped markings with dotted lines indicating where to stitch to create shape in your garment. The dotted lines are the “legs” of the dart that meet at the dart point. These are crucial for shaping fabric around curves of the body.
Pleats differ from darts as they include arrows showing the fold direction. Unlike darts, pleats aren’t typically sewn all the way down.
Buttonholes, pockets, and bust points
Buttonholes are marked by barred lines showing both placement and length. Buttons are typically indicated by an X or cross mark.
Pocket placements are usually shown through a combination of dots, notches, or other transfer markings depending on the pocket style.
The bust point appears as a circle with a cross or X inside, marking the apex or fullest part of the bust. This reference point helps with fit adjustments but typically doesn’t need to be transferred to your fabric.
Lengthen and shorten lines
These parallel lines run across pattern pieces to indicate the ideal spot to add or remove length. Instead of simply cutting off the bottom of a pattern piece (which might disrupt the intended shape), use these designated lines. To shorten, fold along the line and overlap the pattern; to lengthen, cut along the line and add paper to create the desired length.
By mastering these symbols, you’ll transform pattern reading from confusing to intuitive, making your sewing projects much more successful.
How to Choose the Right Pattern and Size
Selecting the right pattern size is a crucial step that many beginners overlook. Unlike store-bought clothing, sewing pattern sizes rarely match ready-to-wear sizes—you might wear a size 12-14 in retail clothing but need a size 20-22 in patterns. Let’s break down this process to ensure your handmade garments fit perfectly.
How to read a pattern envelope
The pattern envelope contains vital information for your project. The front displays the design variations and pattern number, while the back holds the sizing information, fabric requirements, and suggested fabrics. Most importantly, the back flap includes body measurement charts and finished garment measurements. These details help you determine not only which size to select but also how much fabric to purchase.
Using body measurements to select size
First, take accurate measurements of your bust, waist, and hip while wearing undergarments similar to what you’ll wear with the finished garment. For tops and dresses, your bust measurement is typically the determining factor. However, if your bust is more than 2.5 inches larger than your high bust, use your high bust measurement instead and plan to make a full bust adjustment. For bottoms, use your hip measurement as the primary guide, especially if it’s larger than your waist.
When your measurements span multiple sizes, consider the garment type. For pull-on pants with elastic waists, prioritize the hip measurement since the pants need to fit over your widest part. Likewise, if making a top with darts and a waist seam, you might need to combine different sizes for the bodice and skirt.
Grading between sizes for better fit
Grading between sizes allows you to customize patterns to your unique shape. This technique involves creating smooth transitions between different sizes on pattern pieces.
To grade between sizes:
- Identify the relevant pattern pieces that need grading
- Create smooth lines connecting the different size lines
- Ensure all affected pieces (including pockets, facings, etc.) are graded consistently
For example, if you’re a size 10 at the waist but size 14 at the hips, you would grade from the waist line to the hip line, creating a gradual transition.
Understanding finished garment measurements
Finished garment measurements tell you the actual dimensions of the completed garment, which differ from body measurements due to “ease”. Ease comes in two forms:
- Wearing ease: The minimum extra room needed to move comfortably (typically 1-2 inches at waist, 2-4 inches at bust)
- Design ease: Additional room added for style purposes
By comparing your body measurements with the finished garment measurements, you can determine if the intended fit matches your preference. For instance, if your waist measures 30 inches and the finished garment waist is 32 inches, you’ll have 2 inches of ease—sufficient for most garments.
Reading the Instruction Sheet and Layout Plan
Once you’ve selected your pattern and size, the next step in your sewing journey involves decoding the instruction sheet and layout plan. These resources guide you through the entire making process from cutting to finishing your garment.
What’s inside the instruction booklet
Inside your pattern envelope, you’ll find an instruction booklet that typically contains:
- A list of pattern pieces (helpful to circle the ones needed for your chosen view)
- Cutting layout diagrams showing economic fabric use
- Step-by-step sewing instructions with illustrations or photos
- A glossary explaining sewing terminology
- A key showing symbols for right and wrong sides of fabric
Prior to beginning any project, I recommend sitting with a coffee and reading through these instructions carefully, highlighting information relevant to your chosen style.
How to read sewing pattern instructions
Sewing pattern instructions vary between companies, although the fundamentals remain similar. Commercial patterns often provide basic text instructions with illustrations, whereas indie patterns frequently include more detailed guidance with color photos.
When following instructions, read the entire section before starting each step. The booklet typically walks you through the process sequentially—from preparing fabric to final finishing touches. Accordingly, if you encounter unfamiliar terms, refer to the glossary or search online for tutorials.
Understanding the fabric lay plan
The fabric lay plan resembles a map showing how to position pattern pieces on fabric for most economical use. These layouts vary based on:
- Garment view (style variation)
- Fabric width (commonly 45″ or 60″)
- Pattern size
- Whether the fabric has nap (directional pile)
Importantly, follow the correct grainline indicated on pattern pieces—this line must remain parallel to the selvage (fabric edge). To ensure accuracy, measure from both ends of the grainline to the selvage; these measurements should be equal.
Common sewing terms and glossary
Some essential terminology you’ll encounter includes:
- Seam allowance: Area between fabric edge and stitching line
- Notches: Markings that help align pattern pieces
- Grainline: Shows direction of fabric threads
- Cut on fold: Pattern piece placed against folded fabric edge
- Selvage: Finished fabric edge that doesn’t fray
- Bias: Diagonal direction across fabric grain (45° angle)
Understanding these terms makes following pattern instructions substantially easier as you progress through your sewing projects.
Getting Ready to Sew: Fabric, Notions, and Cutting
After choosing your pattern, the next crucial step involves selecting appropriate materials and preparing them for sewing.
Choosing the right fabric type and weight
Fabric weight significantly impacts your project’s success. Lightweight fabrics (2-4oz) work beautifully for blouses and gathered dresses, though they’re often somewhat see-through. Midweight fabrics (4-8oz) are truly versatile—perfect for everything from t-shirts to dresses and flowy pants. Heavyweight options (8-14oz) provide structure for pants, jackets, and totes. When starting out, midweight fabrics offer the most forgiving experience.
How to read fabric requirements
The pattern envelope clearly indicates suggested fabric types and required amounts based on your size and fabric width. Furthermore, it specifies whether you’ll need additional materials for pattern matching stripes or checks. Always check if your fabric has “nap” (directional texture like velvet)—this requires more fabric and special layout considerations.
Essential notions and tools
Quality notions make sewing substantially easier. You’ll need:
- Cutting tools: Fabric scissors, rotary cutter with mat
- Marking tools: Chalk, washable pens, or tailor’s tacks
- Assembly aids: Pins with glass heads (won’t melt under iron), seam ripper
- Thread: Choose quality thread matching your fabric type
Marking and cutting your fabric
Keeping fabric flat against your work surface is key to accurate cutting. Position pattern pieces following the grainline—ensuring the line remains parallel to the selvage. Mark all notches, darts, and other indicators using your preferred marking method. Finally, cut with smooth, full strokes to prevent jagged edges.
Conclusion
Reading sewing patterns certainly takes practice, but mastering this skill opens up a world of creative possibilities. Throughout this guide, we’ve explored the essential elements that transform a flat piece of paper into a wearable garment.
Pattern reading might seem daunting at first, especially when you discover your pattern size differs dramatically from ready-to-wear clothing sizes. Remember, this difference is completely normal and actually helps ensure better-fitting garments. Most importantly, accurate body measurements serve as your foundation for successful sewing projects.
Symbols and markings on patterns work as your roadmap, telling you exactly where pieces connect and how to create proper shaping. Notches, grainlines, darts, and other markings might appear mysterious initially, though they quickly become second nature with practice. After all, these symbols exist to make your sewing journey easier, not more complicated.


