If you’re new to sewing, the machine aisle can feel like a maze. I’ve taught dozens of beginners how to choose a sewing machine for beginners, and I’ve tested many models in real homes and classrooms. The right machine is simple, sturdy, and fits your goals. In this guide, I’ll show you what to look for, what to skip, and how to buy with confidence without overspending.
Start With Your Sewing Goals
Your projects shape your machine choice. Think about what you want to sew in the first six months, not someday. A machine that matches your goals keeps you motivated and avoids costly upgrades too soon.
Use this quick filter:
- Clothing basics: Look for a reliable straight stitch and zigzag, buttonhole, and adjustable stitch length.
- Simple home decor: Choose a machine with good fabric feed and a free arm for corners and cuffs.
- Mending and alterations: Go for an easy needle threader and drop-in bobbin for fast setup.
- Quilting-lite: Seek a strong motor, consistent speed control, and the option to add a walking foot.
- Heavy fabrics: Consider stronger feed dogs, higher presser foot lift, and a metal internal frame.
From my classes, most beginners start with knits and cotton. A modest, well-tuned machine beats a feature-packed one you never learn to use.

Know The Main Types Of Sewing Machines
There are three main types most beginners see. Choosing the right one saves money and frustration.
- Mechanical: Dials and levers control stitches. Pros: durable, simple, easy to repair. Cons: fewer stitches, manual buttonholes on some models. Great for true beginners.
- Computerized: Buttons and LCD select stitches. Pros: one-step buttonholes, speed control, memory settings, auto needle up/down. Cons: pricier, more electronics to service.
- Heavy-duty: Reinforced frames and stronger motors. Pros: handles denim and light canvas. Cons: can be louder, may have fewer decorative stitches.
If you’re unsure, try a solid mechanical or a basic computerized model with speed control. Speed control alone helps anxious beginners sew straighter seams.
The Features That Matter (And The Ones That Don’t)
You don’t need 100 stitches to sew well. Focus on core features that make learning easier.
Must-have features:
- Consistent straight and zigzag stitches: Clean edges and stretch seams start here.
- Adjustable stitch length and width: Fine control for seams, topstitching, and hems.
- Easy bobbin system: Top-drop bobbin with clear cover helps you see when thread runs low.
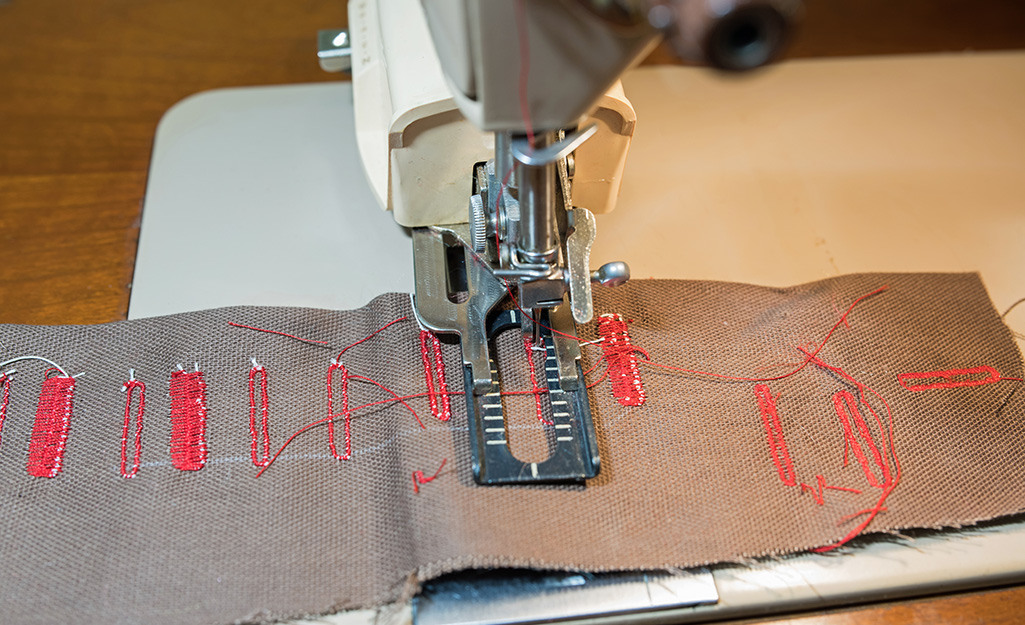
- One-step buttonhole: Simple, repeatable buttonholes for shirts, pillow covers, and bags.
- Free arm: Remove part of the base to sew sleeves and tight tubes.
- Presser feet basics: All-purpose foot, zipper foot, and buttonhole foot included.
- LED light: A bright light reduces eye strain and seam mistakes.
- Manual tension dial: Helpful to learn control and fix uneven stitches.
Nice-to-have if budget allows:
- Needle up/down: Stops the needle where you want for smooth turns.
- Speed control: Keeps stitches steady while you learn.
- Start/stop button: Useful for long seams without using the foot pedal.
- Automatic needle threader: Saves time and reduces frustration.
- Walking foot compatibility: Better feeding on quilts and slippery fabrics.
What you can skip at first:
- Dozens of decorative stitches: You’ll use the basics 95% of the time.
- Built-in fonts: Fun, but not needed early.
- Large touchscreens: Not essential for learning core skills.
In my workshops, students who had needle up/down and speed control learned curves and corners twice as fast.
Build Quality, Motor Strength, And Ease Of Use
A machine that feels solid will sew straighter seams and last longer. Look beyond the brochure and check how it’s built.
What to examine:
- Internal frame: Metal frames reduce vibration and keep parts aligned.
- Feed dogs: Even, sharp feed teeth pull fabric smoothly and reduce puckers.
- Presser foot lift: Higher lift helps with thicker layers and seam joins.
- Motor: More torque matters for denim and canvas. Check if the brand rates stitches per minute and torque.
- Weight: A bit of heft often means stability, but ensure you can carry it.
Ease-of-use signs:
- Clear stitch chart and simple dial layout.
- Front-loading vs drop-in bobbin: Drop-in is beginner-friendly.
- Quick-change presser feet and labeled settings.
Tip from experience: A machine that hums instead of rattles usually has better internal build and alignment.

Budget: What You Get At Each Price Range
Set a range before you shop and match it to your goals. Avoid the cheapest no-name machines; they can skip stitches and break needles.
- Under $150: Entry-level mechanical. Fine for mending and simple projects. Expect fewer buttonhole options and lighter motors.
- $150–$300: Sweet spot for beginners. Better stitch quality, one-step buttonhole, drop-in bobbin, speed control on some models.
- $300–$600: Feature-rich beginner to intermediate. Stronger motors, smoother feed, needle up/down, more presser feet.
- $600+: Advanced or specialized. Great for heavy fabrics, quilting features, or frequent use.
If your budget is tight, consider a certified refurbished unit from a dealer. You’ll often get better build quality for the price, plus a warranty.
Brands, Models, And What To Look For In Reviews
Reputable brands offer more consistent quality and easier service. Look for models with long-term user feedback.
How to read reviews:
- Filter by usage: Seek comments from people sewing the same projects as you.
- Scan for consistent issues: Thread tension, bobbin jams, or needle breakage are red flags.
- Note support and parts: Check availability of feet, bobbins, and needles.
From my bench testing, reliable beginner lines often share the same core mechanics across models, with extras added on top. That means you can pick the simpler version with the same stitching heart and save money.
Try Before You Buy: A 10-Minute Store Test
If possible, bring fabric scraps and test. This tells you more than any spec sheet.
What to test:
- Threading: Time yourself from spool to first stitch.
- Straight stitch consistency: Sew 10 inches on quilting cotton. Look for even tension on both sides.
- Zigzag and buttonhole: Check for fabric tunneling or bird-nesting.
- Thick seams: Fold denim to four layers. Can it climb without stalling?
- Speed control: Can you sew slow and steady and then ramp up?
- Noise and vibration: A smooth, balanced sound is a good sign.
I carry a small “test kit” with cotton, knit, denim, and a slippery fabric. If a floor model handles all four, it’s a safe bet.
Essential Accessories And Setup For Success
A few smart add-ons make learning smoother and your stitches neater.
Helpful accessories:
- Extra needles: Universal 80/12 for cotton, 90/14 for denim, ballpoint for knits.
- Quality thread: All-purpose polyester reduces lint and breakage.
- Seam gauge and seam ripper: Precision in, perfection out.
- Extra bobbins: Prewind a few so you don’t stop mid-seam.
- Walking foot or even-feed foot: For quilts and tricky fabrics.
- Extension table: More support for bigger projects.
Setup tips:
- Use a sturdy table and a chair at elbow height.
- Good lighting doubles your accuracy.
- Clean lint often and oil as directed.
A clean machine with fresh needles and good thread solves most “mystery” sewing issues.
Common Beginner Mistakes And How To Avoid Them
Avoid these pitfalls to save time and thread.
- Skipping needle changes: Change after 6–8 hours of sewing or when stitches look uneven.
- Pulling fabric: Let the feed dogs work. Pulling bends needles and warps seams.
- Wrong needle or thread: Match needle size and type to fabric.
- Ignoring tension: Do a test swatch. Adjust tension until both sides look balanced.
- Buying for features, not quality: A few solid features beat dozens you never use.
One of my students fought loops on the back of her seams for weeks. The fix was simple: correct threading and fresh needle. Basics work wonders.
Frequently Asked Questions
Do I Need A Computerized Machine To Start?
No. A good mechanical machine is enough for learning. Computerized features like speed control and needle up/down are nice but not essential.
How Many Stitches Do I Really Need?
You can do most projects with two: straight and zigzag. A one-step buttonhole is the next useful addition.
What’s The Best Machine For Thick Fabrics?
Look for a model with a metal frame, higher presser foot lift, stronger motor, and compatibility with heavy-duty needles. Test on stacked denim if you can.
Should I Buy New Or Used?
New offers a warranty and support. Used from a dealer can be a great value if it’s serviced and includes basic accessories. Avoid unknown secondhand machines without testing.
How Often Should I Service My Machine?
Clean lint after each project, change needles often, and get a professional service every 12–24 months if you sew regularly.
Wrap-Up And Next Steps
Choosing your first sewing machine is about fit, not flash. Define your goals, focus on build quality and core features, and test on real fabrics. A reliable, simple machine helps you grow fast and enjoy the craft.
Ready to take the next step? Use the test checklist above, visit a local dealer, and try two machines side by side. Want more tips and honest reviews? Subscribe, ask questions in the comments, or share what you’re sewing next.


