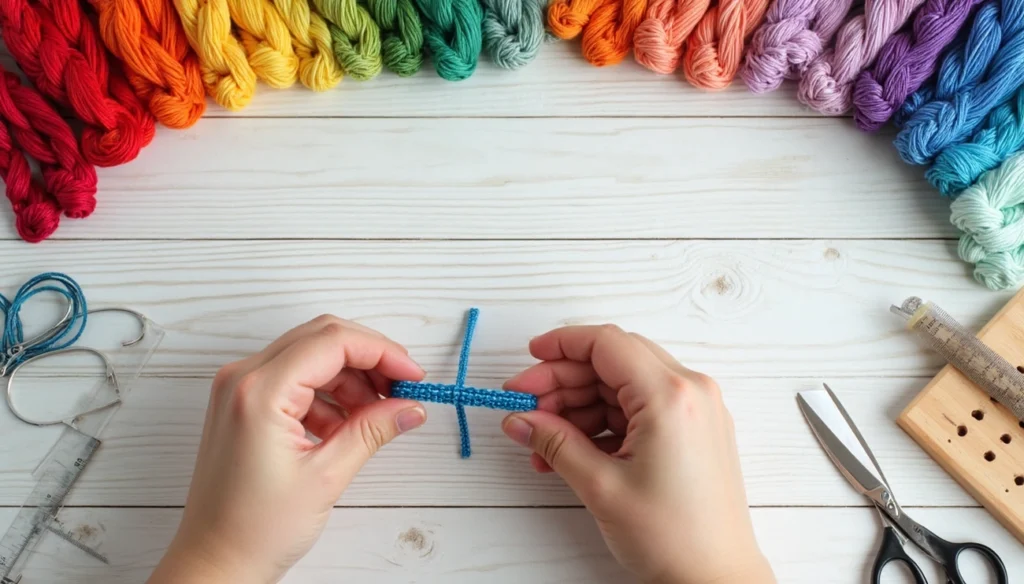
Use about 30 inches (76 cm) of embroidery floss for each color when making a friendship bracelet. Adjust the length for thicker bracelets, complex patterns, or larger wrist sizes. Most bracelets use strands between fingertip-to-shoulder length, with 30–36 inches being a reliable range.
How much embroidery floss do you need?
Determining the correct amount of embroidery floss for friendship bracelet making depends on several factors. For beginners, it’s essential to understand the baseline measurements before diving into a project.
Standard length for most bracelets
The consensus among experienced crafters is that 24 to 36 inches of embroidery floss per strand works best for standard friendship bracelets. This measurement aligns perfectly with the distance from your fingertips to your shoulder, making it easy to measure without tools. In fact, many crafters recommend cutting pieces approximately this length to ensure you have enough material to complete your project.
For a typical friendship bracelet, 36 inches of embroidery floss is sufficient for most patterns. This length provides enough material for average-sized wrists while allowing extra floss for tying off the finished bracelet.
One practical approach is to measure your wrist circumference and multiply it by five. For instance, if your wrist measures 6 inches around, you’d want approximately 30 inches of floss per strand. This formula helps prevent the frustration of running out of material just as you’re nearing completion.
Why 24–36 inches is the sweet spot
This recommended length range exists for practical reasons. Strands shorter than 24 inches often leave crafters struggling to finish their projects, especially for average-sized wrists. Meanwhile, extremely long strands beyond 36 inches can become unwieldy and prone to tangling.
Furthermore, this length provides adequate material for creating both the decorative knotted portion and the ties needed to secure the bracelet. Some crafters prefer working with 18-inch lengths, whereas others might opt for up to double that length. Through my experience, shorter lengths mean frequent thread replacements, whereas longer cuts tend to snag and tangle more easily.
The sweet spot of 24-36 inches strikes the perfect balance between having enough material and maintaining workability. For chevron bracelets specifically, cutting at least 24 inches is recommended, though many crafters opt for 36 inches to be safe.
When to use longer strands
Despite the standard recommendation, certain situations call for longer floss lengths. If you’re creating a bracelet with more than six strands, consider adding an extra 6 inches per strand. This additional length accommodates the extra knots required in more complex patterns.
Additionally, pattern complexity plays a significant role in determining floss length. For designs where one color is used more frequently than others, that particular color should be cut longer. For example, in diamond friendship bracelet patterns, colors used more prominently might need an additional 10 inches of length.
Notably, for bracelets with intricate designs like the chevron pattern, you’ll need at least eight strands of floss, with 10 strands being preferable for thinner embroidery floss. For these more complex patterns, starting with 36 inches provides a safety margin, often leaving about eight inches of unused material.
Some crafters prefer doubling up their colors, particularly when using cheaper embroidery floss. In such cases, you might need up to 72 inches (folded in half to create two 36-inch strands). Similarly, if you’re making a bracelet for someone with larger than average wrists or creating an anklet, additional length is necessary.
For specialized patterns like kumihimo bracelets, which don’t require as much string as traditional patterns, 20-25 inches per strand is typically sufficient.
Factors that affect floss length
The length of embroidery floss needed for a friendship bracelet isn’t a one-size-fits-all measurement. Several key factors can significantly alter how much string you’ll need for your project. Understanding these variables will help you avoid the disappointment of running out of floss mid-bracelet.
Wrist size and fit preference
When crafting friendship bracelets, the recipient’s wrist circumference plays a crucial role in determining string length. I’ve found that adults typically have wrists ranging from 6-8 inches for women and 7-9 inches for men. Children between 5-9 years old need even smaller sizes.
Your personal fit preference also affects how much floss you’ll need. If you prefer a looser fit or plan to wear your bracelet during activities where your wrist might swell, add an extra inch or two to your base measurement. Some crafters multiply their wrist measurement by five as a reliable formula – for a 6-inch wrist, that means starting with 30 inches of floss per strand.
Accordingly, bracelets intended as anklets require about 1.5-2 inches more length than wrist versions, since ankles are naturally larger than wrists.
Number of strands used
The total strand count fundamentally impacts how much embroidery floss you’ll need. Each additional strand increases both the width of your bracelet and the required string length.
For designs using more than six strands, I recommend adding an extra 6 inches per strand to accommodate the additional knots. Essentially, more strands means more knots per row, which consumes floss more quickly.
When working with eight or more strands, you might need to start with lengths closer to 36 inches rather than the standard 30 inches. Furthermore, some crafters double up colors to create thicker stripes, which naturally requires longer starting lengths – sometimes up to 72 inches folded in half.
Type of knotting pattern
Different knotting techniques consume varying amounts of floss. Basic patterns like candy stripes use less material than complex designs such as chevrons or diamond patterns.
For standard patterns like the chevron, all strings typically need about 92.75cm (approximately 36.5 inches) based on how knots are distributed. In contrast, kumihimo braided bracelets generally require less material – only about 20-25 inches per strand.
Alpha bracelets (containing letters or words) have unique requirements, with interior strings needing about 30 inches and exterior strings requiring significantly more – often a full skein’s worth without cutting.
Design complexity and color changes
Complex designs with multiple color changes require careful planning. In patterns where specific colors make more knots than others, those colors will be used up more quickly.
For patterns with diamonds or other intricate elements, the strings creating these features should be cut 10-20% longer than the other strands. One practical formula some crafters use is: String length (in cm) = 45 + percentage of knots made in that color.
Colors that run through the entire pattern (like background colors in alpha bracelets) often require significantly more length – sometimes an entire skein. Alternately, for patterns where certain colors create diagonal lines or X-shapes, those specific strands should be almost twice as long as the others.
The thickness of your embroidery floss also affects length requirements. Thicker threads create larger knots, meaning you’ll need fewer knots (and consequently less string) to achieve the same bracelet length compared to using thinner threads.
Measuring and cutting your floss
Once you’ve determined how much embroidery floss your friendship bracelet requires, the next crucial step is measuring and cutting the strands accurately. With proper measuring techniques, you’ll ensure your bracelet project flows smoothly from start to finish.
Using your arm as a guide
Your body provides natural measurement tools that are always available when crafting. The forearm method is arguably the most popular among bracelet makers. Simply measure from your fingertips to your elbow for a practical length that works well for most projects. This typically yields about 18-24 inches of floss, depending on your arm size.
For children’s bracelets, 21½ inches is typically sufficient. However, for adult wrists or anklets, you’ll need longer strands. Many experienced crafters use their entire arm length as a measurement guide – from fingertips to shoulder – which naturally provides the recommended 30-36 inches discussed earlier.
Alternatively, some crafters prefer using their wingspan (fingertip to fingertip with arms outstretched) for larger projects. This method provides approximately 5-6 feet of floss, which can then be folded in half to create two strands of the same color.
Tips for consistent cutting
Consistency in cutting ensures all your bracelet strands stay relatively even throughout the knotting process. Record your color choices as you work – this simple step allows you to match exact colors should you need to purchase more floss mid-project.
For the most consistent results, consider these practical approaches:
First, cut one strand to your desired length using a ruler or measuring tape. Then use that initial strand as a template for cutting all remaining strands. This prevents the slight variations that can occur when measuring each strand individually.
Secondly, avoid extremely long cuts (beyond arm length) as these frequently tangle and become unwieldy. The sweet spot remains between your fingertips and shoulder for most projects.
How to avoid running out mid-bracelet
Nothing disrupts a bracelet project more than running out of floss before completion. Primarily, the key is starting with more floss than you think you’ll need. Following the “wrist size multiplied by five” rule provides a reliable safety margin.
For complex patterns involving more than six strands, add an extra 6 inches per strand to accommodate additional knots. Moreover, colors that create the majority of knots in your pattern should be cut even longer.
In the event that you do run out of floss, there are solutions. You can secure the current strand by weaving the needle under a few stitches on the back before attaching a new strand. Alternatively, some crafters transform shorter bracelets into keychains or use the opportunity to create interesting multi-part designs.
Above all, remember that slight overestimation in length is always preferable to running short. An extra few inches of unused floss is a minor inconvenience compared to the frustration of an unfinished bracelet.
Examples of floss length by pattern
Different friendship bracelet patterns consume varying amounts of embroidery floss. Let’s examine specific length requirements for popular designs to help you prepare the right amount of string for your next project.
Candy stripe bracelet
The candy stripe pattern represents one of the simplest friendship bracelet designs, requiring relatively modest amounts of embroidery floss. For this basic pattern, cut each string to about 36 inches in length. Although some resources suggest longer measurements of up to 65 inches (which can be folded in half to create a loop at the beginning), the standard measurement works well for average wrists.
If you’re creating a candy stripe bracelet without a loop, a 24-30 inch length per strand is typically sufficient. The beauty of this pattern lies in its adaptability—you can incorporate as many colors as you desire, with each additional strand increasing the bracelet’s width.
Chevron bracelet
Chevron patterns demand significantly more embroidery floss than simpler designs. For a standard chevron bracelet, prepare to cut strands between 36-40 inches for average wrists. For medium to large wrists, consider increasing this to 60-65 inches.
The traditional chevron pattern requires eight strands (two of each color), arranged symmetrically to create the characteristic V-shape. Some crafters prefer to cut 72-inch lengths and fold them in half, creating 36-inch working strands. Remember that color arrangement matters tremendously in chevrons—the order of your strands directly determines the final pattern appearance.
Spiral staircase bracelet
For spiral staircase bracelets, cut strings approximately twice the desired bracelet length. If you want to include a loop at the beginning, make them four times longer than your finished bracelet.
The Chinese staircase variation typically requires about 32 inches of string per color for average wrists. This measurement provides enough material for both the knotted portion and the ties, with some extra for safety.
Multi-color or advanced designs
Complex multi-color designs naturally require additional planning. For bracelets using 10-20 strings, follow this practical guideline: measure your wingspan (fingertip to fingertip with arms outstretched) and add 1-2 extra inches for ties.
Professional bracelet makers often adjust string length based on the number of strands—for a 20-strand bracelet with a loop and ties, approximately 3 feet per string proves adequate. Nonetheless, for thicker wrists, add 4-5 inches extra per string.
Ultimately, the key to success with advanced patterns lies in understanding that different strings within the same bracelet may require different lengths depending on their role in the pattern.
Best practices for embroidery floss bracelets
Beyond selecting the right length, mastering friendship bracelet creation requires understanding quality, organization, and troubleshooting techniques. These best practices will elevate your crafting experience from frustrating to fulfilling.
Choosing the best string for friendship bracelets
Primarily, the brand of embroidery floss significantly impacts your bracelet quality. DMC stands out as a favorite among experienced crafters due to its superior sheen and texture. Alternatively, Loops and Threads offers comparable quality at a lower price point, making it ideal for beginners or bulk purchases.
Interestingly, elastic string like Stretch Magic (0.7mm width) works better than embroidery floss for stretchy friendship bracelets that easily slip on and off. For traditional knotted bracelets, however, cotton embroidery floss remains the gold standard.
Consider using the same brand throughout a single project to maintain consistent thickness and appearance. This approach prevents uneven knotting that could make your bracelet look messy.
How to store and organize your floss
Organizing embroidery floss effectively prevents tangling and saves time. Unlike traditional bobbin winding (which creates unwanted crimps), 4×6 photo boxes provide an excellent storage solution. These clear containers keep floss clean, visible, and organized by color groups.
A DMC color card with real floss samples helps tremendously when planning projects or needing color matches. This reference tool prevents buying duplicate colors and ensures color accuracy.
What to do if you run out of string
Should you run short mid-project, several rescue techniques exist. One effective method involves finding a section where your short thread serves as a base (not visible), then introducing a new string of matching color. Make knots over both the old and new threads simultaneously to secure them together.
For strings that aren’t used as bases, tape the new string at the back of your bracelet and continue knotting. The resulting knot might be slightly thicker but becomes barely noticeable when pulled tight.
Ultimately, adding string mid-bracelet works best when placed further toward the middle rather than at the edges, providing greater stability to your finished piece.
Conclusion
Friendship bracelet making requires careful planning, especially when it comes to measuring your embroidery floss. Throughout this guide, we’ve explored how the standard 30-36 inches per strand serves as an excellent starting point for most projects. However, complex patterns, larger wrists, and designs with numerous strands certainly demand additional length considerations.
Measuring from fingertip to shoulder provides a quick, tool-free method that works remarkably well for most bracelet projects. Remember that multiplying your wrist measurement by five offers another reliable approach to ensure adequate floss length.
Different patterns demand different amounts of material. While candy stripe bracelets might require only 24-30 inches per strand, chevron patterns often need 36-40 inches or more. Pattern complexity fundamentally changes your floss requirements, with background colors and frequently knotted strands needing significantly more length.