Yes, hemming can be undone. Carefully unpick the stitches using a seam ripper, removing the thread without damaging the fabric. Then press the hem to flatten any crease lines. Hem removal is easiest on single-fold hems and more difficult on fusible or serged hems due to adhesive or overlock threads.
Can hemming be undone?
Yes, Let’s look at the facts behind this common alteration question.
When hemming is reversible
Hemming is primarily reversible when the original fabric remains intact. Traditional sewn hems are designed to be alterable if needed in the future. This flexibility is what makes hemming one of the most adaptable clothing alterations. Furthermore, hand-sewn hems are particularly easy to undo by carefully removing the stitches with a seam ripper.
For pants specifically, undoing a hem requires assessing the existing material first. If the original hem was simply folded under and stitched, you can restore the garment to its original length by removing those stitches. Consequently, many tailors leave extra fabric when hemming higher-quality garments, anticipating potential future adjustments.
Signs that hemming can’t be undone
Not all hemming alterations are reversible. Here are clear indicators that unhemming might be challenging or impossible:
- The excess fabric was cut off during the original hemming process
- Visible wear marks, discoloration, or fabric damage along the hem line
- Heavily worn or frayed fabric edges that won’t hold new stitching
- The hem has been altered multiple times, weakening the fabric
Another complication occurs with previously worn items. If the clothing has been worn frequently, you might notice scuffing or color differences along the hemline that will be visible if let out.
Can hemming tape be undone?
In contrast to traditional sewing, hemming tape presents more challenges for reversal. Hemming tape (also known as fusible tape) is designed to create permanent bonds between fabric layers. According to industry information, approximately 60% of home sewers use fabric tape in their projects, but 68% still prefer traditional sewing methods for alterations – partly because of reversibility concerns.
Most hemming tapes contain synthetic polymers like polyurethane or acrylic that form strong bonds with fabric fibers. This makes them essentially permanent once applied. Nevertheless, some types can be partially reversed by reapplying heat to soften the adhesive. For instance, some crafters report success by ironing the tape again to melt it and carefully pulling it apart while hot.
The bottom line: if you anticipate needing to adjust a hem later, avoid hemming tape entirely. Fusible hem tape provides a quick solution but is generally considered irreversible once applied.
Step-by-step: How to unhem pants or jeans
Unhemming your too-short pants is entirely possible with the right approach. Unlike purchasing new garments, this practical solution can save money and restore your favorite pair to wearable condition. Let’s explore exactly how to reverse a hem effectively.
1. Tools you’ll need
Gathering the proper supplies first makes the unhemming process smoother:
- A sharp seam ripper (the most essential tool)
- Fabric scissors for clean edges
- Measuring tape to ensure even length
- Pins to hold fabric in place
- Removable fabric marker or chalk
- Iron and ironing board
- Press cloth to protect delicate fabrics
Additionally, if you’re working with jeans, you might need a denim needle (size 16 or 18) for your sewing machine should you decide to restitch the hem afterward.
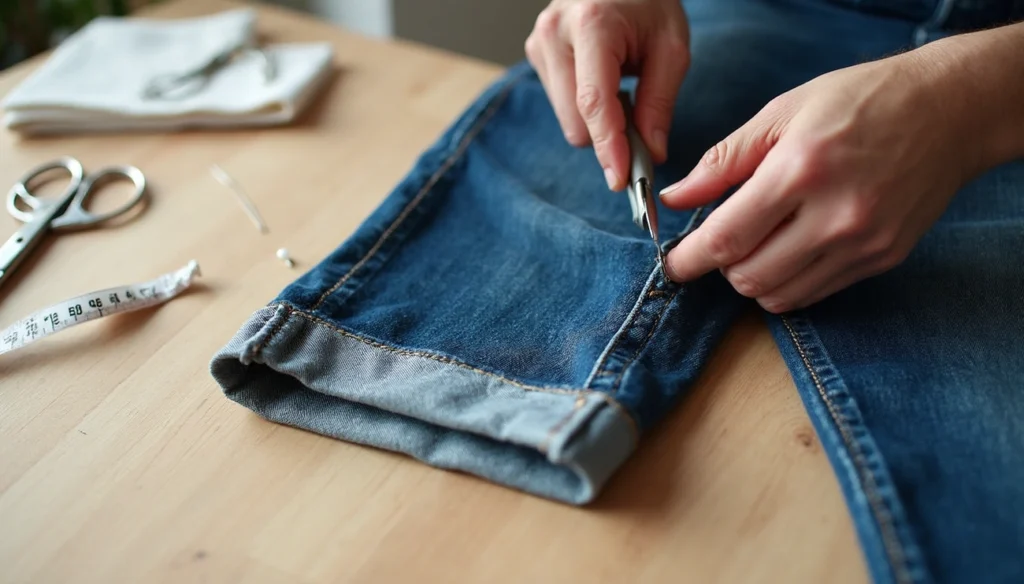
2. Unpicking the hem safely
Start by working from the bobbin side of the stitching where the threads are more visible. Insert the sharp tip of your seam ripper between the thread and fabric, sliding sideways to avoid cutting the material. For most hems:
- Cut a stitch, then skip three or four stitches and cut again
- Turn the fabric over to the top thread side
- Place the seam ripper under the thread and simply lift it away
For stubborn jeans hems, you might carefully use a craft knife along the folded edge after unpicking a small section at the seam.
3. Pressing and removing crease lines
Those persistent crease lines from old hems can be eliminated with this mixture: 1 cup hot water, ½ teaspoon borax, and 1 teaspoon vinegar. Thereafter:
- Dampen a clean cloth with the solution
- Place garment wrong-side out on ironing board
- Lay the damp cloth over the crease mark
- Press with steam until the mark fades
Alternatively, for denim, try placing a wet brown paper bag over the crease and steam thoroughly.
4. Dealing with frayed or worn fabric
Even after careful unpicking, some fabric edges might show fraying. For lightweight fabrics, a thin layer of clear nail polish can seal raw edges. Meanwhile, pinking shears create a zigzag edge that reduces unraveling. For severe fraying, consider edge finishing techniques like zigzag stitching before proceeding with any new hem.
What to do if fabric was cut
When the original fabric has been cut during hemming, simply unpicking stitches won’t restore your pants to their former length. Fortunately, there are several creative solutions to add back the lost inches.
Adding fabric to restore length
Sometimes cutting away the damaged section and adding matching fabric is the best approach. To restore length effectively:
- Measure the existing hem circumference carefully
- Cut a rectangular fabric strip slightly wider than needed (add about 1″ for seam allowance)
- Unfold the existing hem and unpick side seams about an inch higher than where the cut occurred
- Remove any damaged fabric, leaving as much original length as possible
- Pin the new fabric strip to the bottom edge, right sides together
- Stitch with a ¼” seam allowance, then press the seam flat
This technique works especially well for boot-cut or flared pants where the bottom width differs from the hem area. Indeed, you’ll need to ensure the added fabric matches the width where you’re attaching it.
Using matching fabric or trim
Finding the perfect matching fabric can be challenging. Take your garment to the fabric store to compare colors and textures closely. For those hard-to-match fabrics, consider these alternatives:
- Decorative trim or lace that complements rather than matches exactly
- Bias tape in a coordinating color
- Tulle strips doubled up for durability (ideal for extending athletic pants)
- Ribbon attached to the edge, which can add up to ⅞” in length
- Fringe or decorative edging as a design feature
Above all, consider the weight of your chosen extension material. As one seamstress notes, “If you’re working with lightweight delicate fabric, consider something like a sheer ribbon so you’re not weighing the fabric down.”
When to consider professional help
Professional tailors have specialized skills for complex alterations. Seek expert assistance when:
- The garment is valuable or sentimental
- You need substantial additional length (more than 2-3 inches)
- The fabric is delicate, patterned, or difficult to match
- Multiple alterations are needed simultaneously
- Your pants have complex design elements like pleats or tuxedo stripes
For designer items, tailors often have resources to source matching fabrics or can suggest creative solutions like adding contrasting panels that look intentional rather than altered. In reality, professional help might save money compared to replacing cherished garments that don’t quite fit.
Tips for different fabrics and styles
Different fabrics require unique approaches when undoing hems. Knowing the proper techniques for specific materials can make the difference between a successful alteration and a ruined garment.
Undoing hem on jeans vs. dress pants
Jeans and dress pants demand entirely different unhemming methods due to their construction. With jeans, the primary challenge comes from thick topstitching and distressed edges. The “original hem technique” involves removing the original hem and reattaching it at a new position, essentially moving it up the pant leg. This creates excess fabric inside that needs to be serged and tacked in place at the side seams.
For dress pants, the process is typically more straightforward since they usually have simpler hems without decorative stitching. Notably, dress pants often have more generous hem allowances specifically designed for future alterations.
The “Euro jean hem” offers a cleaner inside finish for denim. With this method, the extra fabric created from cutting and reattaching is sewn inside the opened original hem. This eliminates the flap inside your pant leg that occurs with standard jeans alterations.
Stretch fabrics and knits
Stretch fabrics present unique challenges when undoing hems. Common issues include:
- Fabric stretching or waving during the unhemming process
- Thread breaking on densely knit materials
- Stitches popping when wearing after alteration
- Uneven edges due to fabric roll-up
To successfully unhem stretchy knits, use ballpoint or stretch needles that poke between fabric threads without damage. Concerning stabilization, applying fusible hem tape before removing stitches helps maintain fabric shape and prevents distortion.
Interestingly, most knit fabrics don’t fray, eliminating the need for edge finishing after unhemming. For re-hemming after alterations, a twin needle creates parallel lines of stitching with a zigzag underneath that stretches with the fabric.
Preserving original hem look
To maintain the authentic appearance of factory-finished jeans, the “keeping the original hem” technique works remarkably well. For this purpose, measure the desired length, mark where the original hem should sit, then cut the excess fabric leaving approximately 1/8-1/4 inch for edge finishing.
Significantly, if you think you might let the hem out later, skip cutting off excess fabric entirely. Instead, whipstitch the fabric in place at the side seams. To ensure the flattest possible finish, iron the edge thoroughly before topstitching—this creates a smoother final result that looks factory-made.
Given these points, always work with the right thread color. With the original hem technique, the entire hem including topstitching is moved up, so matching thread becomes less crucial. Likewise, for valuable garments where preserving the original look is paramount, hand-stitching with tiny, careful stitches can produce excellent results even without a sewing machine.
Conclusion
Undoing hemming certainly presents a viable solution for those too-short pants hiding in your closet. Throughout this guide, we’ve explored several methods to resurrect your favorite garments, regardless of their original alteration technique. Though the process requires patience, most hemming can indeed be reversed, especially when the original fabric remains intact.
Success largely depends on the initial hemming method. Traditional sewn hems offer the most flexibility, while hemming tape creates nearly permanent bonds. Consequently, your approach must adapt to your specific situation.
The original condition of your garment matters significantly. Worn fabric along hemlines, excessive fraying, or completely cut-off excess material will certainly complicate your unhemming project. Nevertheless, even these challenging scenarios have solutions, from adding matching fabric panels to incorporating decorative trim.


Pingback: Does Hem Tape Work on Polyester? The Truth - Fabric Yardage Calculator