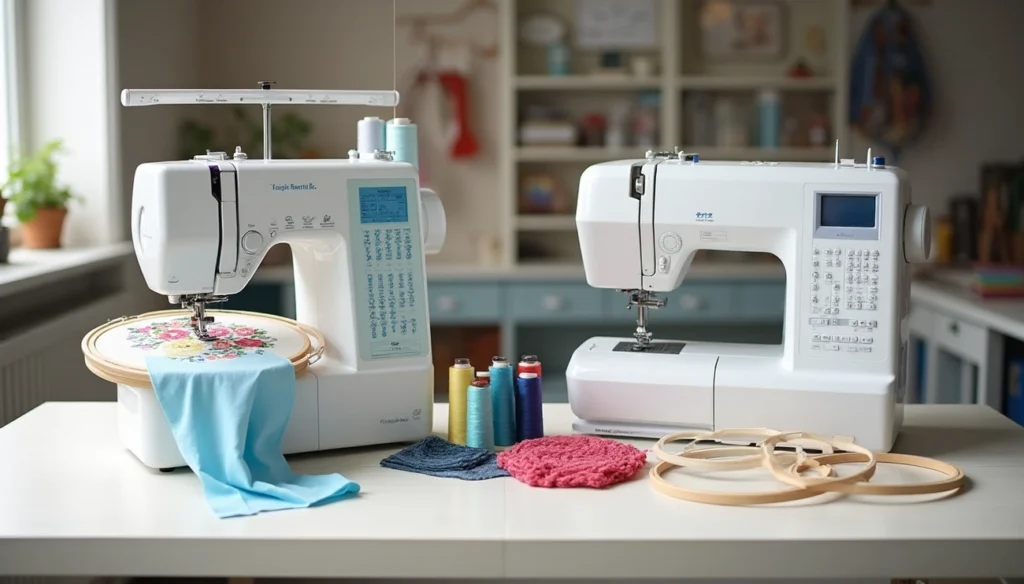
Some embroidery machines can also sew. These are called combination or 2-in-1 machines and handle embroidery and regular sewing tasks such as buttonholes and decorative stitches. Embroidery-only machines cannot perform general sewing, so choosing the right machine depends on your projects and space.
What embroidery machines can and cannot do
Many crafters wonder about the versatility of their sewing equipment. Understanding what embroidery machines can and cannot do helps you make an informed purchasing decision that matches your creative needs.
Can you sew with an embroidery machine?
The straightforward answer depends entirely on which type of machine you own. Many modern embroidery machines are actually combination machines that can perform both embroidery and regular sewing functions. These dual-purpose devices allow you to switch between embroidery and standard sewing as needed.
Essentially, if you have a machine marketed as a “combination” or “sewing and embroidery machine,” then yes, you can absolutely use it for regular sewing projects. These versatile machines offer the best of both worlds, allowing you to create garments one day and add decorative designs the next.
Can embroidery machine be used for regular sewing?
If you own an embroidery-only machine, unfortunately, it typically cannot be used for regular sewing. These specialized devices lack the features necessary for standard sewing tasks like creating seams, attaching buttons, or constructing garments.
The primary difference lies in their fundamental design. Sewing machines have a flat foot that touches the fabric, moving in a straight line for creating basic stitches. In contrast, embroidery machines feature a round foot that floats above fabric held in a hoop, allowing for fancy decorative stitches.
Additionally, embroidery-only machines don’t have feed dogs – the critical mechanism that pushes fabric through during regular sewing. Without this component, you simply cannot move fabric through the machine in the controlled manner required for constructing garments.
What embroidery-only machines are designed for
Embroidery-only machines are specifically engineered to enhance fabrics with decorative designs, patterns, logos, and motifs. These specialized machines excel at creating ornamental elements rather than constructing garments.
Dedicated embroidery machines typically include:
- Built-in embroidery designs (ranging from 263 to 889 depending on the model)
- USB ports for transferring custom designs
- Embroidery hoops of various sizes
- On-screen editing capabilities
- Automatic needle threading features
Most embroidery-only machines come with an embroidery hoop system that includes removable parts of different sizes, enabling work on patterns of various dimensions. The embroidery field size is particularly important – machines range from smaller 4″×4″ work areas to generous 9.5″×14″ spaces for elaborate designs.
For those requiring both functions but limited by space or budget, combination machines offer a practical solution – though remember you’ll need to switch between modes, which typically takes about 2.5 minutes.
Types of machines and their capabilities
When exploring sewing and embroidery equipment, understanding the different machine types helps you select the right tool for your creative projects. Let’s examine the four main categories and what each offers.
Embroidery-only machines
Dedicated embroidery machines focus exclusively on creating decorative designs and patterns. These specialized devices come with built-in embroidery designs (ranging from 160 to 208 designs depending on the model) and preset font styles. Most notably, they feature a removable embroidery module that accommodates various hoop sizes, determining your maximum design area.
Embroidery field size varies significantly among models:
- Entry-level machines: 4″×4″ field
- Mid-range machines: 5″×7″ to 6″×10″ field
- Professional models: Up to 9.5″×14″ for elaborate designs
Unlike their versatile counterparts, these machines cannot perform regular sewing functions, as they lack the feed dogs necessary for fabric movement during conventional sewing.
Sewing-only machines
Sewing-only machines excel at garment construction, quilting, and home décor projects. Modern sewing machines range from basic mechanical models to sophisticated computerized systems with hundreds of built-in stitches.
Higher-end sewing machines like the Brother BQ2450 offer up to 531 built-in stitches and can achieve speeds of 1,050 stitches per minute. These machines often include specialized features for quilting, such as extended workspace (typically 4.1″ x 8.3″ or larger) and powerful feeding systems for consistent stitching.
Sewing and embroidery machine combos
For crafters seeking versatility, combination machines offer the best of both worlds. These dual-purpose devices feature a removable embroidery module, allowing you to switch between sewing and embroidery functions as needed.
Popular combo machines offer varying capabilities:
- Embroidery speed: 650-800 stitches per minute
- Sewing speed: 710-1000 stitches per minute
- Built-in designs: 75-208 designs
- Font options: 7-13 embroidery fonts
Most combination machines now include wireless connectivity for transferring designs and USB ports for importing patterns from external sources.
Free-motion embroidery on regular machines
Don’t have an embroidery machine? Free-motion embroidery offers an alternative approach using a standard sewing machine. Often described as “painting with a sewing machine,” this technique can be performed on almost any machine by lowering the feed dogs.
To prepare for free-motion embroidery, you’ll need a darning foot or free-motion foot, stabilizer material, and embroidery thread. The technique involves moving the fabric manually beneath the needle while the feed dogs remain lowered, giving you complete control over the design.
Choosing the right machine for your needs
Selecting the perfect embroidery machine requires careful consideration of your specific needs and circumstances. Finding the balance between features and practicality ensures you’ll invest in equipment that grows with your skills.
Beginner vs. advanced user needs
Novice embroiderers should prioritize user-friendly interfaces and automatic features. Look for machines with intuitive touchscreens, automatic needle threading, and built-in tutorials. Beginners often benefit from models with pre-installed designs and fonts, allowing immediate practice without needing external designs.
Conversely, advanced users typically require larger embroidery areas and sophisticated editing capabilities. Experienced embroiderers should consider machines with robust memory storage, diverse hoop options, and multi-needle functionality for simultaneous color usage.
Space-saving considerations
For crafters with limited workspace, combination machines offer an excellent solution. These 2-in-1 devices handle both sewing and embroidery functions, eliminating the need for separate machines. Nevertheless, if space permits, having dedicated machines for each function allows you to work on multiple projects simultaneously.
Consider your typical sewing environment—whether it’s a spacious dedicated room or a compact corner—before deciding between combination or specialized machines.
Budget-friendly options
Embroidery machines span a wide price spectrum:
- Entry-level single-needle machines: $300-$1,500
- Mid-range combination machines: $1,000-$3,000
- Professional multi-needle machines: $1,500-$10,000+
Brother consistently offers the most affordable options, while brands like Bernina and Janome typically command higher prices for their premium features.
Brand and model comparisons
For home embroiderers, Brother, Janome, and Babylock are frequently recommended due to their reliability and dealer support networks. The Brother SE600 ($549) offers excellent value for beginners seeking both sewing and embroidery functions.
Alternatively, the Janome Memory Craft 400E ($1,349) provides a larger 7.9″×7.9″ embroidery field for more ambitious projects. For those wanting maximum versatility, the Brother SE1900 ($1,064) delivers 138 built-in embroidery designs alongside 240 sewing stitches.
Ultimately, purchasing from a reputable dealer often provides better long-term value through education, warranty support, and community resources.
Practical tips for getting started
Once you’ve decided which type of machine fits your needs, taking a few practical steps before purchasing will ensure you make the right investment. These initial preparations can save you frustration and help you get the most from your new embroidery machine.
Try before you buy: dealer demos
Above all, visit a dealer that offers demonstrations of various machines. This hands-on experience allows you to test different models and determine which features best match your needs. A reputable dealer will show you how the machine operates and answer your specific questions. Moreover, many dealers provide free demos where you can actually sew on different models before committing to a purchase.
Understand hoop sizes and stitch speeds
Hoop size is crucial when selecting an embroidery machine. The three most common embroidery hoop sizes are:
- 4×4 inch (100×100mm sewing field)
- 5×7 inch (130×180mm sewing field)
- 6×10 inch (160×260mm sewing field)
Remember that the actual sewing field is slightly smaller than the stated hoop size. Consequently, a hoop marketed as 4×4 might have a maximum embroidery area of only 3.93×3.93 inches. For best results, select the smallest hoop that will accommodate your design.
Look for USB support and software compatibility
Check if your prospective machine includes USB connectivity for transferring designs. Machines with USB ports offer greater flexibility as they’re compatible with most embroidery software. To extend the life of your embroidery machine, consider using a short cable to reduce wear from repeatedly inserting USB sticks. Additionally, if your machine has wireless capability, software like PE-Design 11 allows sending designs directly to the machine.
Join sewing clubs or online communities
First thing to remember, you don’t have to learn embroidery alone. Online communities provide valuable support for beginners. Groups like the Machine Embroidery Help Group on Meta have over 50,000 members eager to help newcomers. Joining these communities gives you access to experienced embroiderers who can answer specific questions and share techniques. Alternatively, organizations like the American Sewing Guild offer both online and in-person opportunities to connect with fellow enthusiasts.
Conclusion
Choosing between an embroidery-only machine and a combination model ultimately depends on your specific crafting goals. Throughout this article, we’ve seen that dedicated embroidery machines excel at creating decorative designs but lack the functionality for constructing garments. Consequently, combination machines offer the best solution for crafters who need versatility without sacrificing quality.
Before making your purchase, remember to consider your skill level, available space, and budget constraints. Entry-level embroiderers might start with an affordable Brother model, while advanced users could benefit from investing in premium Janome or Bernina machines with larger embroidery fields.
Additionally, practical research steps like visiting dealers for demonstrations, understanding hoop size limitations, and checking USB connectivity will significantly improve your chances of finding the perfect machine. Most importantly, connecting with fellow embroidery enthusiasts through online communities provides invaluable support during your learning journey.


