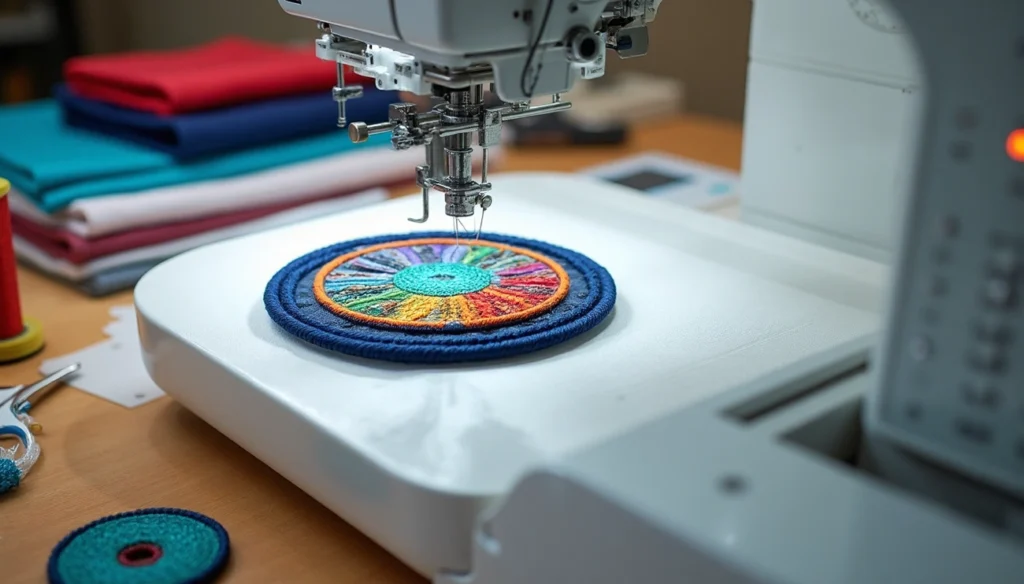
Yes, an embroidery machine can make patches. You can create custom designs with clean edges using standard or commercial machines. Embroidery modules allow thread-based patches on fabric, while commercial units produce thousands with multicolor stitching. Making patches is ideal for decorating clothing, accessories, or bulk branding.
Understanding Patch Types for Embroidery Machines
When exploring patch creation with your embroidery machine, understanding the different types available is essential for choosing the right approach for your project.
Traditional patches vs embroidered-edge patches
Traditional patches feature the distinctive raised border known as a merrowed edge. These borders are typically 2-3mm thick and are applied after the design has been stitched. Historically, this required a specialized Merrow machine and manual handling of each patch.
Alternatively, embroidered-edge patches can be created entirely on your standard embroidery machine. These patches use a wide, full-density satin stitch (typically more than 3mm) around the border to capture the fibers of your patch material. Unlike traditional patches, the edge stitching happens during the initial embroidery process rather than as a separate step.
Traditional patches work best for simple, symmetrical shapes like circles, squares, and rectangles. Conversely, embroidered-edge patches offer flexibility for creating unique shapes that would be difficult to run through an overlock machine.
When to use thread-only patches
Thread-only patches represent a fascinating option where no fabric base is required. Instead, the entire patch is created solely with thread on a stabilizer. This method is ideal when:
- You want to avoid pre-cutting or post-cutting fabric
- You need a patch in any color available in your thread collection
- You’re creating intricate or unusual shapes
- You want a lightweight, flexible patch
For thread-only patches, most embroiderers use non-soluble materials like polyolefin film or 20-gage clear vinyl as the base. This provides a stable foundation while the thread builds up the entire design and structure of the patch.
Pros and cons of each method
Each patch-making approach has distinct advantages and limitations:
Traditional Patches (Merrowed Edge)
- Pros: Extremely durable and resistant to fraying, professional appearance, traditional esthetic
- Cons: Requires additional equipment, limited to simple shapes, more labor-intensive
Embroidered-Edge Patches
- Pros: Can be made with just an embroidery machine, works for complex shapes, no manual cutting around borders needed
- Cons: May not have the same distinctive raised look as merrowed edges, requires careful digitizing
Thread-Only Patches
- Pros: Unlimited color options, no fabric cutting required, works for complex shapes
- Cons: Higher stitch count, potentially less durable than fabric-backed patches, requires special digitizing techniques
On top of these considerations, think about your attachment method. Iron-on patches feature heat-activated adhesive backing for quick application on heat-tolerant fabrics, while sew-on patches offer unlimited wash durability and work on any fabric type.
Your choice ultimately depends on your design complexity, available equipment, and the patch’s intended use. For beginners or those without specialized equipment, embroidered-edge patches offer the simplest entry point.
Step-by-Step: How to Make Patches with an Embroidery Machine
Creating professional-quality patches with your embroidery machine involves six key steps that transform simple materials into durable, attractive designs.
1. Hoop the stabilizer
Start by selecting the right stabilizer – fibrous water-soluble stabilizer works best for clean, thread-wrapped edges. This type stands up to stitching stresses better than thinner alternatives. Hoop your stabilizer drum-tight, ensuring it’s properly stretched with no wrinkles. For optimal results, use the smallest hoop that accommodates your design for maximum stability. Subsequently, tighten the hoop fully – if it sounds like a drum when tapped, you’ve done it correctly.
2. Stitch placement lines
Next, run a placement stitch on the stabilizer to outline where your patch material will go. This crucial step creates a precise template for positioning your fabric. First, the machine will stitch this outline, then pause so you can prepare for the following stage. Some digitizers recommend printing your design on cardstock first to create a cutting template, which helps trim fabric accurately before embroidery.
3. Add and tack down patch material
Once your placement line is complete, position your patch fabric over this outline. For secure adhesion, apply temporary spray adhesive to prevent shifting. The ideal materials include twill fabric with crinoline backing or sturdy cotton/linen. After positioning your fabric, run a tack-down stitch – typically a zigzag stitch for pre-cut materials or 1-3 passes of straight stitches for hand-cut methods.
4. Run the central design
Now embroider the central design of your patch. This should always happen before stitching the border to ensure the stabilizer remains intact. Use appropriate stitch types based on your artwork. Throughout this step, make thread color changes as directed, and trim any easy jump stitches along the way (but only when the machine isn’t actively stitching).
5. Stitch the final border
The border – typically a dense satin stitch at least 3mm wide – must be the last element in your sequence. This prevents premature detachment from the backing. For professional results, use color-matched bobbin thread for a clean wraparound effect. The border acts as both decoration and a seal that encapsulates the edge of your patch material.
6. Remove stabilizer and finish
Finally, release your patch from the hoop. If using water-soluble stabilizer, trim excess material before rinsing. For plastic films, tear away carefully. Some embroiderers use a hot knife for synthetic fabrics to melt and seal the edges, preventing fraying. To create iron-on patches, apply heat-seal adhesive to the back with an iron or heat press at approximately 260 degrees for about 4 seconds.
Advanced Patch-Making Techniques
Taking your patch-making to professional levels requires mastering a few advanced techniques. Your embroidery machine is capable of creating stunning custom patches with these specialized methods.
Using hot knife for clean cuts
For synthetic patch materials, a hot knife creates sealed, fray-resistant edges. Working at 900-950 degrees, this tool simultaneously cuts and melts the edge. For optimal results:
- Apply fusible web (like Heat N Bond Lite) to the back of your completed patch
- Place the patch on a heat-resistant surface such as tempered glass
- Hold the knife at an angle, using only the tip of the blade
- Cut with even pressure, moving slowly around the border
- Clean your hot knife every few inches with a paper towel
After cutting, use the barrel of your hot knife to smooth the edges, creating that professional finish. This technique works best with polyester materials that cleanly melt and fuse.
Creating free-standing thread-only patches
Thread-only patches eliminate fabric entirely, creating designs using just thread and stabilizer. To create these:
- Hoop non-soluble film like polyolefin or 20-gage clear vinyl with textured sides facing each other
- Digitize a 3-layer underlay mesh with opposing angles beneath the main design area
- Build the patch with high stitch density to compensate for the lack of fabric support
- Once complete, tear the patch from the film and heat-seal the edges
The underlay mesh provides structure and stability, essentially creating a tiny, free-standing bridge of thread. Although these patches require higher stitch counts, they offer vibrant colors and eliminate fabric cutting completely.
Digitizing tips for complex designs
Proper digitizing makes the difference between amateur and professional patches:
- Create wide satin stitch borders (minimum 3mm) to properly seal edges
- Add placement and tack-down stitches as separate color stops
- For thread-only designs, increase underlay density to boost stability
- Consider building a 3-layer mesh underlay with opposing angles for additional support
- Digitize the border stitches perpendicular to the patch’s interior for optimal strength
Furthermore, many professionals recommend testing your design on cardstock first to ensure proper alignment and cutting accuracy before committing to your final materials.
Choosing the Right Materials and Tools
Selecting quality materials is foundational to creating professional patches with your embroidery machine. The right supplies ensure durability, clean edges, and professional results.
Best stabilizers for machine embroidery patches
For successful patch creation, stabilizer selection is crucial. Water-soluble stabilizer works excellently for patches with clean, thread-wrapped edges. It completely dissolves in water, leaving no visible residue behind. For traditional patches, medium-weight tear-away stabilizer provides adequate support while being easy to remove.
Moreover, for patches with high stitch counts or when using lightweight felt, a middle-weight cut-away stabilizer offers superior support. Many professional embroiderers layer stabilizers for additional strength when creating complex designs. For difficult-to-hoop items, adhesive stabilizers like Ultra-Solvy allow you to embroider patch edges without backing showing.
Recommended patch fabrics (twill, felt, vinyl)
Felt remains the most popular choice for patches because its edges don’t fray like other fabrics. It requires minimal edge finishing and offers a wide variety of colors. Wool felt is particularly valuable as it’s sturdier, less prone to pillage, and holds its shape better.
Twill fabric (also known as tackle-twill) excels at keeping embroidery stitches in place, creating long-lasting patches. Its diagonal texture adds visual interest while enhancing strength. For patches requiring printing alongside embroidery, polyester twill with almost no discernible rib works exceptionally well.
Cotton canvas provides another robust option, offering a lightweight yet durable base for both light and heavy designs. Vinyl can also be used with a 90/14 or 100/16 needle.
Adhesives and backing options
Patch backing determines how your creation attaches to garments:
- Heat-seal backing provides durable adhesion but shouldn’t be laundered at high temperatures
- Sew-on backing (non-woven or plastic) offers permanent attachment without adhesive
- Velcro (hook and loop) backing allows for removable application, ideal for tactical gear
- Self-stick adhesive works for temporary placement or trade show samples
For iron-on patches, materials like Heat N’ Seal or Thermofix create strong bonds. When choosing backing, consider your fabric type, the patch’s intended use, and washing frequency.
Conclusion
Creating patches with an embroidery machine offers endless possibilities for crafters at any skill level. Throughout this guide, we’ve seen how your standard embroidery machine can produce professional-quality patches without specialized equipment. Most importantly, the process requires just basic materials and follows a straightforward workflow anyone can master.
Certainly, your choice of patch type—whether traditional, embroidered-edge, or thread-only—depends on your specific project needs and available materials. Each method has unique advantages, though embroidered-edge patches provide the simplest entry point for beginners. Additionally, mastering advanced techniques like hot knife cutting and proper digitizing will elevate your patch-making to professional levels.
Material selection undoubtedly makes a significant difference in your final results. Quality stabilizers, appropriate fabrics, and the right backing options ensure your patches remain durable and attractive. Furthermore, testing your designs before committing to final materials saves time and prevents frustration.


