Yes, embroidery can be undone using tools like a seam ripper or stitch remover. The success depends on factors such as stitch type, density, thread, and fabric. While removal is usually possible, it may leave small holes or marks on the fabric, especially with dense or machine embroidery.
Essential Tools for Removing Embroidery
Having the right tools makes all the difference when removing embroidery. With proper equipment, what seems like a daunting task becomes manageable and even straightforward. Here’s everything you need to get started.
Seam ripper or stitch remover
The humble seam ripper is your most essential tool for undoing embroidery. This inexpensive tool (available for as little as $5) features a small, sharp blade with a curved hook that slides under stitches to cut them without damaging fabric. For more serious embroidery removal, consider investing in an electric stitch eraser. These specialized tools range from $80-$170 and feature motorized blades specifically engineered to get under embroidery stitches, grab them, and clip them efficiently.
Additionally, professional options like Peggy’s Stitch Eraser® and the All-Stitch Remover are designed specifically for dense machine embroidery. They feature special cutting heads and powerful motors that remove stitches without damaging the material underneath.
Embroidery scissors
Small, sharp embroidery scissors are crucial for precision cutting. Unlike regular scissors, embroidery scissors are typically 3-4 inches long with fine, sharp points that allow you to cut threads in tight spaces. Curved embroidery scissors are particularly valuable for removing stitches as their design helps you cut close to the fabric surface while minimizing the risk of accidentally cutting the fabric itself.
Furthermore, some embroiderers prefer specialized scissors like goldwork scissors with serrated blades for cutting metal threads or duckbill scissors for appliqué work.
Tweezers
After cutting threads, tweezers become indispensable for grabbing and pulling out the cut threads. Fine-pointed tweezers offer precision control, while angled tweezers provide better visibility and can be positioned flat against fabric for wider area tweezing.
For maximum effectiveness, look for tweezers with excellent grip that won’t let go unless you release pressure. This precision control makes removing tiny thread bits much easier.
Magnifying glass (optional)
A magnifying glass helps tremendously when working with intricate embroidery. Practical options include magnifiers with integrated additional lenses that provide both 2x and 8x magnification. Models with adjustable straps can hang around your neck, keeping both hands free for working.
Lint roller or tape
Once you’ve removed most threads, you’ll likely notice tiny bits of thread residue clinging to the fabric. This is where lint rollers, clothing brushes, or even regular tape become valuable. These tools effectively pick up leftover threads that your other tools might have missed, giving your fabric a clean finish after removing embroidery.
Step-by-Step Process to Undo Embroidery
Removing embroidery requires patience and a methodical approach. With your tools in hand, follow these precise steps to safely undo embroidery without damaging your fabric.
1. Turn the fabric inside out
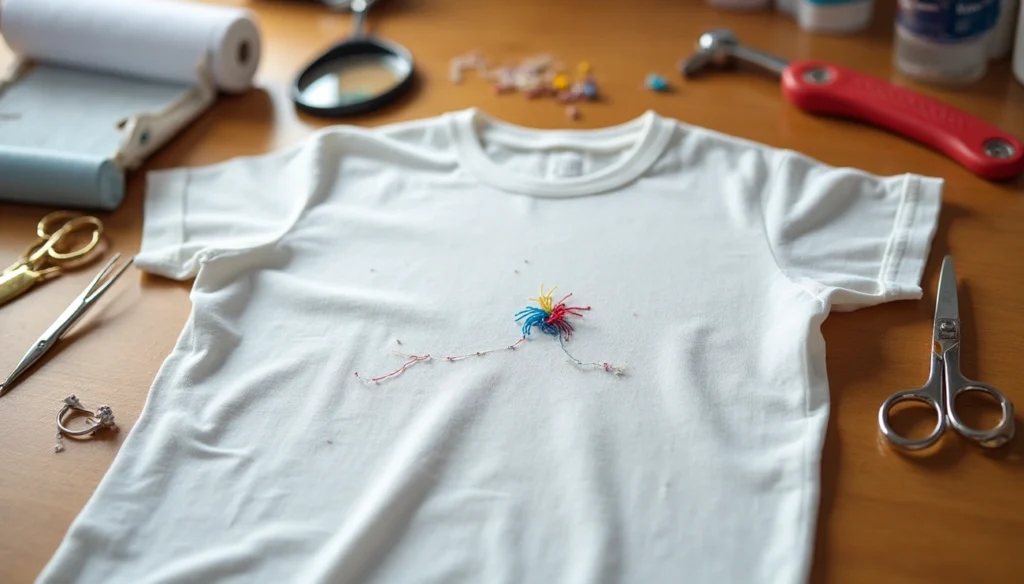
Initially, flip your garment or fabric piece inside out to expose the back of the embroidery. This crucial first step gives you access to the underside where the messy threads and connections are visible. Working from the back offers two significant advantages: you’ll see how stitches connect, making removal easier, and any potential fuzzing from tools won’t show on the front of your item. For delicate fabrics prone to snagging, consider covering the right side (the embroidered side) with masking tape or painter’s tape for added protection.
2. Cut threads from the back
Once positioned correctly, begin cutting threads from the back side. Slide the sharp point of your seam ripper or the tip of embroidery scissors under a thread, then carefully lift and snip. Work methodically in small sections rather than trying to remove everything at once. For machine embroidery, you might cut multiple threads simultaneously, whereas hand embroidery typically requires cutting each thread individually. Remember to be extremely careful not to cut the fabric itself.
3. Pull threads from the front
Afterward, turn your fabric right side out again. Using tweezers, gently grasp the cut ends of threads and pull them through to the back. If threads are stubborn or short, use your seam ripper to loosen them slightly before attempting removal. Never force threads out – this can damage your fabric. Instead, if a thread won’t budge easily, flip the fabric over and check if you missed cutting some connecting threads.
4. Clean up leftover fibers
Finally, remove any remaining thread bits with a lint roller or tape. These tools efficiently pick up tiny thread fragments that might otherwise be overlooked. For especially stubborn areas, a credit card swiped across the surface can lift lingering thread pieces. Once all visible threads are gone, inspect both sides of your fabric thoroughly to ensure you haven’t missed anything.
Handling Different Fabric Types
Different fabrics require unique approaches when removing embroidery. The techniques that work perfectly on cotton might damage delicate materials or prove ineffective on thicker fabrics. Let me guide you through fabric-specific methods that make undoing embroidery possible on virtually any material.
Removing embroidery from delicate fabrics
Delicate fabrics like silk, chiffon, and lace demand extra care during embroidery removal. For these sensitive materials, I always work from the back of the fabric whenever possible to minimize visible damage. A magnifying glass becomes invaluable here, helping spot tiny stitches and preventing accidental cuts to the base fabric.
For extremely delicate materials, I place a thin piece of cardboard between fabric layers to avoid cutting through both sides simultaneously. Moreover, using gentler tools makes a significant difference—opt for a fine-tipped seam ripper, small embroidery scissors, and tweezers with rounded tips.
Always test your chosen method on a hidden area first. If the fabric starts pulling or stretching, stop immediately and try an alternative approach.
Working with thick or dense materials
Thick fabrics like denim and canvas present different challenges. Standard seam rippers often struggle with the dense weave and thicker threads used in these materials. Consequently, I recommend using a larger seam ripper or specialized stitch eraser tool designed for tougher threads.
Dense satin stitches typically require cutting every third or fourth stitch rather than each individual one. For stubborn threads, sticky tape works wonders—press it firmly over remaining thread bits, then lift to remove them from the fabric.
Electric seam rippers, thread-picking combs, and adhesive lint rollers are particularly effective on these materials. On top of that, older embroidery might be firmly set into thick fabric, so applying a tiny bit of fabric softener with a cotton swab can help loosen these stitches.
Using stabilizers for stretchy fabrics
Stretchy fabrics such as knits and jersey require stabilization during embroidery removal to prevent distortion. Cut-away stabilizers work best for these materials, as they hold stitches in place and prevent the embroidery from warping.
The more elastic the fabric, the more stable your stabilizer must be. In contrast to woven fabrics, stretchy materials benefit from stabilizers that remain attached to the fabric even after washing multiple times, providing continued support for the area where embroidery was removed.
When working with particularly stretchy fabrics, I place a piece of fabric stabilizer beneath the embroidery area before starting removal. This additional support prevents the delicate fabric from stretching or tearing as I remove stitches.
Tips to Minimize Damage and Restore Fabric
Even with careful removal, embroidery can leave its mark on fabric. Nonetheless, with the right techniques, you can minimize damage and restore your fabric to nearly its original condition.
How to reduce visible holes
After undoing embroidery, those tiny needle holes can be frustrating. Fortunately, there are effective methods to minimize their appearance:
First, gently stretch the fabric between your fingers to help realign the fibers. For stubborn holes, lightly dampen the area and use your fingertip to carefully rub the fabric in circular motions. This technique encourages threads to return to their original position.
Another approach involves using a blunt needle to gently manipulate individual threads back into place. Some professionals use the flat edge of a fingernail or a spoon, scraping horizontally and vertically across the holes to close them.
For persistent holes, a cross stitch needle works remarkably well—use its blunt end to gently rub over the affected areas, helping realign the weave.
Using steam or ironing to reset fabric
Heat and moisture work wonders for fabric restoration. To begin, place a pressing cloth over the area where embroidery was removed. This prevents direct contact between the iron and potentially damaged fabric.
Apply a warm iron (never hot) to the area, keeping it moving to avoid scorching. The combination of pressure and heat helps fabric fibers settle and reduces needle marks. For best results, maintain the iron at the appropriate temperature for your specific fabric type.
Steam proves particularly effective for stiff fabrics that resist manual manipulation. Hold the fabric over steam carefully, allowing the moisture to penetrate and relax the fibers. For delicate fabrics, use a light misting of water instead of direct steam.
When to wash the fabric after removal
Washing after embroidery removal serves two purposes: cleaning the area and helping fibers reset. A gentle hand wash with mild soap helps remove any remaining thread fragments and allows the fabric structure to relax.
However, caution is essential with certain materials. Silk and wool threads may bleed when wet, while metallic threads can be damaged by washing. For colored threads or hand-dyed fabrics, test colorfastness on an inconspicuous area first.
Allow the fabric to dry flat after washing. For optimal results, let the fabric rest for at least 24 hours after treatment, giving fibers ample time to fully relax and settle into place.
Conclusion
Undoing embroidery might seem daunting at first, but as we’ve seen throughout this guide, the process becomes manageable with the right tools and techniques. Patience stands as your greatest ally when removing unwanted stitches. Whether you’re fixing a mistake or repurposing fabric, the methods outlined above will help preserve your materials while effectively eliminating unwanted embroidery.
Remember that different fabrics demand different approaches. Delicate materials require gentler handling, while thicker fabrics might need more robust tools. Additionally, taking time to restore your fabric after embroidery removal pays dividends in the final result. Steam, careful washing, and gentle manipulation can significantly reduce visible evidence that embroidery ever existed.
My years of experience have taught me that embroidery mistakes happen to everyone—beginners and experts alike. The ability to undo and correct these mistakes represents an essential skill in any embroiderer’s toolkit. Though the process takes time, the satisfaction of salvaging a project or fabric makes every careful snip worthwhile.