Choose the best interfacing for sewing by matching it to your fabric weight, project type, and desired finish. Use lightweight fusible interfacing for delicate fabrics like silk, medium-weight for shirts or dresses, and heavy sew-in interfacing for coats or bags. Always pre-test on fabric scraps to ensure compatibility and drape.
Finding the best sewing interfacing can be tricky, there are so many types, weights, and brands to choose from. Whether you’re sewing garments, handbags, or quilts, the right interfacing gives your fabric structure, shape, and a professional finish. In this guide, we’ve tested and reviewed the 10 best sewing interfacings for every type of project: from lightweight fusible options to heavy-duty stabilizers that hold up beautifully.
10 Best Interfacing for Sewing (2025 Reviews)
Finding the right interfacing can make or break your sewing project. The best options add structure, stability, and a professional touch, whether you’re working on shirts, bags, or quilts. Here are our top 10 picks for the best sewing interfacings, tested and reviewed for performance and quality.
HeatnBond Fusible Woven Interfacing
Check Price
PLANTIONAL Lightweight Non-Woven Fusible Interfacing
Check Price1. Thermoweb Heatn Bond Medium Weight Fusible Interfacing
Best for:
General garment support
This medium-weight, non-woven fusible interfacing provides reliable structure for collars, cuffs, waistbands, and facings. It’s easy to apply with an iron, adheres evenly, and holds up well after washing. Ideal for sewists who want quick, clean results without pinning or stitching.
Pros:
- Smooth adhesion with no wrinkles
- Adds moderate stiffness without bulk
- Great for everyday garments
Cons:
- Slightly stiff for delicate fabrics
2. Pellon 911FF Fusible Featherweight Interfacing
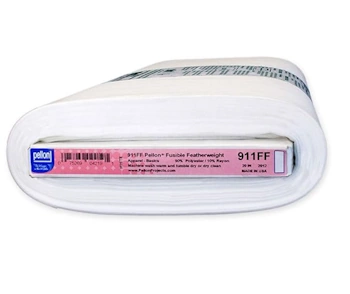
Best for: Lightweight fabrics and blouses
This featherweight fusible interfacing gives gentle support without changing the natural drape of fine fabrics. Perfect for linings, yokes, and delicate cottons where a soft touch is key.
Pros:
- Light and flexible
- Machine washable and dry-cleanable
- Great for sheer or thin materials
Cons:
- Too light for structured garments
3. Pellon SF101 Shape-Flex Fusible medium weight woven interfacing
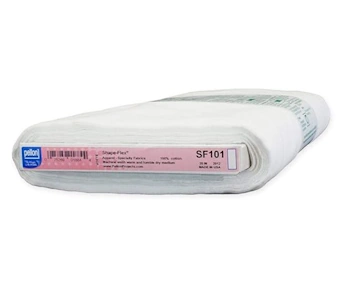
Best for: Shirts, dresses, and quilting
Made from 100% cotton, this woven fusible interfacing acts like fabric — offering crisp stability while maintaining a natural drape. It’s a favorite among dressmakers and quilters alike.
Pros:
- Strong, woven texture feels natural
- Excellent for cotton garments
- Washable and durable
Cons:
- May feel a bit firm on very soft fabrics
4. FIVEIZERO Medium Weight Non-Woven Fusible Interfacing
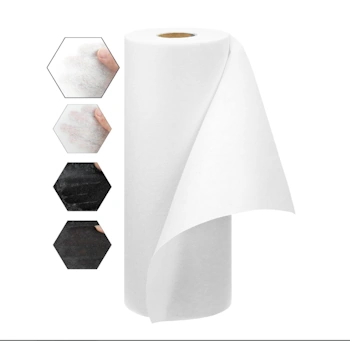
Best for: Everyday sewing and crafts
An affordable and versatile option that works well for collars, facings, and simple projects. The large yardage roll makes it ideal for frequent sewing.
Pros:
- Budget-friendly and durable
- Good adhesion and strength
- Easy to cut and press
Cons:
- Slightly stiffer than woven types
5. PLANTIONAL Lightweight Non-Woven Fusible Interfacing
Best for: Quilting and light crafts
This lightweight interfacing adds gentle stability to thin fabrics without making them bulky. It’s a great option for appliqué, quilting, or light cotton garments.
Pros:
- Soft feel and good flexibility
- Bonds well with a hot iron
- Generous length for multiple projects
Cons:
- May not hold up for heavy fabrics
6. Pellon PLF36 Ultra Lightweight Fusible Interfacing
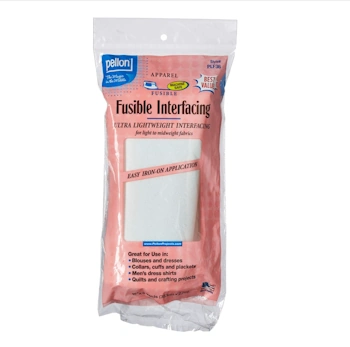
Best for: Sheer fabrics and delicate garments
A barely-there stabilizer for fine materials like voile, silk, and chiffon. It keeps fabrics smooth and stable without affecting drape or transparency.
Pros:
- Ultra-thin and invisible under fabrics
- Easy to fuse evenly
- Doesn’t alter fabric texture
Cons:
- Minimal structure — not for heavier fabrics
7. HeatnBond Fusible Woven Interfacing
Best for: Structured collars and waistbands
A woven alternative that mimics fabric feel while giving lasting shape. It’s strong, flexible, and suitable for both garments and light home décor.
Pros:
- Feels natural and breathable
- Excellent for tailored clothing
- Bonds smoothly with no bubbling
Cons:
- Slightly pricier than non-woven types
8. Pellon 950F ShirTailor Fusible Interfacing
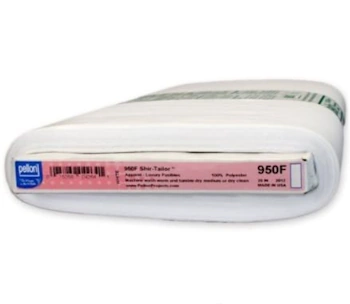
Best for: Professional shirt collars and cuffs
This interfacing delivers crispness and body, making it ideal for tailored garments. It provides firm support while remaining flexible enough for comfortable wear.
Pros:
- Gives sharp, professional edges
- Long-lasting adhesion
- Resists puckering after washing
Cons:
- Too stiff for lightweight fabrics
9. Vilene G700 Woven Fusible Interfacing
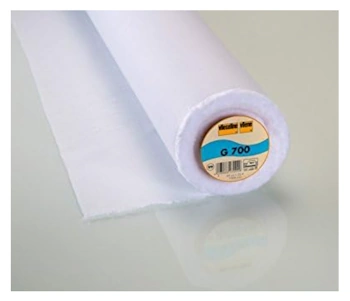
Best for: Dresses, shirts, and bags
Vilene’s G700 is a woven cotton interfacing known for its smooth texture and durability. It adds natural firmness without altering the hand of the fabric.
Pros:
- Excellent quality and consistency
- Works beautifully with cotton and linen
- Maintains drape
Cons:
- Must be pre-shrunk for best results
10. Bosal Light Fusible Woven Interfacing
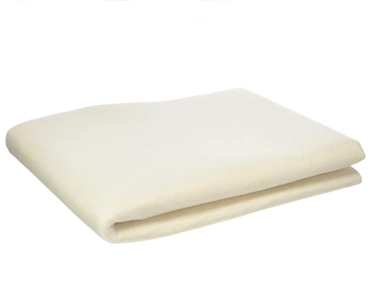
Best for: Quilting and craft projects
Light yet strong, this interfacing supports detailed quilting work, appliqué, and small craft designs. It adheres smoothly and keeps shapes neat during stitching.
Pros:
- Smooth surface for precise stitching
- Adds strength without bulk
- Great for decorative sewing
Cons:
- Limited availability in some regions
What is Interfacing and Why It Matters
Interfacing serves as the hidden backbone of quality sewing projects. This inner construction material lies between layers of fashion fabric, adding essential shape, strength, and body to your creations. Unlike visible elements that get all the attention, interfacing works silently behind the scenes to elevate your sewing from amateur to professional.
What is interfacing used for in sewing?
The primary purpose of interfacing is to provide stability and support. Specifically, it prevents fabric from stretching and sagging, customizes seams, and reinforces areas subject to strain. Interfacing strengthens areas where buttons, buttonholes, and other fasteners are sewn, substantially increasing the garment’s lifespan.
Moreover, interfacing proves invaluable for supporting embroidery and embellishments. If you have a heavily embroidered area that weighs down your fabric, adding interfacing offers the extra support needed. For knit fabrics, interfacing is especially crucial as it prevents them from stretching out of shape.
Where interfacing is applied in garments
Several key areas in garments benefit from interfacing. These include:
- Collars and cuffs for structure and stiffness
- Necklines and waistbands for stability
- Buttonholes and button areas for reinforcement
- Pocket flaps and hems for shape retention
- Sleeveless armholes to prevent stretching
Jackets and coats typically use substantial amounts of interfacing to retain their shape and prevent distortion with regular wear. Furthermore, interfacing stabilizes areas before inserting zippers and creates soft rolls on folded edges of hems.
How interfacing affects structure and drape
FIVEIZERO Medium Weight Non-Woven Fusible Interfacing
Check Price
Pellon 911FF Fusible Featherweight Interfacing
Check PriceInterfacing significantly impacts how your finished project looks and feels. First and foremost, it provides body without bulk—adding crispness rather than heaviness. The right interfacing maintains the garment’s intended shape wear after wear.
Importantly, interfacing should generally be slightly lighter or the same weight as your fashion fabric. This rule ensures the fabric maintains its natural characteristics unless you specifically want to create an exaggerated effect or modify the hand and drape.
Since interfacing affects drape so profoundly, testing is essential before application. Simply drape the interfacing over your arm, place the fabric over it, and evaluate if it creates your desired effect. Remember that fusible interfacing typically provides more body than sew-in varieties.
To preserve natural movement, interfacing should follow the same grain as your fashion fabric. This principle helps maintain the look and drapeability of the fashion fabric throughout the garment’s life.
Understanding the Types of Interfacing
The world of interfacing includes several distinct types, each with unique properties that serve different sewing needs. Understanding these variations helps you select the best interfacing for sewing projects with confidence.
Woven interfacing
Woven interfacing closely resembles regular fabric with a defined grain line that must be aligned with your fabric’s grain. This type maintains a natural drape and movement in your garment, making it ideal for delicate fabrics like silk. Because it’s constructed just like woven fabric, it retains fabric-like properties even after application. Woven interfacing is particularly suitable for tailored clothing where maintaining the fabric’s inherent qualities is essential.
Non-woven interfacing
Non-woven interfacing consists of fibers bonded or felted together, creating a paper-like material with no grain line. This characteristic allows you to cut it in any direction without worrying about fraying or unraveling. Non-woven options are typically more affordable yet less durable after washing compared to woven alternatives. I find non-woven interfacing works best for crafting projects, bags, accessories, or garments that won’t undergo frequent washing.
Knit interfacing
Knit interfacing offers crosswise stretch with minimal lengthwise stretch, allowing it to move with your fabric. This makes it perfect for knit garments or stretchy fabrics where maintaining elasticity is crucial. For instance, a 2-way stretch fusible interfacing stretches lengthwise, crosswise, and diagonally, providing flexibility without causing wrinkles or puckering. Alternatively, 1-way stretch interfacing only stretches crosswise and works excellently for stabilizing button plackets or shoulder seams.
Fusible vs. sew-in interfacing
Fusible interfacing features adhesive dots on one side that bond permanently to fabric when heated with an iron. The primary advantage is convenience—simply iron on and continue sewing. Conversely, sew-in interfacing requires basting to the fabric before construction. Although more time-consuming, sew-in options provide a more natural drape and are essential for heat-sensitive fabrics like sequins, textured materials, or loosely woven textiles where fusibles might cause damage.
Types of fusible interfacing
Fusible interfacings come in various weights from featherweight to heavyweight. Lightweight options like Pellon 906F provide stable support without adding bulk, making them suitable for delicate fabrics. Medium-weight interfacings such as Pellon 911FF work well for collars and cuffs, whereas heavyweight options like Pellon 931TD offer firm support for active sportswear. Specialty fusibles include ShirTailor for crisp shirt collars and Easy-Knit for machine embroidery stabilization.
How to Choose the Right Interfacing for Your Fabric
Selecting the appropriate interfacing remains a critical yet often overlooked aspect of successful sewing projects. Once you understand the various types available, following these practical guidelines will help you make the perfect match for your fabric.
Match interfacing weight to fabric weight
The golden rule of interfacing selection is straightforward: choose interfacing that’s the same weight or slightly lighter than your fabric—never heavier. This approach allows the interfacing to provide structure without overpowering your fabric’s natural properties.
As a practical guide, consider these fabric-interfacing weight pairings:
- Lightweight fabrics (30-150 GSM): Use featherweight or lightweight interfacing for delicate materials like silk, voile, and lightweight cotton.
- Medium-weight fabrics (150-350 GSM): Apply medium-weight interfacing for quilting cotton, ponte roma, and similar fabrics.
- Heavyweight fabrics (350+ GSM): Select heavyweight interfacing for canvas, denim, and upholstery fabrics.
If uncertain between two weights, opt for the lighter option to avoid unnecessary stiffness.
Consider fabric stretch and drape
The stretch factor plays a crucial role in interfacing selection. For stretchy knits, exclusively use knit interfacing to maintain the fabric’s natural flexibility. Using woven or non-woven interfacing on knits will eliminate their stretch—a mistake that ruins the garment’s comfort and fit.
Additionally, select interfacing with slightly less drape than your fabric to add structure while preserving movement.
Choosing interfacing color
Despite being hidden inside your project, interfacing color matters. The rule is simple: dark fabrics require black interfacing, light fabrics need white interfacing. For mid-tone fabrics like reds, test both options on scraps to check for show-through.
When to use specialty interfacings
Certain projects benefit from specialty interfacings:
- Water-soluble interfacing for temporary stabilization that washes away
- Double-sided fusible for crafts and bags
- Wigan interfacing for hem stabilization
- Hair canvas for traditional tailoring
Remember that fusible interfacing isn’t suitable for all fabrics—avoid using it on textured or heat-sensitive materials like velvet, tweed, acetate, or delicate silks.
How to Apply Interfacing Correctly
Proper application techniques transform good interfacing choices into professional results. Let’s explore the correct methods for both fusible and sew-in varieties.
How to apply fusible interfacing
First, identify the adhesive side of your interfacing—it typically has a slightly bobbly, raised appearance with visible glue dots. Place your fabric wrong side up on the ironing board, then position the interfacing with the adhesive side down against the fabric. Cover both layers with a damp press cloth (an essential step never to be skipped). Set your iron to the appropriate heat—usually wool setting for medium fabrics—and press down for 10-15 seconds per section. Importantly, use a pressing motion rather than sliding the iron, as gliding can distort alignment.
Tips for using sew-in interfacing
Sew-in interfacing remains equally valuable despite fusible options being more common. Indeed, it gives garments a more natural look and drape due to less stiffness. Additionally, it eliminates those little “unglued” bubbles that can appear after washing fusible versions. To apply, pin all layers together with sew-in interfacing on top of your fabric. Subsequently, stitch along the designated seam line using a slightly shorter seam allowance than your pattern indicates. Afterward, trim surplus interfacing close to the stitching line to reduce bulk.
Common mistakes to avoid
Common application errors include:
- Using steam with fusible interfacing (unless specified by manufacturer)
- Not pressing long enough for proper adhesion
- Sliding the iron instead of pressing down firmly
- Moving the fabric while still hot (always let cool completely)
- Using incorrect temperature settings for your fabric type
Using a press cloth and iron settings
A press cloth protects both your iron and fabric while helping interfacing stick faster and more evenly. Cotton muslin works excellently—some professionals even recommend using two cloths, one beneath and one above your project. Match iron temperature to your fabric type, generally avoiding excessively high heat for delicate materials.
Pre-shrinking and grainline considerations
Pre-shrinking prevents future interfacing shrinkage. For fusibles, soak in warm (not hot) water until cool, then hang to dry without pressing. For woven and knit interfacing, pay careful attention to grainline direction during cutting and application. Primarily, this ensures your interfacing follows the same grain as your fabric, maintaining proper drape. Block fusing—applying interfacing to larger fabric pieces before cutting pattern pieces—often yields more precise results.
Choosing the right interfacing is just one part of creating professional-looking sewing projects. To ensure your fabrics and designs hold up beautifully, check out our guide on how to sew elastic waistbands for tips on adding stretch and structure. You might also be interested in our article on where sewing needles are made to understand which tools give you the best results.
Frequently Asked Questions (FAQs)
1. What is interfacing used for in sewing?
Interfacing adds structure, strength, and shape to fabrics. It’s commonly used in collars, cuffs, waistbands, bags, and other areas that need extra support.
2. What’s the difference between fusible and sew-in interfacing?
Fusible interfacing has an adhesive on one side that bonds with heat from an iron, while sew in interfacing is stitched in place. Fusible is faster and ideal for most projects, while sew-in gives more flexibility for delicate fabrics.
3. How do I choose the right weight of interfacing?
Match the weight of your interfacing to your fabric. Lightweight fabrics (like voile or silk) need lightweight interfacing, while medium or heavy fabrics (like denim or canvas) pair best with medium to heavy interfacing.
4. Can I wash fabric with interfacing?
Yes, most modern fusible interfacings are machine washable. Always pre-wash your fabric before fusing, and check the product label for specific washing and drying instructions.
5. How do I apply fusible interfacing properly?
Place the adhesive (rough) side of the interfacing on the wrong side of the fabric. Use a hot, dry iron and press, don’t slide, for about 10–15 seconds per section. Let it cool completely before moving the fabric.
6. What’s the difference between woven and non-woven interfacing?
- Woven interfacing has a fabric like texture and is ideal for garments, as it moves with the fabric.
- Non-woven interfacing is made from pressed fibers, offering stronger structure but less drape, great for crafts and accessories.
7. Can I use interfacing on stretch fabrics?
Yes, but choose a knit or stretch interfacing that can move with the fabric. Regular interfacings may restrict stretch and cause puckering.
8. What’s the best interfacing for bags and purses?
For structured bags, use foam stabilizers like Bosal In-R-Form Plus or heavyweight fusible interfacings. They keep the shape firm and prevent sagging over time.
9. Should I pre-shrink interfacing?
If it’s woven or sew-in, yes lightly steam or soak it in warm water and air dry before cutting. This prevents shrinkage after fusing or washing.
10. Can I remove fusible interfacing if I make a mistake?
Yes, gently reheat the area with an iron, then peel back the interfacing while it’s warm. For stubborn adhesive, use a pressing cloth or adhesive remover sheet.
Conclusion
Selecting the right interfacing truly transforms ordinary sewing projects into professional-looking creations. Throughout this guide, we’ve explored how this hidden layer provides essential structure and support while enhancing the overall quality of your work. Undoubtedly, matching your interfacing weight to your fabric creates the perfect balance of stability without compromising natural drape.
After testing different interfacing types on fabric scraps, you’ll develop an intuitive sense for which option works best for specific projects. Initially, fusible interfacing offers a convenient starting point for beginners, while sew-in varieties eventually become valuable for their natural drape and compatibility with heat-sensitive fabrics.
Additionally, proper application techniques make all the difference in your final results. Therefore, take time to pre-shrink your interfacing, follow correct pressing methods, and align grainlines appropriately. These steps might seem tedious at first, but they prevent future disappointment with puckered seams or bubbling adhesive.

