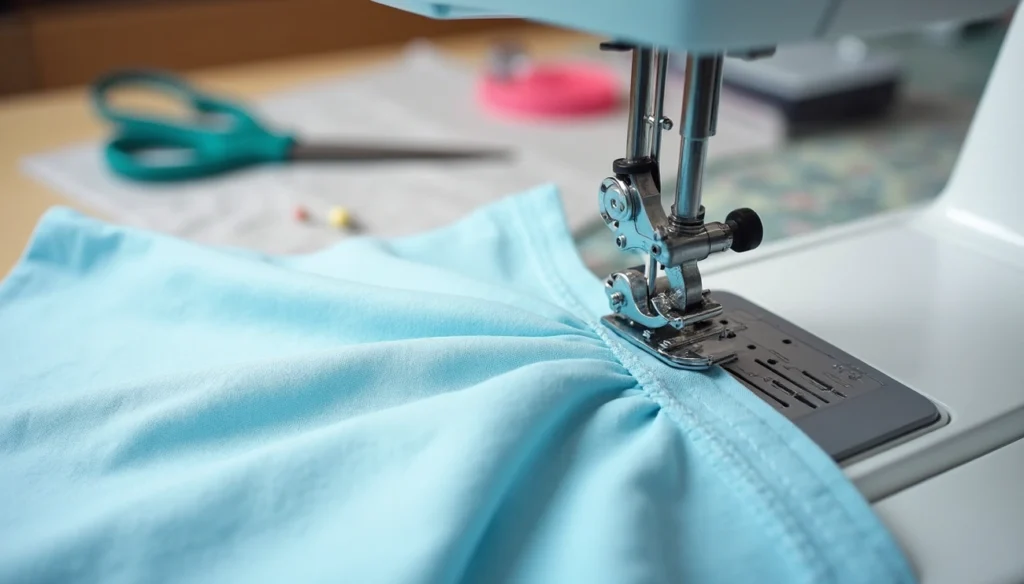
Several factors contribute to wavy hems and curling edges. When sewing stretchy fabrics, the bottom layer often becomes “impatient” and moves faster than the top layer, resulting in wavy seams. Additionally, I’ve noticed puckering along the hem and stitches that pop when wearing the garment. Lightweight materials such as silk, chiffon, and rayon tend to show waviness more than heavier fabrics. Furthermore, inconsistent stitching, improper hemming, or uneven seam allowances can cause the hemline to ripple.
However, there are effective solutions to address these issues. Adjusting your pressure foot pressure can reduce stretching of the top layer, while using a zigzag stitch allows stretch fabric to move without breaking stitches. Throughout this article, I’ll share expert techniques and tools to fix your wavy hems and prevent them in future projects.
What Is a Wavy Hem and Why It Happens
A wavy hem presents as uneven, rippled edges along the bottom of your garment. Instead of lying flat and straight, these hems create an irregular, sometimes decorative but often unwanted wavy effect that can ruin the professional look of your project. Understanding what causes this common sewing issue is the first step toward fixing and preventing it.
Signs your bottom stitch is wavy
When examining your sewn project, several telltale signs indicate a wavy bottom stitch problem:
- Uneven folds and irregular draping along the hemline
- Visible waves or ripples that won’t press flat
- Bottom thread forming loops, zig-zags, or knots underneath the fabric
- Hem that appears stretched out or distorted
If your stitches look loose or zig-zaggy on the underside of your fabric, this typically indicates a tension imbalance. In many cases, when the wonky stitches appear on the bottom, it’s actually your upper thread causing the issue. This happens because the tension of the upper thread is too weak or the tension of the lower thread is too tight, creating an imbalance that results in those unsightly wavy patterns.
Why is my rolled hem wavy?
Rolled hems are particularly prone to waviness due to their construction technique. The primary culprit behind wavy rolled hems is the differential feed setting on your serger or overlocker. Because the stitch length on a rolled hem is so short, it naturally tends to stretch fabric out as you sew, leading to those wavy edges where you don’t want them.
Interestingly, this same technique that causes unwanted waves in some projects is deliberately used to create decorative edges in others. The “lettuce edge” – that wavy, frilly finish often seen on feminine children’s clothing – is intentionally created by decreasing differential feed to stretch the fabric out as it stitches. For standard rolled hems that should lie flat, increasing the differential feed can help counteract this natural stretching tendency.
Moreover, the direction of your fabric grain significantly impacts rolled hem results. You’ll achieve better results when stitching rolled hems on bias edges, as the grain of the fabric will more willingly fold and curl under smoothly when cut on the bias. Nevertheless, remember that bias edges are stretchier, requiring extra attention to differential feed settings.
How fabric type affects hem appearance
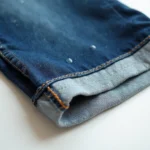
Different fabrics react uniquely when hemmed, which dramatically influences the final appearance of your project. Lightweight materials like silk, chiffon, and rayon tend to show waviness more prominently than heavier fabrics such as denim, wool, and cotton. This happens because these delicate fabrics have less structure to resist distortion during the sewing process.
Stretch fabrics present their own challenges. As noted by experienced sewers, knit fabrics with high stretch content can stretch out during sewing, resulting in wavy hems. Jersey fabric particularly tends to roll up at the edges, making it tricky to work with when trying to achieve even hems.
For curved hems, fabric behavior becomes even more critical. When working with curved shirt bottoms, even non-stretchy wovens like linen can develop waves if not handled properly. This occurs because the curve requires the fabric to compress slightly at the fold, and without proper techniques, this compression creates waviness.
Regardless of fabric type, successful hemming requires matching your technique to your material. For instance, using narrower hems on curved edges or employing a gathering stitch along the hemline can help manage excess fabric that would otherwise cause waves. First and foremost, understanding your fabric’s properties allows you to anticipate potential issues and select the appropriate hemming method.
Main Causes of Wavy Hems
Understanding the technical causes behind wavy hems can save you hours of frustration and rework. I’ve discovered through countless projects that seemingly minor details in your sewing process can dramatically impact your hem’s final appearance. Let’s examine the four primary culprits behind those annoying wavy hems.
Incorrect stitch type or tension
Thread tension issues rank among the most common causes of wavy bottom stitches. When examining your problematic hem, look for these telltale signs:
- Visible loops or bird nesting on the underside of your fabric
- Puckered fabric along the seam line
- Thread that snaps easily when the fabric is stretched
If your upper thread tension is too loose or your bobbin thread is too tight, your machine creates unbalanced stitches that pull the fabric unevenly. This tension imbalance forces the fabric to pucker, creating that wavy appearance along your hemline. Consequently, you’ll need to adjust your tension dial to a higher number until you achieve balanced tension.
Stitch selection likewise plays a crucial role. Using a straight stitch on stretch fabrics virtually guarantees a wavy hem since the fabric will stretch but the thread won’t. Instead, opt for a stretch stitch or a narrow zigzag stitch that allows the fabric to stretch without breaking threads.
Stretching fabric while sewing
The way you handle fabric during sewing significantly impacts hem quality. Initially, many sewers unknowingly stretch their fabric while guiding it through the machine. As noted by experienced sewers, “Keep your knit fabric relaxed as you sew. Don’t pull it toward or away from you. Let your sewing machine do the work!”
Another overlooked factor is fabric weight. When your project hangs off your sewing table, gravity stretches the fabric, causing distortion in your hem. Always work on a surface large enough to support your entire project’s weight.
The pressure from your presser foot can likewise contribute to wavy hems. “If the pressure is set too high, it will stretch out your fabric. It will look rippled,” note sewing experts. For most knit fabrics, a pressure setting of 1 or lower typically works best.
Improper pressing or measuring
Good pressing techniques fundamentally shape your garment and flatten seams. Throughout the sewing process, pressing helps set stitches properly into the fabric. According to professional tailors, “No amount of careful cutting, fitting and construction can make up for too much, too little or incorrect pressing.”
Rather than dragging your iron across the fabric, use a true pressing motion—lowering and lifting in an up-and-down motion. This flattens seams without stretching or distorting the fabric grain. Additionally, press hems with the grain, directing the iron from the lower edge upward.
Measuring inconsistencies also lead to wavy hems. Uneven hem depths force fabric to distribute unevenly, creating ripples. Using a hem gage ensures consistent depth throughout your project.
Unstable or lightweight fabrics
Different fabrics present unique hemming challenges. Lightweight fabrics like silk, chiffon, and rayon show waviness more prominently than heavier materials. These delicate fabrics lack the structure to resist distortion during sewing.
Knits and stretch fabrics require special handling since they easily stretch during sewing. Jersey fabrics particularly tend to roll at edges, making even hemming difficult. For these fabrics, avoid double-fold hems common with woven materials—they “create unnecessary bulk and can cause the hem to roll toward the right side or look messy.”
Stabilizing techniques can dramatically improve results with unstable fabrics. Consider using lightweight interfacing or knit stay tape to prevent stretching during sewing. For extremely lightweight fabrics, placing tissue paper beneath your fabric while sewing provides temporary stabilization that tears away afterward.
Each fabric type demands specific techniques for successful hemming. Understanding your material’s unique properties allows you to select appropriate methods that prevent those frustrating wavy hems.
Essential Tools to Fix and Prevent Wavy Hems
Finding the right tools can make all the difference between frustrating wavy hems and professional-looking finishes. Throughout my sewing journey, I’ve discovered that specific equipment dramatically improves hemming results, especially on challenging fabrics.
Walking foot and hem guides
The walking foot is a specialty sewing machine attachment that revolutionizes how fabric moves through your machine. Unlike standard presser feet, a walking foot has feed dogs on its underside that work in tandem with your machine’s built-in feed dogs. This synchronized movement prevents the top layer of fabric from stretching as you sew.
“The walking foot keeps the layers of fabric feeding through the machine at the same speed. This eliminates those annoying ripples,” as experienced sewists confirm. This tool is particularly effective when:
- Hemming stretch fabrics like jersey or knits
- Working with slippery fabrics that tend to shift
- Sewing multiple layers that might otherwise feed unevenly
Pairing your walking foot with a hem guide ensures even more consistent results. These guides help maintain uniform hem depths throughout your project. The Multi-Functional Hem Guide offers three guiding options: a spring-loaded guide to keep hems in place, a roller ball guide for smooth topstitching around curves, and straight edge guides for clean, professional-looking hems.
Twin needles and stretch thread
For stretchy fabrics, twin needles create professional-looking hems that maintain elasticity. These specialized needles feature two needles on a single shank, creating parallel straight stitches on the top with a zigzag pattern underneath that allows stretch.
When selecting twin needles, look specifically for “ballpoint” or “stretch” varieties designed for knits. These have rounded tips that slide between fabric threads rather than piercing them, preventing damage to your fabric.
Stretch thread works wonderfully alongside twin needles. Made from highly elastic materials, it stretches comfortably without breaking, making it ideal for close-fitting garments that require movement. Firstly, stretch thread helps prevent popped stitches when the fabric stretches. Additionally, it provides flexibility similar to serged seams without requiring specialized equipment.
Wash-away tapes and stabilizers
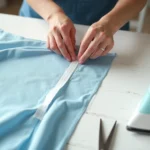
Wash-Away Wonder Tape serves as “sewing’s secret weapon” for problematic hems. This transparent, double-sided adhesive tape temporarily holds fabric in place while you sew, then completely disappears in the wash. It’s especially valuable for:
- Holding tricky hems in place (particularly stretchy knits and lightweight wovens)
- Keeping layers together when pins don’t work well
- Creating extremely narrow hems without distortion
Besides tapes, stabilizers provide critical support during hemming. These temporary backing materials prevent fabric distortion during sewing. For knits, fusible hem tape added before hemming prevents stretching and puckering. Options include hand-cut tricot interfacing, Heat n Bond Soft Stretch Lite, and tricot interfacing rolls specifically designed for hem allowances.
Iron, pressing cloth, and steam
Proper pressing techniques fundamentally improve hem quality. Using a pressing cloth protects delicate fabrics from direct heat while allowing steam to penetrate. Place the cloth between your iron and project to prevent shine marks or scorching.
Although often overlooked, pressing is different from ironing. Instead of gliding continuously over fabric, press in light spurts, avoiding prolonged contact that might stretch fabrics. For perfect results, press seams before hemming to eliminate built-up tension, subsequently creating flatter, more professional hems.
Step-by-Step Guide to Fix a Wavy Hem
When faced with a wavy hemline, fixing it properly requires both patience and technique. Tackling this common sewing problem systematically will help you achieve professional results without frustration.
Remove the old hem carefully
Start by using a seam ripper to safely remove the problematic hem. Insert the sharp tip between the thread and fabric, sliding it sideways to avoid damaging your material. For efficient removal, cut every third or fourth stitch, then gently pull the thread from the opposite side. This method is faster than removing each stitch individually yet safer than ripping seams apart, which could permanently distort your fabric.
Press and stabilize the fabric
Once the hem is removed, press out the old crease marks. Place a damp cloth over the hemline and use steam to relax the fibers. For particularly stubborn creases, a borax solution (two tablespoons each of borax and white vinegar mixed with two cups of hot water) can help eliminate fold lines. Next, stabilize the fabric with fusible hem tape cut to your desired hem width. For knits, tricot interfacing or Heat n Bond Soft Stretch Lite works exceptionally well to prevent stretching during sewing.
Choose the right stitch and needle
Select appropriate tools based on your fabric type. For denim, use a size 90/14 or 100/16 needle specifically designed for heavy fabrics. Lightweight materials require smaller needles. Generally, stretchy fabrics need zigzag or stretch stitches rather than straight stitches to allow flexibility. Adjust your tension settings—higher for denim, lower for delicate fabrics—and test on scraps first.
Sew slowly with even feed
Rushing through hemming leads to skipped stitches and uneven results. Primarily, use a walking foot if available—its additional feed dogs work with your machine’s built-in ones to move fabric evenly, preventing waves. Set your stitch length between 3-4mm for denim or slightly shorter for lightweight fabrics. Keep fabric relaxed as you sew, never pulling or stretching.
Press again for a clean finish
Finally, press your completed hem with appropriate heat settings. Use a pressing cloth to protect delicate fabrics. Apply firm pressure rather than dragging the iron, which can stretch your hem. For knits, allow the hem to cool completely before handling to set the stitches properly.
Tips to Prevent Wavy Hems in Future Projects
Preventing wavy hems is far more efficient than correcting them after completing your project. With proper preparation and technique, you can avoid those frustrating ripples and waves that plague many sewing projects.
Test on fabric scraps first
The golden rule of hemming is to always practice on a scrap piece of the same fabric before tackling your actual project. This crucial step allows you to identify potential issues and adjust your settings accordingly. Different fabrics behave uniquely under the needle, plus you may need to fine-tune presser foot pressure or thread tension for optimal results. Furthermore, testing gives you an opportunity to check if your stitch length complements your fabric weight—shorter stitches (2-2.5mm) work best for lightweight fabrics, whereas longer stitches (3-4mm) suit heavier materials.
Avoid pulling or stretching fabric
Proper fabric handling primarily determines whether your hem lies flat. Position your left hand close to the needle and presser foot to control the fabric before it’s stitched. Your right hand should gently guide the fabric from a good distance in front of the needle. Accordingly, never pull or tug from either direction as this creates tension issues resulting in poor stitch quality and puckered hems. Let the feed dogs move the fabric naturally—they’re designed for this exact purpose.
Use the right tools for the fabric type
Match your tools to your fabric:
- Needles: Use ballpoint or stretch needles (sizes 70/10 or 75/11) for knits and lightweight fabrics
- Thread: Consider wooly nylon in the bobbin for stretch fabrics
- Stabilizers: Apply lightweight fusible interfacing or knit stay tape along hem edges
- Specialty feet: Employ a walking foot for even fabric feeding, or clear feet for better visibility
Maintain consistent stitch length and tension
Unquestionably, proper tension settings create balanced, flat stitches. Start with your machine’s standard tension (typically marked with a dot, often around 4) and adjust based on test results. For variable thickness fabrics, slow down when approaching thicker areas, stop with the needle down, then raise and lower the presser foot before continuing. This simple technique allows fabric to rearrange itself under the foot, maintaining even stitch length throughout your hem.
Conclusion
Wavy hems certainly represent one of the most common frustrations for sewers at any skill level. Throughout this article, we’ve explored how factors like incorrect tension settings, fabric stretching during sewing, improper pressing techniques, and challenging fabric types contribute to those annoying ripples along your hemlines.
Fixing wavy hems requires patience and the right approach. Accordingly, using specialized tools like walking feet, twin needles, and proper stabilizers makes a significant difference in your results. These tools, combined with proper tension settings and careful fabric handling, transform frustrating projects into professional-looking garments.
Remember that prevention works better than correction. Testing on fabric scraps before starting your actual project allows you to adjust settings and techniques specifically for your fabric type. Additionally, maintaining consistent stitch length and tension while avoiding fabric stretching virtually eliminates most hem problems before they begin.