
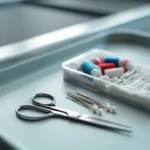
Yes, sewing needles can rust if you do not store them properly. Because they are usually made of steel. Most are coated with nickel or gold to prevent corrosion, but damage or prolonged moisture exposure can cause rust. To avoid rusting, store the needles in a dry container with silica gel or talcum powder.
Why Do Sewing Needles Rust?
Understanding rust formation on sewing needles involves examining several contributing factors. While many assume their metallic sewing companions are immune to corrosion, the reality is quite different.
Moisture and humidity exposure
The primary culprit behind needle corrosion is environmental moisture. Steel needles, despite their protective plating, remain vulnerable to oxidation when exposed to humid conditions. In high-humidity environments, moisture in the air settles on the metal surface, initiating the chemical reaction that produces rust. This process accelerates in coastal areas or during rainy seasons when ambient humidity levels rise dramatically.
Sweat and natural oils from hands
Your hands themselves can be surprisingly destructive to sewing needles. Every time you handle a needle, you transfer natural oils and sweat that contain salt and moisture—both catalysts for rust formation. Additionally, some people appear to have more corrosive hand chemistry than others. As noted by metal experts, certain individuals’ finger oils can cause almost instant marring of metal finishes, sometimes crudely referred to as having “piss fingers” in collector circles.
Saliva and mouth contact
A common but harmful sewing habit is licking thread ends to ease threading. Many sewists (myself included) do this without realizing the consequences. “Another cause of rust might be the saliva from when you lick the thread… eventually, it might result in a corroded needle”. Saliva contains moisture and biological compounds that dramatically accelerate corrosion on metal surfaces, making this seemingly harmless habit particularly damaging.
Poor storage conditions
How and where you store your needles significantly affects their longevity. Leaving needles in plastic containers in humid areas creates a perfect environment for condensation. Similarly, storing needles in bathrooms or kitchens exposes them to steam and moisture fluctuations. One embroidery expert found that needles stored in humid conditions with “hot sweaty little hands” accessing them frequently rusted noticeably faster.
The science behind rust is straightforward—it’s iron oxide formation that occupies less space than the original metal, causing flaking that exposes fresh metal to further corrosion. Unlike aluminum oxide, which forms a protective layer, iron oxide continues deteriorating the metal beneath. This explains why once rust begins on a needle, it tends to progress rather than stabilize.
How to Keep Sewing Needles from Rusting
Protecting your sewing needles from oxidation requires preventive measures that directly address the causes we’ve explored. Fortunately, there are several practical strategies I’ve found effective for extending needle life.
Use silica gel in storage containers
Silica gel packets are moisture-absorbing champions that can protect your needles from humidity. Instead of tossing these packets from shoe boxes and medication bottles, save them for your sewing supplies. Place them in your needle storage containers to keep the environment dry. These packets can absorb moisture up to 30-40% of their initial weight before needing reactivation. For reuse, simply bake them at 250°F for about 4 hours.
Avoid plastic containers in humid areas
Although convenient, plastic containers can trap moisture, especially in humid environments. If you must use plastic, ensure it’s airtight and include silica gel packets. An empty pill bottle works effectively as an alternative. For coastal areas or particularly humid locations, consider metal tins which provide better protection against environmental moisture.
Store in original paper wraps
One of the simplest yet most effective strategies is keeping needles in their original packaging. These paper wraps are designed to protect needles from moisture exposure. As noted by sewing experts, “The best way to keep them safe and secure is to store them in the same paper wraps they came with”.
Keep in a cool, dry place
Location matters immensely for needle storage. Avoid areas prone to temperature fluctuations or moisture, such as bathrooms and kitchens. Instead, store your sewing supplies in a dedicated drawer or cabinet away from heat sources and humidity.
Avoid touching with wet hands
Since hand moisture contributes significantly to needle corrosion, always ensure your hands are dry before handling needles. As one expert recommends, “Always dry off your sewing needles if they get wet before putting them away for storage”. Additionally, breaking the habit of putting needles in your mouth will substantially extend their lifespan.
Best Storage Methods for Rust Prevention
Proper storage can make the difference between needles that last for years and those that quickly develop rust. Throughout my years of sewing, I’ve experimented with numerous storage solutions—some more effective than others.
Airtight containers
Specialized airtight containers provide excellent protection against ambient moisture. These containers, typically made of plastic or glass, feature tight-fitting lids that create a moisture barrier. Small pill bottles make perfect repurposed needle containers, offering both portability and protection. First and foremost, ensure whatever container you choose closes securely to maintain a controlled environment inside.
Needlebooks and felt cases
Historically, needle cases date back centuries, with early versions made from bone, wood, or bronze with tight-fitting stoppers. Modern needlebooks utilize felt pages—a perfect material for needle storage as the matted fibers don’t snag and can be pierced repeatedly without damage. Felt also naturally resists moisture, making it an excellent choice for rust prevention.
“Felt makes a great case for needles, the matted fibers don’t snag, and you can pierce it over and over without damaging the pages,” notes one expert source. Beyond functionality, needlebooks can be personalized and make thoughtful gifts for fellow sewists.
Magnetic storage options
Magnetic storage solutions represent perhaps the most innovative approach to needle organization. These products feature strong magnets that hold needles securely in place—even when the case is open or upside down. Magnetic needle cases come in various designs, from vintage-inspired decorative boxes to modern transparent containers with rotating mechanisms. Moreover, magnetic strips with adhesive backing can be mounted anywhere convenient, preventing lost needles during busy sewing sessions.
Using powder as a moisture absorber
For those without access to silica gel packets, ordinary powder serves as an effective alternative. “Put some powder into the container and just like the silica gel packets, the powder will absorb moisture and also keep your needles rust-free”. Notably, you don’t need much—a small amount is sufficient to absorb environmental moisture. Some traditionalists even recommend talcum powder, which has been used effectively for decades.
What to Do If Your Needle Rusts
Despite careful preventive measures, discovering rust on your favorite sewing needles can be frustrating. Fortunately, there are several methods to rehabilitate rusty needles and determine when they’re beyond saving.
Use an emery strawberry to clean
That small strawberry attached to your tomato pincushion isn’t merely decorative—it serves a crucial purpose. Filled with emery powder (a coarse, sand-like mineral), these strawberries are specifically designed to clean and polish tarnished needles. To use one effectively:
- Push your needle completely through the strawberry in one direction
- Pull it all the way through (don’t poke in and out)
- Repeat several times if necessary
“The proper way to use emery is to push the needle all the way through the strawberry in one direction. That smooths any burrs down,” notes one expert. This technique not only removes light rust but additionally helps prevent moisture buildup on the needle.
Try crocus cloth for stubborn rust
For more persistent rust, crocus cloth offers a superior solution. Unlike regular sandpaper, crocus cloth is “like a more durable sandpaper made from cloth so that it can withstand liquids and repeated use.” At approximately 1400 grit, it’s exceptionally fine and perfect for delicate needle work.
Another surprising remedy comes from your kitchen—strong tea. “Using around 5 regular tea bags in a cup of water, make a very strong brew. Remove bags and soak needles in it for a few hours. It will remove the rust. The Tannic acid does the work.”
When to replace a rusty needle
Regardless of your cleaning efforts, sometimes replacement becomes necessary. Key indicators include:
- Metallic smell on your hands after sewing
- Persistent tarnishing that returns quickly
- Difficulty passing through fabric
- Visible pitting on the needle surface
- Thread fraying or breaking
Can you reuse a rusty needle safely?
Ultimately, safety concerns should guide your decision. A corroded needle loses its “smooth, sleek surface that makes it easier for them to pass through the fabric.” This increased friction damages both thread and fabric, leading to fraying and poor stitch quality.
Though rehabilitation is possible for lightly rusted needles, deeply corroded ones pose risks to your fabric and project quality. Given that needles are relatively inexpensive, replacing severely rusted ones is often the wisest choice.
Conclusion
Sewing needles require proper care despite their seemingly hardy nature. Throughout this guide, we’ve seen that rust formation isn’t just possible but almost inevitable without preventive measures. Steel needles, regardless of their protective coating, remain vulnerable to moisture and environmental factors.
After all, maintaining rust-free needles doesn’t demand complicated procedures. Simple habits like storing needles in their original wrappings, using silica gel packets, and keeping them away from humidity can drastically extend their lifespan. Additionally, breaking habits such as threading needles with saliva or handling them with damp hands prevents premature deterioration.
Most importantly, recognizing when rehabilitation efforts make sense versus when replacement becomes necessary saves both time and frustration. Light surface rust often responds well to cleaning with an emery strawberry or crocus cloth. However, deeply pitted needles with persistent tarnishing should be replaced without hesitation.
Pingback: Can You Use a Sewing Machine Needle To Hand Sew? - Fabrellia