Yes, a regular sewing machine can do basic embroidery using free-motion stitching, especially if it allows the feed dogs to drop. However, for detailed or digital designs, a dedicated embroidery machine is recommended. Embroidery machines handle digital patterns, larger hoops, and complex stitching with more precision.
Can You Do Embroidery with a Regular Sewing Machine?
You can embroider with a regular sewing machine without investing in specialized equipment. While dedicated embroidery machines offer advanced features, we can still create stunning designs using basic techniques on standard machines. The key lies in free motion embroidery, which essentially lets us “draw” with thread by using a free motion or darning foot for better control.
What makes embroidery possible on a standard machine
The magic happens when you make two critical adjustments to your sewing machine. Firstly, you’ll need to lower or cover the feed dogs—those metal teeth beneath your needle plate that normally move fabric forward. This gives you complete control over fabric movement. Secondly, you’ll need to swap your standard presser foot for a darning or embroidery foot, preferably one with an open toe for better visibility.
Your machine settings also play a crucial role. Set your stitch length to zero since you’ll be controlling stitch length manually through fabric movement. Most machines allow these adjustments, making embroidery accessible without specialized equipment.
Limitations compared to dedicated embroidery machines
Nevertheless, regular sewing machines have limitations compared to purpose-built embroidery machines. A dedicated embroidery machine comes equipped with built-in design templates, computerized pattern capabilities, and specialized hoops. They can execute intricate, complex designs with precision that’s difficult to achieve manually.
Although a standard machine can perform basic embroidery tasks, it lacks the advanced features needed for highly detailed commercial work. Creating consistent, identical designs repeatedly is challenging on a regular machine, primarily because results depend heavily on your manual skill and control.
Why free motion embroidery is the key
Free motion embroidery is ultimately what unlocks the embroidery potential of your regular sewing machine. This technique allows you to “draw” with thread by moving the fabric freely under the needle in any direction. It’s like sketching with your machine, giving you creative freedom despite the technical limitations.
With free motion embroidery, you can create everything from simple monograms to intricate illustrations. The technique opens up endless possibilities – outlining designs with straight stitches, filling areas with zigzag stitches, or creating textural effects through stitch density variation.
Mastering this skill takes practice, but even beginners can achieve impressive results after some experimentation. Many textile artists create professional-quality work exclusively using regular sewing machines with free motion techniques.
Getting Ready: What You’ll Need
Before diving into your first embroidery project on a regular sewing machine, gathering the right supplies makes all the difference between frustration and success. I’ve found that preparing properly saves time and helps achieve better results.
Basic supplies checklist
To start embroidering with your regular sewing machine, you’ll need these essential items:
- Embroidery/darning foot: This open-toed presser foot gives you visibility of your stitching area
- Embroidery hoop: Keeps fabric taut and prevents puckering
- Water-soluble marking pen or chalk: For transferring designs onto fabric
- Stabilizer: Prevents fabric from stretching or puckering during embroidery
- Sharp scissors: For trimming threads and cutting fabric
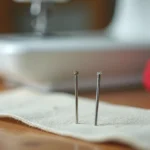
- Quality embroidery needles: Size 75/11 or 80/12 work well for most projects
- Embroidery thread: Polyester or rayon thread designed specifically for embroidery
Optional tools that make things easier
Beyond the basics, several additional tools can enhance your embroidery experience. A darning plate covers feed dogs if your machine lacks the option to lower them. Additionally, quality embroidery-specific scissors with fine tips allow for precise thread cutting in tight spaces. Moreover, transfer paper helps move complex designs to fabric without frustration, especially for beginners.
Thread stands keep thread feeding smoothly when using specialty threads that might tangle easily. Furthermore, an extension table provides extra support for larger embroidery projects, reducing fabric drag that can affect stitch quality.
Choosing the right fabric and thread
For beginners, medium-weight cotton fabric offers the perfect balance—stable enough to hold stitches yet soft enough for the needle to penetrate easily. Tightly woven fabrics generally work better than loosely woven ones, which may allow the needle to push threads aside rather than piercing them cleanly.
Regarding thread, 40-weight embroidery thread provides excellent coverage and comes in countless colors. Polyester threads offer durability and colorfastness, whereas rayon threads provide a beautiful sheen that catches the light. Match your thread choice to your project requirements—polyester for items needing frequent washing, rayon for decorative pieces where appearance matters most.
Thread tension requires attention too. Before starting your actual project, always test your settings on scrap fabric identical to your final piece. This preparation step saves countless headaches once you begin your actual embroidery work.
Setting Up and Testing Your Machine
Setting up your regular sewing machine for embroidery requires a few simple adjustments that transform its functionality. Once you understand the basic setup process, you’ll be ready to create beautiful embroidered designs without specialized equipment.
Installing the embroidery foot
Initially, turn off your machine and raise both the needle and presser foot lever. Remove your current foot by pressing the release button at the back of the presser foot holder. For most embroidery feet, you’ll also need to unscrew and remove the entire foot holder using a small screwdriver.
Hold the embroidery foot with your index finger wrapped around the lever at the back. Position it so the bar fits over the needle clamp screw, with the arm resting above the needle holder. Secure it firmly with the screw – a loose foot can cause needle breakage.
Lowering feed dogs or using a darning plate
Feed dogs are those metal teeth beneath your needle plate that normally move fabric forward. Subsequently, locate the feed dog position switch, typically found at the rear of your machine’s base. Slide this lever to lower them.
If your machine lacks this feature, place a darning plate (a small plastic or metal cover) over the feed dogs. This creates a smooth surface allowing you to move fabric freely in any direction.
Testing stitch length and width
For basic embroidery outlines, set your machine to straight stitch. Conversely, for filling areas, select zigzag stitch. Adjust stitch width by pressing the width selection buttons – wider for bold lines, narrower for delicate work.
Most machines default to standard settings that work well for regular sewing but need adjustment for embroidery. Following this, set stitch length to zero when using zigzag stitch for filling work.
Practicing on scrap fabric
Old t-shirts make perfect practice materials due to their stable weave and low cost. Test your settings on fabric scraps identical to your final project material to check thread tension and stitch formation.
Check for issues like thread bunching, skipped stitches, or needle breakage. Meanwhile, practice moving the fabric smoothly at different speeds to see how it affects stitch consistency. This preparation step is crucial for successful embroidery on your regular sewing machine.
Your First Embroidery Project: A Simple Walkthrough
Now that you’re all set up, let’s dive into an actual embroidery project using your regular sewing machine. These step-by-step instructions will help you create your first beautiful design.
Transferring a design to fabric
The foundation of any embroidery project begins with transferring your pattern onto fabric. For light-colored fabrics, use a light pad or tape your design to a window, then place fabric over it and trace with a water-erasable pen. Alternatively, heat-erasable markers like Pilot Frixion pens work well, though they may leave ghost lines on some fabrics.
For darker fabrics, carbon paper provides the best results. Place carbon side down on your fabric, position your pattern on top, and trace with firm pressure. Remember that whichever method you choose, always test on a fabric scrap first to avoid unwanted surprises.
Outlining with straight stitch
Once your design is transferred, begin with outlining. The outline stitch creates a layered, rich effect perfect for defining shapes. Bring your needle up at point 1, insert it a stitch-width to the right (point 2), then come back up just before the previous stitch (point 3). For tighter curves, try the back stitch instead – it offers better control for intricate details.
Filling with zigzag stitch
After outlining, fill larger areas using zigzag stitch. This technique requires two steps: first, stitch from left to right creating vertical and diagonal stitches; afterward, add a second layer of diagonal stitches crossing over the previous ones. This creates a textured, dimensional effect that adds depth to your design.
Finishing and cleaning up your work
Upon completion, secure your threads by running the needle through stitches on the back for about 1cm, then trim excess thread. Remove any visible transfer lines according to your marking tool’s instructions – do this before ironing to avoid setting ink permanently. Press your finished work gently to flatten any puckering, being careful not to squash dimensional stitches.
Conclusion
Embroidery with a regular sewing machine offers endless creative possibilities without investing in specialized equipment. Throughout this guide, we’ve discovered that any domestic machine can transform into an embroidery tool with just a few simple adjustments. Free motion embroidery truly stands as the gateway technique that unlocks your machine’s artistic potential.
Remember, successful machine embroidery depends primarily on proper setup and practice. Lowering those feed dogs, installing the right presser foot, and maintaining proper tension make all the difference between frustration and beautiful results. Additionally, choosing appropriate stabilizers and threads significantly impacts your finished work quality.
Most crafters feel surprised by how quickly they progress from basic outlines to more complex designs. Your first few attempts might not look perfect – mine certainly didn’t! However, with consistent practice, you’ll develop the smooth hand movements and speed control necessary for professional-looking embroidery.