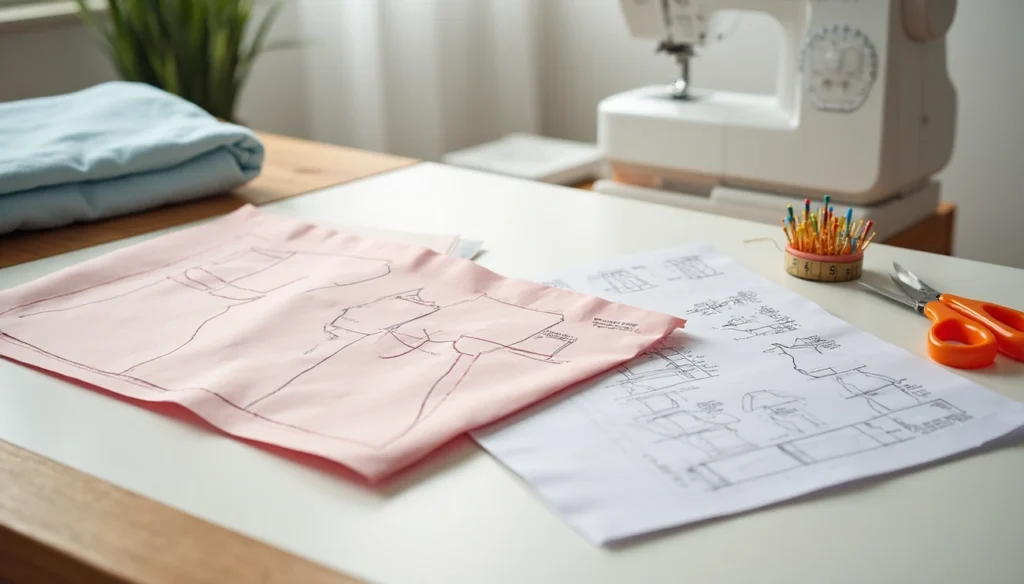
Yes mate, most of the patterns comes with instructions that guide users step-by-step from cutting fabric to completing the garment. These instructions are typically included as printed booklets or sheets. While some vintage or secondhand patterns may lack instructions, modern commercial and indie patterns usually provide clear assembly guidelines or video tutorials.
Types of sewing patterns and how they differ
When exploring sewing patterns, you’ll quickly discover they come in various formats and difficulty levels. Understanding these differences helps you choose the right pattern for your skill level and preferences.
Commercial vs independent patterns
The sewing pattern market features two main categories: commercial and independent patterns. The “Big 4” commercial pattern companies—Vogue, Butterick, Simplicity, and McCall’s—have been industry standards for decades. These companies follow standardized sizing, symbols, and drafting methods, making them reliable options for beginners and experienced sewists alike.
In contrast, independent (or “indie”) pattern companies are typically smaller businesses that offer unique designs often filling gaps left by commercial patterns. While indie patterns frequently provide more detailed instructions and modern designs, they’re generally more expensive than commercial patterns, with prices ranging from $12-15 compared to $8-14 for most commercial options.
Printed vs digital formats
Printed patterns traditionally come in tissue paper form, packaged in envelopes with instruction sheets. The tissue paper is lightweight, easy to pin to fabric, but tears easily and can be challenging to store.
Digital PDF patterns have grown increasingly popular because they offer:
- Instant access after purchase
- The ability to print multiple times for different sizes
- Lower prices (often 40% less than their printed counterparts)
With digital patterns, you can either print at home on standard paper and tape the pieces together, or have them printed at a copy shop on large-format paper. Most importantly, both formats contain identical information—they just come in different delivery methods.
Skill levels and pattern complexity
Pattern companies typically categorize their designs by difficulty level, though terminology varies between brands. For example, Named Clothing uses five skill levels from Beginner to Master, while Closet Core uses a star system ranging from one star (Beginner) to five stars (Challenging).
Each skill level corresponds to specific techniques and time investment. Beginner patterns feature simple constructions like plain seams and basic hems, while advanced patterns include complicated details like collars, linings, and complex closures. Master or challenging patterns might require 10+ hours to complete and incorporate tailoring techniques.
Understanding these classifications helps you select patterns that match your abilities while providing appropriate challenges for growth.
What’s inside a sewing pattern package?
Opening a sewing pattern package is like unveiling a roadmap to your next project. Each element inside serves a specific purpose, guiding you from fabric selection to final stitches.
Pattern envelope front and back
The envelope serves as your project’s first introduction. On the front, you’ll find the design illustration showing different views or variations of the garment. The back contains essential information including:
- Size ranges and corresponding body measurements
- Fabric recommendations with yardage requirements for each size
- Finished garment measurements
- Difficulty level indication
- Brief description of the garment features
This information helps you quickly determine if the pattern matches your skill level and vision before you even open the package.
Instruction sheet or booklet
Yes, sewing patterns absolutely come with instructions! The instruction sheet (or multi-page booklet in more complex designs) walks you through the entire construction process. These typically include:
- Step-by-step written directions
- Illustrated diagrams showing techniques
- Layout guides for cutting pattern pieces
- Glossary of sewing terms
- Tips for challenging sections
Instruction quality varies between brands. Commercial patterns often use concise technical language, while independent companies frequently provide more detailed explanations with photographs.
Pattern tissue or PDF pieces
The actual pattern templates come either as tissue paper pieces in physical packages or printable PDF files for digital patterns. Each piece is labeled with:
- Pattern piece number and name
- Cutting instructions (cut 1, cut 2, cut on fold)
- Grain line arrows
- Notches for alignment
- Dart markings and other construction details
These markings ensure your fabric pieces will assemble correctly when sewn together.
Notions and fabric requirements
Beyond fabric yardage, patterns list all additional supplies needed to complete your project. These notions might include:
- Thread type and quantity
- Zippers, buttons, or other closures
- Interfacing specifications
- Elastic, bias tape, or trim measurements
- Specialized tools required
This comprehensive list ensures you gather everything necessary before beginning, preventing frustrating mid-project shopping trips.
How to read sewing pattern instructions step-by-step
After unfolding your pattern pieces, it’s time to navigate the instruction sheet – your roadmap to a successful project. Let’s break down this process into manageable steps.
Identifying your pattern view
First thing to remember, most patterns include multiple design variations called “views” (labeled as A, B, C, etc.). Carefully examine the illustrations at the beginning of your instruction sheet and decide which variation you’re making. Once you’ve chosen, highlight or circle all steps related to your specific view. This simple technique prevents confusion as you progress through construction.
Using the size chart and finished measurements
Accurate measurements are crucial for proper fit. Start by measuring your body wearing only undergarments. Most patterns require bust, waist, and hip measurements. At this point, compare your measurements to the sizing chart.
Keep in mind that pattern sizes differ significantly from store-bought clothing sizes, so don’t be alarmed if your pattern size is larger than expected. After selecting your size, check the finished garment measurements – these tell you how the completed garment will actually measure.
Understanding ease and fit
Ease refers to the difference between your body measurements and the finished garment measurements. There are three types:
- Positive ease: When garment measurements exceed body measurements (common in most clothing)
- Negative ease: When garment measurements are smaller than body measurements (used in stretchy fabrics)
- Zero ease: When garment and body measurements match exactly
Generally, fitted garments need approximately 2″ of ease at the bust, 1″ at the waist, and 1.5″ at the hip for comfortable movement.
Reading the sewing steps in order
As a matter of fact, pattern instructions are designed to be followed sequentially. Before cutting fabric, read through all instructions to familiarize yourself with the construction process. The instruction sheet typically includes a glossary explaining sewing terminology and a key for understanding symbols used in diagrams.
Above all, don’t skip steps – each one builds upon the previous. If you encounter unfamiliar techniques, many pattern companies offer online tutorials for additional support.
Tips for beginners using a sewing pattern
Beginning your sewing journey requires patience and practice. Fortunately, modern sewing patterns contain instructions that can guide you through each step – if you know how to approach them strategically.
Start with simple patterns
Navigating your first few sewing projects becomes much less overwhelming when you choose appropriate patterns. Look for designs specifically labeled for beginners that feature:
- Fewer pattern pieces (check the back of the envelope for piece count)
- Simple closures (avoid zippers and buttonholes initially)
- Limited details and seam lines
- Loose-fitting styles that don’t require precise fitting
Indie pattern designers often excel at providing beginner-friendly instructions with clear illustrations. Furthermore, patterns from companies like Tilly and the Buttons, Made by Rae, and Grainline Studio typically include wonderful step-by-step directions with each pattern.
Make a muslin or toile first
A muslin (sometimes called a toile) is essentially a practice version of your garment made from inexpensive fabric. This crucial step allows you to:
“Think of it as a test garment or a trial run,” explains one sewing expert. You don’t need to construct the entire garment – focus primarily on the main body pieces to study overall fit. Use fabric similar to your final fabric in weight and drape for accurate results.
When sewing your muslin, set your machine to a longer stitch length for faster sewing and easier unpicking. This investment of time protects your good fabric and increases the likelihood you’ll love your finished project.
Highlight your size and pieces
Once you’ve selected your pattern, organization becomes vital. Take a highlighter and trace over your size on the pattern to prevent accidentally cutting the wrong size. This technique proves particularly helpful if you fall between sizes and need to grade between them.
Circle the specific pattern pieces needed for your chosen view on the instruction sheet. In fact, this simple step ensures you don’t miss cutting essential pieces.
Use online tutorials for extra help
Pattern instructions, while comprehensive, sometimes benefit from visual demonstrations. Thankfully, many pattern companies now offer:
- Video tutorials demonstrating tricky techniques
- Sewalongs on company blogs
- Online sewing classes covering basic to advanced skills
These resources can clarify confusing steps and provide additional guidance beyond what’s printed in your pattern envelope.
Conclusion
Understanding sewing patterns becomes significantly easier once you recognize their structure and purpose. Throughout this guide, we’ve established that patterns indeed come with instructions – albeit with varying levels of detail depending on the brand. Commercial patterns typically offer concise directions, while independent designers often provide more thorough guidance for each step.
Beginners should remember that pattern selection greatly impacts your sewing experience. Choosing a simple design with clear instructions allows you to build confidence before tackling more complex projects. Additionally, taking time to familiarize yourself with pattern markings and terminology pays dividends as your skills develop.
The evolution of sewing patterns has certainly benefited modern sewists. Digital formats offer convenience and reusability, while the surge in independent pattern companies has introduced fresh designs with beginner-friendly instructions. Consequently, learning to sew has become more accessible than ever before.


