If you’ve ever struggled with a too-small sewing surface, a wobbly table that shakes when you stitch, or a layout that forces you to hunch over your work, learning how to make a custom sewing table is a game-changer for your craft. Unlike mass-produced options that never quite fit your space, machine, or workflow, a DIY custom table lets you prioritize exactly what matters most to your sewing routine.
You can add built-in storage for threads and pressing tools, install a flush insert for your sewing machine to eliminate fabric snagging, and size the surface to fit even the smallest apartment corner. As a sewer with over 10 years of experience building custom studio furniture, I’ve tested every method below and refined them to work for beginners and intermediate DIYers alike. Below, we’ll walk through every step of the process, from planning to final assembly, with tips for all skill levels.

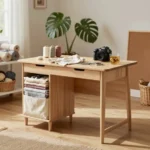
PAKASEPT Folding Sewing Table with Storage, Craft Storage Cabinet and Multipurpose Sewing Machine Table with Lockable Wheels, Magnetic Doors & Hidden Storage
Check PriceWhy Build a Custom Sewing Table Instead of Buying One?
Pre-made sewing tables and cabinets range from $300 for basic models to over $2,000 for custom-built options from specialty brands. For most sewers, neither extreme fits: cheap tables are flimsy and lack storage, while high-end options are often still not tailored to your specific machine or sewing style. Building your own solves these pain points, with three key benefits that stand out.
Save Money Without Sacrificing Quality
A basic custom sewing table built with ¾-inch plywood and pine framing costs roughly $150 to $200 total, even if you need to buy a few basic tools. Compare that to a $400 pre-made table that uses particle board (which warps easily) and lacks a machine insert. You can allocate your budget to high-impact upgrades instead: a smooth maple butcher block surface, soft-close drawer slides, or a retractable machine lift, all of which would double the cost of a store-bought table.
Tailor the Design to Your Exact Needs
Do you quilt large throws and need a 60-inch wide surface? Do you sew mostly small garments and want a compact 36-inch table with vertical thread storage? A custom build lets you prioritize exactly what you use most. If you’ve browsed pre-made options like top-rated sewing cabinets and still can’t find a fit, a custom build is the only way to get a table that works for your specific workflow. You can also add niche features like a built-in ironing board pull-out, a serger shelf at the perfect height, or a pull-out cutting mat for small spaces.
Maximize Small or Awkward Spaces
Most pre-made tables come in standard sizes that don’t fit under windows, in alcoves, or against sloped ceilings. A custom table can be cut to fit a 24-inch deep alcove, or built with casters to roll under a bed when not in use. For renters who want temporary storage upgrades, our guide to IKEA sewing table storage ideas has quick, non-permanent hacks to pair with your custom build if you’re not ready to commit to built-in cabinetry.

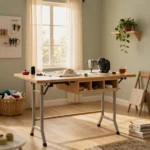
Best Choice Products Folding Sewing Table Multipurpose Craft Station & Side Desk with Compact Design, Wheels, Shelves, Storage Trays, Pegs, Magnetic Doors, Metal Doorknobs – White
Check PriceTools and Materials You’ll Need
You don’t need a full woodworking shop to build a basic custom sewing table. Below is a split list of essentials for beginners, and optional upgrades for those who want a more polished finish.
Basic Woodworking Tools (for beginners)
- Circular saw or jigsaw (for cutting plywood)
- Power drill with Phillips and flathead bits
- Measuring tape and carpenter’s square
- Sandpaper (120-grit and 220-grit)
- Wood screws (1.5-inch and 2.5-inch, coarse thread for plywood)
- Wood glue (waterproof for long-lasting holds)
If you’re new to woodworking, brush up on basic saw safety with trusted DIY safety guides from Family Handyman, a leading home improvement resource. Always wear safety glasses and a dust mask when cutting and sanding lumber.
Optional Upgrades for Smoother Builds
- Table saw (for perfectly straight, square cuts)
- Orbital sander (saves time on surface prep)
- Pocket hole jig (for hidden, strong joints)
- Clamps (at least 4, to hold pieces while glue dries)
Surface and Storage Materials
- ¾-inch plywood (for the table base and shelves; avoid particle board, which warps)
- 1×3 pine boards (for framing and edge banding)
- Butcher block or laminate sheet (for the work surface, if not using plywood edge-banded)
- Drawer slides (soft-close preferred, measure your drawer width before buying)
- Sealant or polyurethane (to protect the surface from fabric dyes and water spills)
Step-by-Step Guide: How to Make a Custom Sewing Table

Folding Sewing Table with Charging Station, Rolling Sewing Machine Craft Table with Storage Trays and Shelf, Foldable Sewing Cabinet Desk with Lockable Wheels for Small Spaces (Natural Wood & White)
Check PriceFollow these 7 steps for a sturdy, functional table that will last for years. Set aside 6-8 hours for a basic build, or 12+ hours if you’re adding custom storage or a machine insert.
Step 1: Measure Your Space and Sewing Machine
Start by measuring the space where the table will live: width, depth, and height from floor to ceiling (to make sure you can fit storage shelves above). Next, measure your sewing machine: width, depth, and height from the bottom of the machine to the top of the bed (the flat metal surface where the needle is). You’ll need these measurements to cut the opening for your machine insert later. Pro tip: add 2 inches to all machine measurements to give yourself wiggle room when inserting the machine.
Step 2: Sketch Your Design (Include Storage!)
You don’t need fancy design software: a pencil and graph paper works fine. Sketch the table from the top, front, and side, labeling all dimensions. Decide where you want storage: drawers for small notions, open shelves for fabric bolts, or a cabinet for your serger. Make sure the sewing machine opening is centered on the table, at a height that lets you sit with your elbows at a 90-degree angle while stitching (standard table height is 28-30 inches, but adjust to your height).
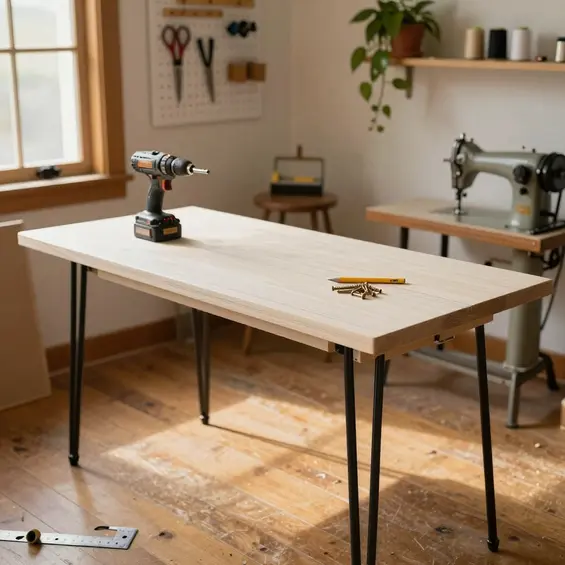
Step 3: Cut and Sand Your Base Pieces
Using your sketch measurements, cut all plywood pieces: table top, base frame, shelves, and drawer fronts. Use a carpenter’s square to mark straight lines, and cut slowly to avoid jagged edges. Once all pieces are cut, sand every surface with 120-grit sandpaper first, then 220-grit for a smooth finish. Pay extra attention to the edges of the machine opening: rough edges will snag fabric later.
Step 4: Assemble the Table Frame
Start by building the base rectangle: attach 1×3 pine boards to the bottom of the table top using wood glue and 1.5-inch screws, spaced 6 inches apart. Then attach the legs (cut from 2×2 or 4×4 lumber) to the corners of the base, using 2.5-inch screws and glue. Add cross braces between the legs for extra stability: this prevents the table from wobbling when you press heavy fabric. If you’re adding shelves, install shelf pins or brackets now, before attaching the table top to the base.
Step 5: Install the Sewing Machine Insert (Critical for Flat Stitching)
A machine insert is a custom-cut piece of plywood or acrylic that surrounds your sewing machine, so the bed of the machine is flush with the table surface. This eliminates the lip that causes fabric to catch and bunch when you sew. To install: place your machine on the table, trace the opening with a pencil, then cut the opening with a jigsaw. Cut a ¼-inch smaller insert piece that fits snugly around the machine, then attach it to the table with hinges so you can lift it to access the machine’s bobbin. For a professional finish, use a router to bevel the edges of the insert opening.
Step 6: Add Storage and Surface Finishes
Install drawer slides to the inside of the base frame, then attach the drawer fronts. Add edge banding to the plywood edges of the table top using iron-on veneer tape, for a polished look that hides raw plywood edges. Apply 2-3 coats of polyurethane or sealant to the entire table surface, letting each coat dry fully (24 hours) before sanding lightly with 220-grit sandpaper and applying the next. This protects the table from water spills, fabric dyes, and scratches from rotary cutters.
Step 7: Level the Table and Test for Stability
Place the table in its final spot, then use a level to check the table top. If the legs are uneven, add adjustable levelers to the bottom of each leg (screw-in levelers cost $2 each at hardware stores). Shake the table gently: if it wobbles, add more cross braces between the legs. Finally, test your sewing machine in the insert: make sure it sits flush, and stitch a scrap piece of fabric to check that it glides smoothly without snagging.
Pro Tips for a Professional-Grade Custom Sewing Table
These small upgrades take your table from basic to high-end, with minimal extra cost:
- Add a retractable machine lift: these $40-60 mechanisms let you lower your machine into the table when not in use, creating a flat work surface for cutting or pressing.
- Use a self-healing cutting mat as your table surface: glue a large cutting mat to the table top for a dual-purpose surface that resists rotary cutter blades.
- Install under-cabinet LED strip lights: these stick to the bottom of overhead shelves, providing bright task lighting without taking up table space.
- Add lockable casters: if you need to move the table often, attach lockable wheels to the bottom of the legs, so it stays put when you sew.
Common Mistakes to Avoid When Building Your Sewing Table
Even experienced DIYers make these errors: skip them to save time and frustration:
- Forgetting to measure machine clearance: make sure your machine’s power cord and foot pedal fit through the insert opening, and that the machine can be lifted out easily for maintenance.
- Using warped lumber: check all plywood and boards for warping before buying; even a 1/8-inch warp will make the table top uneven.
- Skipping surface sealing: unsealed plywood absorbs moisture and stains easily, ruining the look of your table within months.
- Not testing the height: sit in your sewing chair and check that the table height lets your elbows rest at 90 degrees; adjusting the leg length later is much harder than cutting legs to the right height upfront.
Frequently Asked Questions
How much does it cost to make a custom sewing table?
Most DIY custom sewing tables cost between $150 and $400 to build, depending on materials and whether you already own tools. Plywood builds with basic storage run on the lower end, while solid wood tables with retractable machine lifts and custom inserts can reach the higher end. This is still 50-70% cheaper than comparable pre-made custom cabinets, which often start at $800.
Can I build a custom sewing table with no woodworking experience?
Yes! A basic table with no drawers or insert only requires cutting straight lines and drilling screws. Start with a simple design, watch a few basic power tool tutorials online, and ask a friend with DIY experience to help with cutting if you’re nervous. The most complex part (the machine insert) can be skipped for a first build, then added later once you’re comfortable.
How do I make a custom sewing table for a small apartment?
Opt for a narrow 24-30 inch deep table that fits against a wall, add casters so it can roll under a bed or into a closet when not in use, and prioritize vertical storage (tall shelves instead of wide drawers) to save floor space. You can also build a fold-down table that attaches to the wall, folding flat when you’re done sewing.
Should I use plywood or solid wood for my sewing table?
¾-inch plywood is the best choice for most builders: it’s affordable, stable (less likely to warp than solid wood), and easy to cut. Solid wood (like maple or oak) is more expensive and prone to warping with humidity changes, but it has a more high-end look. If you use solid wood, make sure it’s kiln-dried to prevent warping later.
How do I install a flush sewing machine insert?
Trace your machine’s outline on the table top, adding 1/8 inch of clearance on all sides. Cut the opening with a jigsaw, then cut a insert piece from ½-inch plywood that fits snugly inside the opening. Attach the insert to the table with small hinges on one side, so you can lift it to access the machine’s bobbin. Use a router to bevel the edges of the opening for a smooth transition between the table and insert.
Conclusion
Learning how to make a custom sewing table is one of the best investments you can make in your craft. It saves you money, fits your exact space and workflow, and lasts for decades with proper care. Start with a simple design if you’re new to DIY, and add upgrades like storage and a machine insert as you gain confidence. Within a weekend, you’ll have a sturdy, functional table that makes every sewing session more comfortable and efficient. Grab your measuring tape, pick a design that works for you, and get building!