To troubleshoot serger tension issues, first identify if the upper or lower tension is causing problems. Adjust the upper tension if stitches are loose and the lower tension if puckering occurs. Test adjustments on scrap fabric, aiming for balanced stitches that lie flat without loops. Check the differential feed for proper fabric movement. Regular maintenance, including thread checks and machine cleaning, is essential for consistent performance. Keep going for more insights on effective tension management.
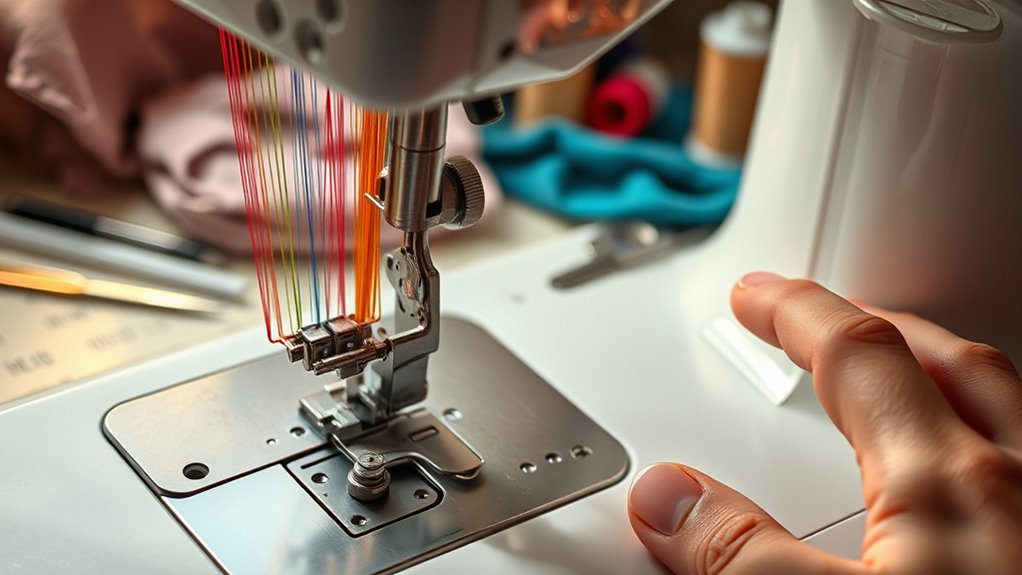
Understanding Serger Tension Mechanics
When you explore serger tension mechanics, it’s essential to understand how each thread interacts within the machine. The tension settings influence thread behavior, directly affecting stitch consistency and quality.
Each thread—needle and loopers—requires precise tension to create balanced stitches. If the upper thread is too tight or too loose, you’ll notice variations in stitch appearance. Similarly, the lower threads must maintain consistent tension for proper locking.
Familiarizing yourself with the tension dials and their effects allows you to make informed adjustments.
Common Tension Issues and Their Symptoms
Understanding the mechanics of serger tension sets the stage for identifying common issues that can arise during use. One major concern is when the tension indicators show inconsistent readings, leading to uneven seams.
If you notice your thread behavior is looping or puckering, it’s likely that your upper tension is too loose. Conversely, if the fabric is being excessively gathered, the upper tension may be too tight.
Lower thread tension issues can manifest as bobbin thread showing on the top side, indicating imbalance. Additionally, if threads break frequently, it could result from improper tension settings.
Recognizing these symptoms early helps you address tension problems before they result in more significant sewing complications.
Adjusting Upper and Lower Thread Tension
When you’re experiencing tension issues with your serger, it’s vital to identify whether the upper or lower thread tension is the culprit. Adjusting the upper tension can often resolve problems like loose stitches, while addressing the lower tension is important for preventing puckering. Let’s explore the specific adjustments needed for both upper and lower thread tension to achieve the best stitching.
Identifying Tension Issues
Identifying tension issues in your serger is essential for achieving a clean, professional finish on your projects, as improper tension can lead to uneven seams and fabric puckering. Start by examining the tension indicators on your machine; these will help you gauge if adjustments are necessary.
Different thread types can also impact tension—thinner threads may require higher tension settings, while thicker threads might need a looser approach. If you notice your stitches are loose or gathering, check both upper and lower thread tensions.
A balanced stitch should lie flat on the fabric, with no visible loops or puckers. By paying attention to these details, you can effectively pinpoint and address tension issues for best results in your sewing.
Adjusting Upper Tension
Once you’ve pinpointed any tension issues, adjusting the upper tension is the next step in achieving balanced stitches. Begin by locating the upper tension dial on your serger. For most fabrics, a setting between 4 and 6 is typical.
If your stitches are loose, increase the upper tension by turning the dial clockwise; if they’re too tight, turn it counterclockwise. Use tension troubleshooting techniques, like testing on scrap fabric, to confirm adjustments.
Keep an eye on stitch appearance—tight stitches may cause puckering, while loose stitches won’t hold seams properly. Remember, small adjustments can make a significant difference, so tweak gradually and re-test as needed to guarantee peak performance. Balancing the upper tension is vital for professional-looking results.
Adjusting Lower Tension
To achieve a balanced stitch, adjusting the lower tension is just as essential as managing the upper tension. Start by identifying the type of fabric and thread you’re using, as these factors influence lower tension techniques.
If the lower thread is visible on the fabric’s top side, it indicates that the lower tension is too loose; tighten it gradually until the stitches align properly. Conversely, if the fabric puckers, the lower tension may be too high, requiring slight loosening. Make thread tension adjustments in small increments to avoid drastic changes.
Always test on a fabric scrap before finalizing your settings, ensuring your stitches are even and secure. This methodical approach will enhance your serging results considerably.
The Role of Differential Feed in Tension
While adjusting tension on your serger is essential for achieving ideal stitch quality, understanding the role of differential feed can greatly enhance your sewing experience.
Differential feed controls the speed at which the front and back feed dogs move fabric through the machine. This feature is particularly important when working with various fabric types, such as knits or wovens, as it helps prevent puckering or stretching.
By adjusting the differential feed, you can compensate for the unique characteristics of different materials, ensuring even stitching and preventing distortion. If you notice any issues with your stitches, consider whether the differential feed setting needs tweaking. Using it correctly can lead to flawless seams and a more enjoyable sewing process.
Maintenance Tips for Consistent Tension
To maintain consistent tension in your serger, regular thread checks are essential to guarantee your threads are in good condition. Additionally, cleaning and oiling your machine will help prevent buildup that can affect performance. Finally, don’t forget to adjust tension settings as needed based on your fabric and project requirements.
Regular Thread Checks
Regular thread checks are essential for maintaining consistent tension in your serger, as even minor variations can lead to stitching issues. Start by inspecting the thread quality; using high-grade threads can greatly improve your results. Look for fraying, tangling, or uneven thickness, as these factors can disrupt the tension balance.
Verify that the threads are correctly threaded through each guide and tension disc, as improper threading can cause tension irregularities. It’s also wise to regularly replace old or worn threads since they can stretch or degrade over time. By consistently checking these elements, you’ll help verify that your serger operates smoothly and produces high-quality stitches, minimizing the risk of tension-related problems during your projects.
Clean and Oil
Maintaining proper tension in your serger also involves routine cleaning and oiling. Regularly using effective cleaning techniques is vital for removing lint and debris from the machine’s internal components. Start by unplugging your serger and using a soft brush or vacuum attachment to clear out any buildup around the feed dogs and tension disks.
After cleaning, it’s necessary to perform oil application to keep moving parts lubricated. Apply a few drops of sewing machine oil to the designated areas as specified in your serger’s manual. Avoid over-oiling, as this can attract more dust and lint. Following these maintenance steps will help guarantee your serger operates smoothly and maintains consistent tension for peak sewing results.
Adjust Tension Settings
While you might think that tension adjustments are only necessary for specific fabrics or stitches, keeping your serger’s tension settings properly calibrated is crucial for achieving consistent results across all projects. Regularly check your tension calibration, especially when changing thread quality or types. Here’s a quick guide to help you adjust your settings effectively:
| Thread Type | Recommended Tension Setting |
|---|---|
| Standard Thread | 4-5 |
| Specialty Thread | 3-4 |
| Heavyweight Thread | 5-6 |
To maintain ideal tension, always use high-quality thread, as poor thread quality can lead to inconsistent stitches. Make adjustments incrementally and test your settings on scraps to verify your tension is just right before starting on your main project.
Testing and Fine-Tuning Your Serger Settings
Testing and fine-tuning your serger settings is essential for achieving ideal stitch quality. Begin by confirming proper tension calibration; adjust the tension dials based on your fabric type and stitch requirements.
Use a test piece of fabric similar to your project to evaluate the stitch. Look for balanced stitches; the threads should lie flat, with no puckering or excessive thread visibility.
Next, check thread compatibility; verify the threads you’re using are suitable for your fabric and machine. If the stitch quality is still off, re-evaluate your tension settings and perform additional tests.
Frequently Asked Questions
Can Fabric Type Affect Serger Tension Settings?
Yes, fabric characteristics greatly affect serger tension settings. Different materials, like stretch or woven, require adjustments. Additionally, thread weight influences how tension interacts with fabric, so you’ll need to calibrate accordingly for ideal results.
How Often Should I Check My Serger’s Tension?
You should check your serger’s tension regularly, ideally before each project. Regular inspections guarantee peak performance and help prevent issues. Consistent tension maintenance is essential for achieving professional-quality stitches and prolonging your serger’s lifespan.
What Tools Do I Need for Tension Adjustment?
You’ll need tension gauges and adjustment tools like screwdrivers or tweezers for precise tension adjustments. These tools help guarantee your serger’s settings are accurate, promoting ideal stitch quality and consistent performance during your sewing projects.
Is It Normal for Tension to Change Between Projects?
Just like a tightrope walker adjusts their balance, it’s normal for tension to shift between projects due to variability in fabric and thread types. Ensuring tension consistency is key for achieving the best results each time.
Can I Use Different Thread Types Without Adjusting Tension?
You can’t always use different thread types without adjusting tension. Thread compatibility is essential for tension consistency; mismatched threads often lead to uneven stitches. Always test new threads and adjust tension accordingly for ideal results.