Sewing thread bunches up when the machine is incorrectly threaded, the bobbin is inserted wrong, or the upper thread tension is too loose. Other causes include lint buildup, mismatched needle and thread sizes, or poor-quality thread. Rethread the machine, clean the bobbin area, and adjust tension to fix the issue.
What causes thread to bunch up when sewing?
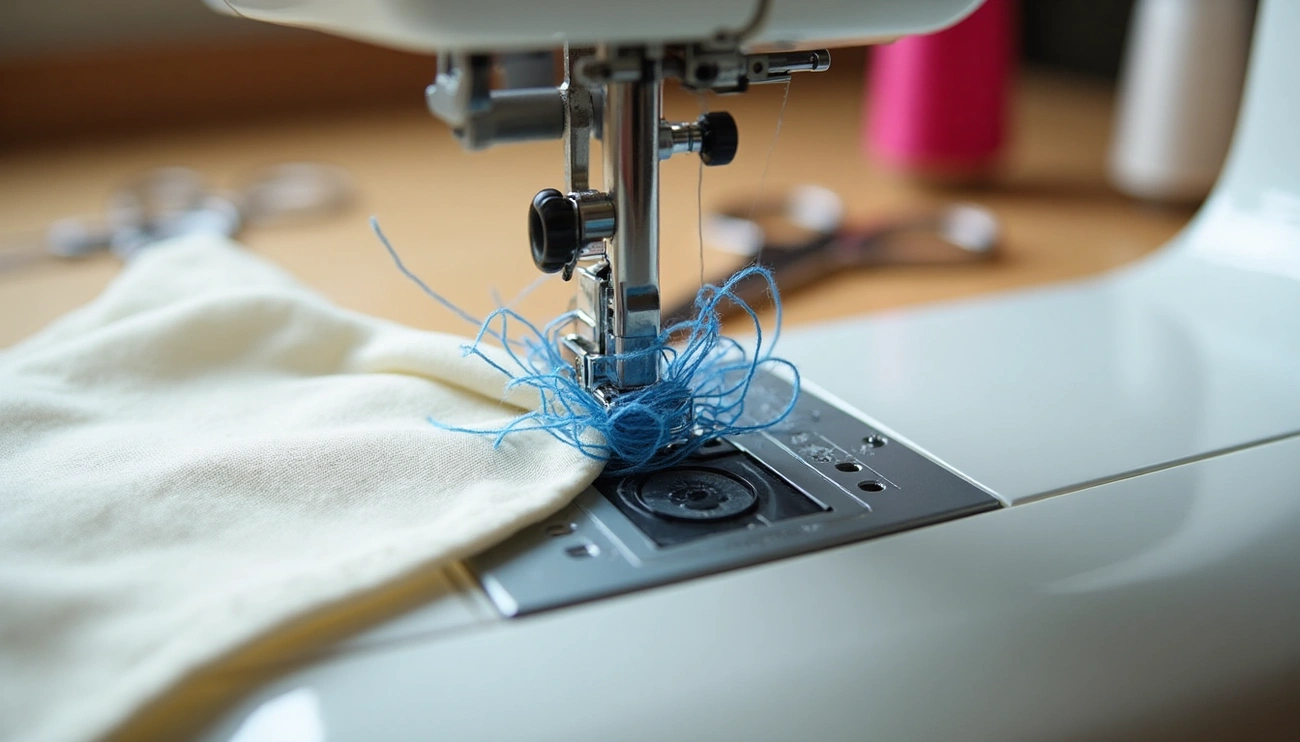
Thread bunching is primarily a tension issue. Whether you’re seeing a bird’s nest of tangled thread on your fabric or experiencing uneven stitches, understanding what’s happening beneath the surface of your sewing machine can save you hours of frustration.
Top thread vs. bottom thread issues

Simthread 12 Multi Colors All Purposes Cotton Quilting Thread 50s/3
Check Price
New brothread – 18 Options – Multi-Purpose 100% Mercerized Cotton Threads 50S/3 600M
Check PriceThe location of thread bunching tells you exactly where to look for the problem. Many sewists assume any thread bunching means there’s an issue with the bobbin, but this isn’t always the case.
If thread bunches up on the top of your fabric, the problem typically lies with your bobbin threading or tension. In contrast, when thread bunches underneath your fabric, the upper thread is usually the culprit not the bobbin as most people think. This distinction is crucial for troubleshooting effectively.
Understanding thread tension balance
Tension is the foundation of proper stitch formation. It controls how much thread passes through the machine to create each stitch. The less thread in a stitch, the tighter it becomes; the more thread, the looser the stitch.
Perfect tension means both the top and bottom threads interlock smoothly in the middle of the fabric layers, creating identical-looking stitches on both sides. Think of it as a tug-of-war between the upper and lower threads, they should be evenly matched for beautiful stitches.
When tension is unbalanced, you’ll see visible evidence:
- If bobbin thread shows on the top side, your upper tension is too tight (or bobbin is too loose)
- If upper thread shows on the underside, your upper tension is too loose (or bobbin is too tight)
Common beginner mistakes
Simthread 12 Multi Colors All Purposes Cotton Quilting Thread 50s/3
Check Price
New brothread – 18 Options – Multi-Purpose 100% Mercerized Cotton Threads 50S/3 600M
Check PriceBeyond tension issues, several other factors can cause thread bunching:
- Incorrect threading is responsible for more “tension” problems than any other factor. Skipping thread guides or threading with the presser foot down prevents the thread from properly seating between tension disks.
- Sewing with the presser foot up means there’s no tension on the upper thread because the tension disks remain open a recipe for thread bunching.
- Using the wrong needle for your fabric or thread can cause tension problems and lead to bunching. Needles should match your fabric type and weight.
- Low-quality thread not only breaks more often but has looser fibers that create more lint, leading to bunching issues.
- Lint buildup under the throat plate or in the bobbin case affects stitch formation. Regular cleaning prevents many stitching problems.
Furthermore, holding thread tails when starting can prevent the machine from pulling threads down into the throat plate, a simple trick that prevents bunching at the beginning of seams.
Fixing thread bunching on top of the fabric
Spotting thread bunches on top of your fabric points directly to bobbin issues rather than upper thread problems. This distinct “bird nesting” effect typically means something’s amiss in the bobbin area. Let’s tackle each potential fix systematically.
Check bobbin threading
Incorrect bobbin threading is among the most common culprits behind thread bunching on top of your fabric. First, remove your bobbin completely from its case and examine it carefully. The thread should be wound evenly without knots, unevenness, or looseness.
To test if your bobbin is properly engaged in the tension spring, hold the bobbin thread with one hand, if the bobbin drops straight to the floor, you’ve missed the tension spring in the bobbin case. Additionally, verify you’re following your machine’s specific threading path exactly as outlined in your manual.
Inspect bobbin case tension
After correctly threading your bobbin case, perform a simple tension test. Hold the thread end with one hand and let the bobbin case hang. Properly tensioned bobbins will drop only an inch or two with slight resistance.
If it doesn’t move at all, your tension is too tight. Conversely, if it falls almost to the floor, the tension is too loose. Adjust the small flat-head screw on your bobbin case accordingly, clockwise to tighten, counterclockwise to loosen. Make adjustments in tiny increments (1/8 to 1/4 turn) and test between each change.
Use correct bobbin type and size
Using the wrong bobbin can sabotage your sewing regardless of perfect threading or tension. Always use bobbins specifically designed for your machine’s make and model. Bobbins vary significantly: Class 15, Class 66, L Style, and M Style are just a few common types, each with specific dimensions.
Moreover, never substitute plastic bobbins with metal ones (or vice versa) unless your machine manual explicitly permits this. Even slight differences in size, height, or material can affect tension, cause thread jams, or potentially damage your machine.
Remember that overfilled bobbins cannot move freely in the bobbin case. Lastly, discard any bobbins that become chipped, bent, warped or otherwise damaged, as they’ll create persistent threading problems.
Fixing thread bunching underneath the fabric
Despite common misconceptions, thread bunching underneath fabric primarily stems from upper thread problems, not bobbin issues. Addressing these concerns systematically can quickly get you back to smooth sewing.
Re-thread the upper thread properly
Incorrect threading is the leading cause of tension issues that create thread bunching. To properly re-thread:
- Cut the thread a few inches from the spool
- Remove it completely through the needle
- Raise the presser foot to open the tension disks
- Thread according to your machine’s manual
- Ensure the thread passes fully through all guides and tension disks
A helpful technique is to hold thread on either side of the tension disk and slide it back and forth with a flossing motion to ensure proper engagement.
Ensure presser foot is down
A surprisingly common mistake is attempting to sew with the presser foot raised. Generally, this prevents proper tension as the disks remain open when the foot is up. Without adequate downward pressure, the fabric floats during sewing, resulting in uneven stitch length and wandering seams. Additionally, insufficient presser foot pressure allows fabric to lift with the needle, creating skipped stitches and thread breakage.
Adjust upper thread tension
Until you achieve balanced stitches, you may need to fine-tune tension settings. If upper thread appears on the fabric underside, your upper tension is too loose. Initially, try turning the thread tension dial clockwise to tighten it. Subsequently, test on scrap fabric after each small adjustment. Ideally, both threads should cross near the fabric center, with only upper thread visible from the right side and only bobbin thread visible from the wrong side.
Replace bent or dull needle
Throughout approximately 8 hours of sewing time, needles gradually become dull or bent. Signs of needle issues include skipped stitches and inconsistent stitching. Ultimately, even slightly bent needles can dramatically affect stitch quality and cause thread bunching. Always install new needles with the flat side facing the back, and choose the correct size for your fabric type.
Clean the bobbin area and feed dogs
Lint buildup affects stitch formation and creates tension issues. To maintain your machine:
- Remove the presser foot and needle for better access
- Use a soft brush to clean between feed dog teeth
- Remove any thread ends or lint from the bobbin case
- Gently clean the hook race with a lint-free cloth
Regular maintenance takes just minutes but prevents countless stitching problems.
Quick fixes when nothing else works
Still facing stubborn thread bunching after trying all the standard fixes? Sometimes even properly threaded machines with correct tension can develop mysterious sewing issues. Fortunately, a few last-resort techniques often solve problems that resist conventional solutions.
Change to high-quality thread

Sewing Thread-24 Spools of Polyester Thread for Sewing Machine for Beginners
Check Price
New brothread – 18 Options – Multi-Purpose 100% Mercerized Cotton Threads 50S/3 600M(
Check PriceLow-quality threads aren’t just prone to breaking, they actually damage your machine over time. Poor-quality threads shed more lint, creating internal buildup that causes thread bunching. These loose fibers can even cause irreparable damage to your sewing machine’s delicate components.
Switch to reputable brands like Gutermann, Mettler, or Aurifill. While slightly more expensive, quality threads create less lint, tangle less frequently, and last considerably longer. Many sewists who struggled with persistent thread bunching discover this simple change immediately solves their problems.
Hold thread tails when starting
One remarkably effective technique is gently holding both thread tails for the first few stitches when beginning to sew. This prevents the machine from pulling threads down into the needle plate at startup—often the exact moment when thread bunching begins.
To implement this method properly, draw out several inches of both top and bobbin threads, then hold them firmly behind and to the side of the presser foot while starting your seam. After 3-4 stitches, you can release the threads and continue sewing normally.
Watch the thread uptake lever
The thread uptake lever is the component that moves up and down as you sew, pulling thread from the spool and feeding it through the machine. Located directly above the presser foot, this crucial part is often hidden by the machine’s plastic housing.
Occasionally, throughout the sewing process, thread can slip off this lever, instantly causing bunching underneath. On some machines, you can remove the left cover using the multi-function tool to observe whether the upper thread remains properly seated in the uptake lever while sewing.
Reset machine settings to default
As a final troubleshooting step, restore your machine to factory settings. Many modern machines allow this through the settings menu, look for options like “Factory Reset” or “Reset to Default.” This reverts any accidental tension or stitch length adjustments that might contribute to thread bunching.
For mechanical machines or specific models like Brother machines, you might need to follow manufacturer-specific reset procedures. The process typically involves accessing the setup menu, selecting reset options, and confirming your choice to reboot the machine with factory defaults.
Sewing Thread-24 Spools of Polyester Thread for Sewing Machine for Beginners
Check Price
New brothread – 18 Options – Multi-Purpose 100% Mercerized Cotton Threads 50S/3 600M(
Check PriceConclusion
Thread bunching certainly ranks among the most frustrating issues for sewists at any skill level. Throughout this guide, we’ve seen that most thread bunching problems stem from either tension imbalances or incorrect threading techniques. The location of bunching provides the first important clue, bunching on top points to bobbin issues, while bunching underneath typically indicates upper thread problems.
Despite its prevalence, thread bunching remains one of the easiest sewing machine problems to fix yourself. Simple maintenance steps like regular cleaning, proper threading, and using quality materials will prevent most issues before they start. Additionally, remembering to keep your presser foot down while sewing and holding thread tails during the first few stitches can spare you countless headaches.
Many sewists blame their machines when facing persistent bunching problems. However, as we’ve discovered, the sewing machine rarely deserves the blame. After all, most bunching issues stem from human error rather than mechanical failure. Before rushing to a repair shop, try the systematic troubleshooting approaches we’ve outlined, from re-threading your machine properly to checking bobbin tension and replacing worn needles.