Yes, you can hem joggers by shortening the leg length and reattaching or tapering the cuff. Use a stretch stitch or serger to preserve fabric elasticity. Measure from the inseam, pin the new hem, and sew along the fold. Always match thread and cuff material for a professional finish.
Why Joggers May Need Hemming
Many jogger wearers struggle with fit issues that can detract from both comfort and style. If you’ve ever found yourself dealing with excess fabric pooling around your ankles, you’re certainly not alone. Let’s explore why joggers might need alterations and how to address these common problems.
Common fit issues with joggers
Finding perfectly fitting joggers straight off the rack can be challenging, particularly for those with shorter frames. Height-related fit problems typically manifest in several ways:
- Excessive bunching around the ankles
- Too much fabric creating a baggy appearance
- Cuffs sitting lower than the intended ankle position
- Proportions looking unbalanced on shorter frames
For shorter individuals, standard-length joggers often require some modification to achieve that polished, intentional look. Even premium brands rarely offer enough inseam options to accommodate everyone’s height variations.
Can joggers be hemmed or tailored?
The short answer is yes, joggers can be hemmed or tailored—but with important caveats. The unique construction of joggers presents specific challenges during the alteration process.
Joggers aren’t the easiest pants to hem, primarily because of their distinctive features: the elastic cuff and the tapered leg. The cuff design is particularly tricky to modify without compromising the original esthetic. Furthermore, some joggers with elastic cuffs are practically impossible to hem properly without altering their fundamental design.
The tapering that gives joggers their characteristic silhouette adds another layer of complexity. A professional tailor might need to carefully remove the cuff, adjust the length, potentially re-taper the leg, and then reattach the cuff—a process requiring precision and experience.
When to consider hemming vs returning
Before reaching for your scissors or heading to a tailor, consider whether returning is a better option. Generally, if you can return the joggers for a better fit, that route is preferable. Here’s a practical decision framework:
First, check if the manufacturer offers shorter inseam options. Notably, switching for a shorter length rather than a smaller overall size is key—a smaller size might fix length issues but create problems with waist and leg fit.
Consider hemming only when returns aren’t possible or when you’ve found a pair that fits perfectly everywhere except length. However, be realistic about the potential outcomes. The cost of professional tailoring (or purchasing necessary sewing supplies) might actually exceed the price of finding a better-fitting pair initially.
For expensive joggers, the risk of ruining them through DIY alterations should factor heavily into your decision. Consequently, many find that professional tailoring makes more sense for higher-end pairs despite the additional cost.
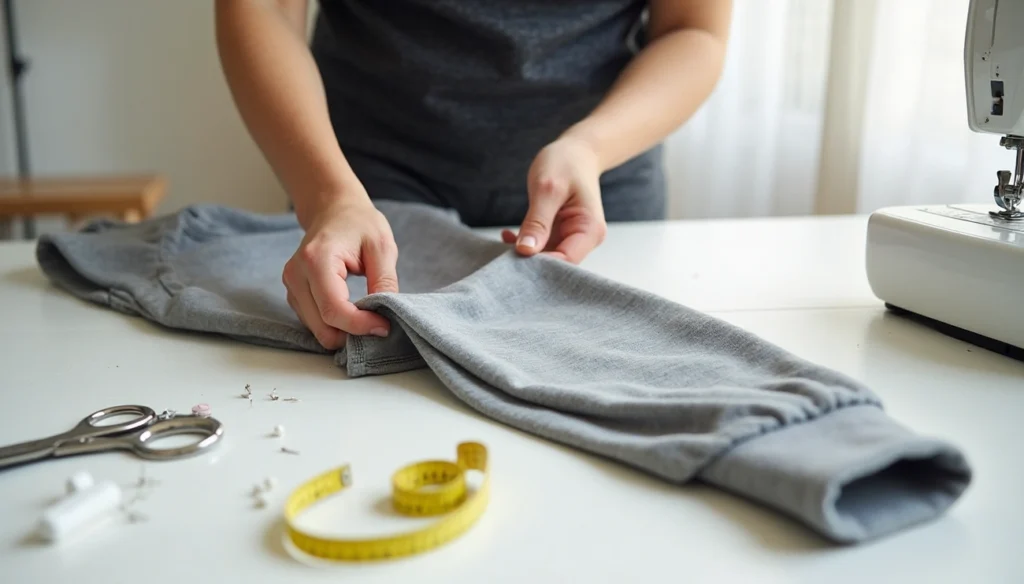
Tools You’ll Need to Hem Joggers
Before diving into the hemming process, gathering the right tools is essential for a successful jogger alteration. Having everything prepared ahead of time will make the process smoother and help you achieve professional-looking results.
Measuring tape and chalk
First, you’ll need accurate measuring tools to ensure precise alterations. A flexible measuring tape allows you to determine exactly how much length to remove from your joggers. I recommend taking measurements while wearing the shoes you’ll typically pair with your joggers. Additionally, tailor’s chalk or fabric markers provide temporary guidelines that won’t damage the fabric. These markings will serve as your cutting and sewing guides throughout the process.
Fabric scissors and seam ripper
Sharp fabric scissors are non-negotiable for clean, precise cuts. Unlike regular household scissors, fabric scissors are designed specifically to cut through textile materials without fraying the edges. Alongside scissors, a seam ripper is invaluable for carefully removing the original cuff without damaging it. This specialized tool helps you disassemble seams methodically while preserving the elastic cuff for reattachment later.
Sewing machine or needle and thread
For hemming joggers, you’ll need either a sewing machine or hand-sewing supplies. While a sewing machine makes the job faster and creates more durable seams, hand-sewing is perfectly acceptable for those without access to a machine. If you’re using a machine, choose a needle appropriate for your jogger’s fabric weight—ballpoint needles work best for knit fabrics commonly used in joggers. Moreover, select thread that matches your joggers’ color exactly for a seamless finish.
Pins, iron, and ironing board
Straight pins are crucial for temporarily holding fabric in place before sewing. Use fine pins to avoid leaving noticeable holes in the material. Furthermore, an iron and ironing board are essential for pressing seams flat both before and after sewing. Proper pressing creates a professional finish and makes sewing much easier. For synthetic materials often found in athletic joggers, use a low heat setting with a pressing cloth to prevent melting or scorching the fabric.
How to Hem Joggers: Step-by-Step
Now that you’ve gathered your tools, let’s dive into the actual hemming process for your joggers. Following these steps will help you achieve a professional-looking result that maintains the joggers’ original style and comfort.
1. Measure the correct length
First, put on your joggers along with the shoes you typically wear with them. Stand upright in front of a mirror to accurately determine your ideal length. Subsequently, have someone help you measure from the desired hemline (usually just above the ankle) to the existing hem. Mark this point with your tailor’s chalk or fabric marker. Once marked, take off the joggers and lay them flat on your work surface.
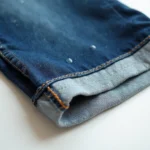
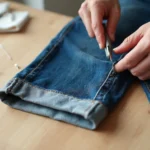
2. Remove the cuff carefully
Next, locate the seam connecting the cuff to the pant leg. Using your seam ripper, gently unpick the stitches that attach the cuff—do not cut it! Work slowly around the entire circumference until the cuff is completely detached. Set the cuff aside safely as you’ll need to reattach it later.
3. Cut the excess fabric
After removing the cuff, measure up from your marked hemline and add about half an inch for the seam allowance. Draw a straight line with your chalk at this point. Given these points, cut along this line with your fabric scissors, taking care to make the cut as even as possible.
4. Taper the leg if needed
In fact, many joggers require tapering after shortening to maintain their proportional look. Ensure the bottom leg circumference matches where you’ll reattach the cuff. If necessary, mark a gradual taper from the knee down and trim accordingly to achieve the right silhouette.
5. Reattach the cuff and sew
Fold the raw edge up by approximately half an inch and press it with an iron to create a clean crease. Accordingly, pin the cuff to this folded edge, aligning any seams with the jogger’s inseam. Using either a sewing machine or hand stitching, attach the cuff with a straight stitch close to the edge.
6. Try on and test the fit
Finally, turn your joggers right side out and try them on with your typical shoes. Check that the length is even on both legs and that the cuffs sit comfortably at your ankles. Make any necessary final adjustments to ensure perfect fit and comfort.
Should You DIY or Go to a Tailor?
Deciding between DIY hemming and professional tailoring for your joggers requires weighing several important factors. Making the right choice can save you time, money, and potential frustration.
Pros and cons of DIY hemming
Hemming joggers yourself offers clear advantages for those with basic sewing skills. First and foremost, you’ll save money on tailoring costs. Additionally, DIY hemming gives you complete control over the finished product and the satisfaction of a personal accomplishment.
Nevertheless, joggers aren’t the easiest pants to hem, primarily because of their distinctive cuff and tapered leg design. The project requires several hours of your time and a certain level of sewing competence. Without proper experience, you risk potentially ruining your joggers—especially problematic with expensive pairs. As one source notes, “this might not be the project to start with” if you lack sewing experience or basic supplies.
When to choose professional tailoring
Professional tailoring becomes the logical choice for several scenarios. Opt for a tailor when dealing with expensive joggers where mistakes would be costly. Similarly, if you lack confidence in your sewing abilities or don’t own basic sewing supplies, professional help prevents potential disasters.
Tailors bring specialized expertise to the table, particularly valuable for joggers’ unique construction. They understand how to properly maintain the tapered silhouette while adjusting length. Furthermore, professionals use high-quality stitching techniques that help your pants maintain their shape and style over time. For performance fabrics often used in athletic joggers, some tailors even use specialized industrial coverstitch machines—the same equipment trusted by premium activewear brands.
Cost and time considerations
Essentially, the cost of professional hemming typically ranges between $10-$25 for basic alterations. More complex adjustments involving tapering might run $30-$45. Meanwhile, rush services may incur additional fees for faster turnaround.
Time-wise, simple hemming alterations usually take professionals 1-3 days to complete. More complex alterations might require 1-2 weeks. In contrast, DIY hemming might consume several hours of your time, especially for beginners.
When calculating total costs, factor in all potential expenses. For DIY projects, consider not just fabric and thread, but potentially new sewing supplies if you don’t already own them. In some cases, “the cost of a new pair (or for all the sewing supplies you’ll need) might actually be more expensive than enlisting a pro.”
Conclusion
Hemming joggers might seem intimidating at first, especially given their unique cuffed design and tapered silhouette. However, as we’ve seen throughout this guide, the process becomes manageable with the right tools and approach. Whether you choose the DIY route or professional tailoring ultimately depends on your sewing skills, the value of your joggers, and your comfort level with alterations.
For beginners, professional tailoring offers a safer option that prevents costly mistakes. Conversely, those with basic sewing experience can tackle this project at home and save money in the process. The step-by-step method outlined above provides a clear pathway to transform those too-long joggers into perfectly fitted pants that hit right at the ankle.
Remember, proper measurement stands as the most critical step before making any cuts. Likewise, careful removal and reattachment of the cuff preserves the distinctive jogger style that makes these pants so popular.