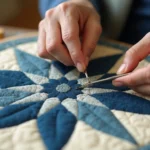
Did you know that threading a sewing machine bobbin is one of the most essential skills for creating perfect stitches? Although sewing machines have evolved dramatically since their introduction to homes in the 1860s, the bobbin remains a critical component in every machine.
For many beginners, learning how to thread a bobbin can seem daunting at first. However, with practice, this fundamental skill becomes second nature. Whether you have a modern machine with a drop-in bobbin or an older model with a front-loading system, the basics of how to thread a sewing machine bobbin follow similar principles.
Before you can start any sewing project, you’ll need to understand how to thread the bobbin properly. This small circular thread-holder carries the bottom thread that works with your top thread to create stitches. Today, we have more sewing machine options than ever before, but they all require a correctly wound and inserted bobbin to function properly.
In this guide, we’ll walk you through exactly how to thread a bobbin, how to load a bobbin into different machine types, and how to thread a bobbin case if your machine requires one. Let’s get started with this fundamental sewing skill!
Get Ready to Thread the Bobbin
Before diving into the threading process, proper preparation ensures smooth bobbin winding. Taking a few minutes to set up correctly will help you avoid frustration later.
Gather your tools and thread
Successfully threading a sewing machine bobbin requires having the right supplies on hand. You’ll need:
- A spool of quality thread (the better the thread quality, the better your results will be)
- An empty bobbin compatible with your machine
- Your sewing machine with bobbin winding capability
- The machine’s manual (especially helpful for first-timers)
While pre-wound bobbins are available in craft stores if you prefer not to wind your own, winding fresh bobbins gives you more thread color options. Furthermore, quality thread makes a significant difference—inexpensive thread often creates more problems than it’s worth.
Understand your bobbin type
Did you know there are over 60 different bobbin styles available? Using the wrong type can damage your machine or create stitching problems. Most household sewing machines (about 95%) use one of these three common types:
- Class 15 (A Style): Approximately 20.3mm in diameter and 11.7mm wide with two flat sides
- L Style: Same diameter as Class 15 but narrower at 8.9mm wide
- M Style: Larger at approximately 24.9mm in diameter and 10.7mm wide
While L Style bobbins can sometimes work in machines designed for Class 15 bobbins because they share the same diameter, a Class 15 bobbin is too wide to fit in a machine designed for L Style. Additionally, factory-wound bobbins typically hold 20-30% more thread than self-wound ones.
Clean the bobbin area if needed
Regular cleaning prevents lint buildup that can affect your machine’s performance. Brother recommends cleaning the bobbin area regularly following these steps:
- Turn off and unplug your machine
- Remove the needle plate (usually requires loosening screws)
- Remove the bobbin case
- Gently clean dust from the race and surrounding areas
- Reinsert the bobbin case, aligning any marker points
Avoid using compressed air, which can push lint deeper into the machine. A small brush or lint-free cloth works well for removing debris. Surprisingly, a mixture of lint and oil can accumulate under the bobbin case, causing tension problems. Regular maintenance will keep your machine running smoothly.
Step-by-Step: How to Thread a Bobbin
Threading a bobbin properly ensures smooth sewing and prevents tension issues down the line. Once you’ve prepared your machine and gathered supplies, let’s move to the actual threading process.
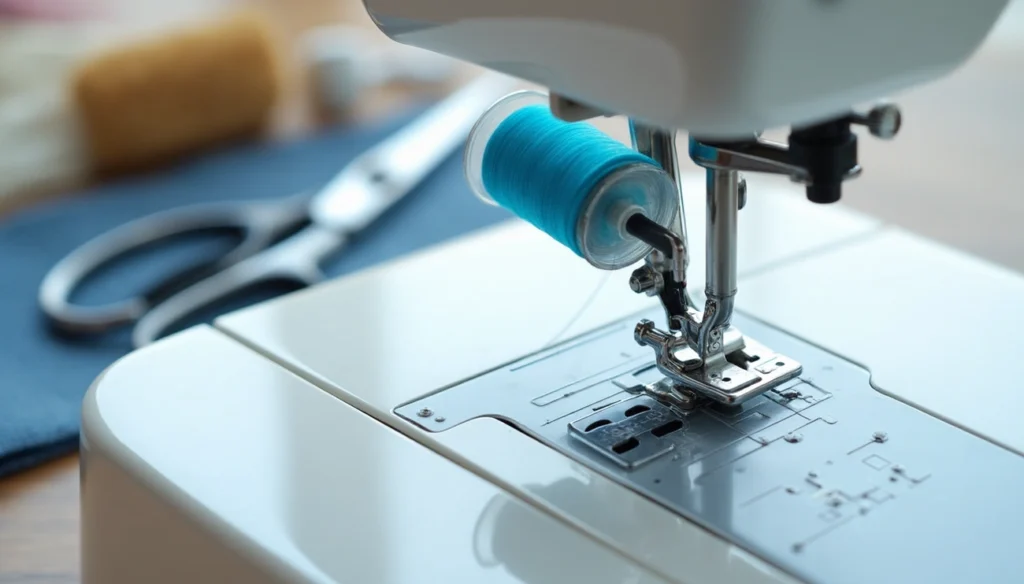
1. Place thread on spool pin
Proper thread placement is crucial for smooth unwinding. Place your thread spool on the spool pin, positioning it so the thread unwinds from the bottom toward the front if using a vertical pin. For horizontal pins, the thread should unwind over the top toward the back. Next, secure the spool with an appropriately sized spool cap – using the wrong size can affect thread tension. If your spool has a slit, align it with the base of the spool pin for smooth unwinding.
2. Guide thread through tension disk
Thread guidance creates proper tension for evenly wound bobbins. Pass the thread under the thread guide at the top of your machine, then beneath the thread guide cover. Subsequently, wrap the thread counterclockwise around the pretension disk. This creates the necessary tension for proper winding – inadequate tension here results in loosely wound bobbins that cause stitching problems.
3. Wind thread onto bobbin
Initially, insert the thread through one of the small holes in your empty bobbin, working from the inside out. Afterward, place the bobbin on the bobbin winder shaft, aligning any notches with the spring on the shaft. Pull the thread several inches through the bobbin hole and hold it while starting to wind. Wind the thread clockwise around the bobbin 5-6 times to secure it.
4. Use foot pedal or button to wind
You can wind your bobbin using either method. For foot pedal winding, simply press down as you would when sewing. Alternatively, press the “Start/Stop” button if your machine has one. Control the winding speed with the speed controller – slide right to increase speed or left to decrease it.
5. Stop and cut thread when full
Modern machines typically stop automatically when the bobbin is full. Otherwise, stop manually when the bobbin looks full or slows down. Cut the thread, slide the bobbin winder shaft back to the left until it snaps into place, and remove the bobbin. Finally, trim any loose ends from the top of the bobbin for neat threading.
How to Insert the Bobbin into the Machine
Once you’ve wound your bobbin, the next critical step is inserting it correctly into your machine. Most modern sewing machines feature either a drop-in (top-loading) or front-loading bobbin system, each requiring specific loading techniques.
Drop-in bobbin loading
For machines with a drop-in bobbin system, begin by turning off your machine or activating the safety mode. Next, locate and slide the latch beside the see-through bobbin cover to unlock it. After removing the cover, hold your bobbin with the thread unwinding counterclockwise (to the left). Insert the bobbin into the built-in bobbin case. Subsequently, guide the thread through the slit in the needle plate cover, which allows tension to be applied properly. Some machines have a thread cutter at the end of the slit—use this to trim excess thread unless you’re gathering or free-motion quilting.
Front-load bobbin loading
Front-loading machines require removing the extension table and opening the hinged cover to access the bobbin area. Initially, make sure your needle is in its highest position. Grasp the hinged latch on the bobbin case and gently pull it out. Hold your wound bobbin so the thread comes off clockwise (to the right). Place the bobbin in the case, thereafter pulling the thread through the notch and under the tension spring until you hear a click.
How to thread a bobbin case
For front-loading systems, once the bobbin is in the case, pull the thread through the small slit along the edge. Afterward, guide it under the flat “finger” of the bobbin case until it slips into the opening on the side, passing the tiny “teeth” at the end of the finger. You’ll hear a distinct click when done correctly.
Secure the bobbin and close the cover
For drop-in systems, replace the bobbin cover by first inserting the tab into the notch, therefore pressing down until it snaps into place. In front-loading machines, hold the bobbin case by the latch with the metal extension pointing to 12 o’clock position. Push it completely into the shuttle until it clicks securely. Consequently, close the front cover and replace the extension table. Henceforth, you’re ready to bring up the bobbin thread and begin sewing.
Common Mistakes and Pro Tips
Even expert sewists make these common bobbin mistakes that can derail your sewing projects. Knowing how to avoid these pitfalls will save you time and frustration in the long run.
Don’t double wind colors
Wind thread on empty bobbins only. Indeed, adding thread to partially wound bobbins causes stitch irregularities when sewing. This practice creates uneven thread distribution, leading to inconsistent tension. Moreover, overfilled bobbins can’t move freely in the bobbin case, causing jams and broken threads. For larger projects, prepare multiple bobbins with the same thread in advance rather than trying to add more thread to a partially used bobbin.
Match bobbin and top thread weight
Despite popular belief, your top thread doesn’t always need to match your bobbin thread. In fact, it’s perfectly acceptable to use different weighted threads top and bottom. Think of top and bottom threads as having a tug-of-war – when using different weights, you’ll need to adjust tension settings to balance this “battle”. Primarily, what matters is adjusting your machine’s tension correctly for the combination you’re using. Factors affecting stitch results include batting density, fabric type, and thread thickness.
Use correct bobbin type for your machine
Using the wrong bobbin can damage your machine and cause serious stitching problems. Always use the same class and style of bobbins that came with your machine – never substitute! If your machine came with plastic bobbins, stick with plastic bobbins. Similarly, if it came with metal ones, use metal ones. Although you might find the right bobbin style (A style, L style, M Style) in different materials, they aren’t necessarily interchangeable. If a bobbin becomes chipped, bent, warped or damaged, discard it immediately.
How to fix loose or tangled stitches
Loose or tangled stitches typically indicate tension issues. To fix this problem:
- Check upper and lower thread tension – if loops appear on the underside, adjust the upper tension; if on the top side, adjust the lower tension
- Ensure your machine is threaded correctly, with thread properly seated in tension disks
- Clean lint and debris from the bobbin area using a small brush
- Verify the bobbin is evenly wound and inserted correctly
- Replace any bent or dull needles immediately
Remember that raising the presser foot when threading is crucial for proper tension, as this opens the tension disks and allows thread to seat properly.
Conclusion
Threading a sewing machine bobbin might seem challenging at first, but practice makes perfect. Throughout this guide, we’ve covered everything from preparation to troubleshooting common issues. Remember, proper bobbin winding forms the foundation of beautiful stitches and frustration-free sewing sessions.
Most importantly, using the correct bobbin type prevents machine damage while matching thread weights ensures balanced stitches. Certainly, taking time to clean your bobbin area regularly will extend your machine’s life and improve stitch quality. Additionally, following the specific loading instructions for your machine type—whether drop-in or front-loading—creates optimal thread tension.
Many sewing problems actually stem from incorrectly wound or inserted bobbins. Therefore, mastering this fundamental skill saves countless hours of troubleshooting later. We recommend practicing bobbin threading until the motion becomes second nature.