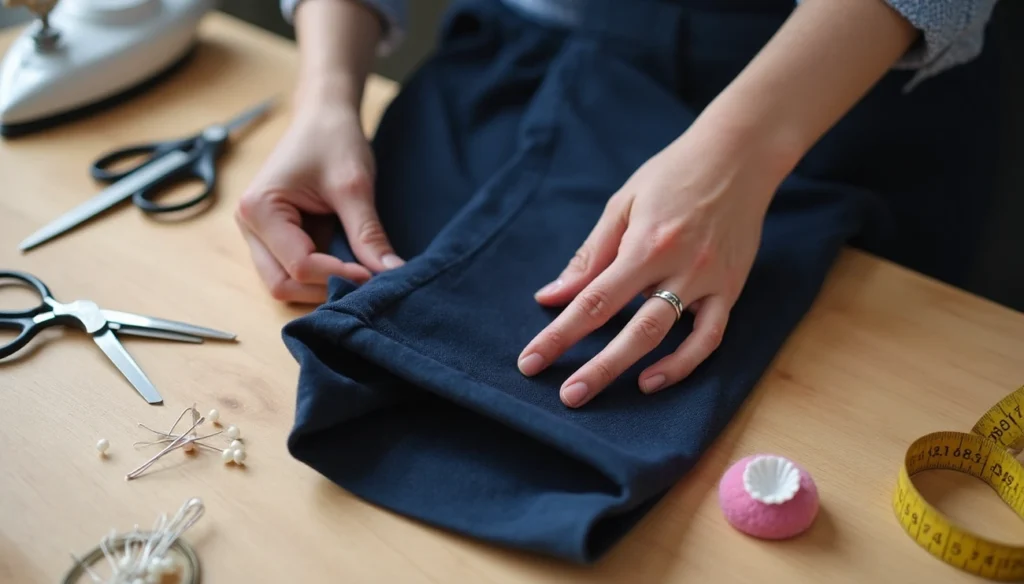
Sew a hem on pants by measuring, cutting, folding, and stitching the fabric for a clean finish. Follow these steps:
- Pin the pants to the desired length
- Measure and mark the new hemline
- Cut off excess fabric (typically 2.5 cm)
- Fold and press the hem inward
- Sew using a straight or blind stitch from the inside seam
Use a blindstitch hemmer for an invisible finish. Always measure twice and secure stitches with a reverse stitch.
Understanding Hem Types and When to Use Them
Choosing the right hem for your pants makes all the difference between a professional finish and an amateur look. Before diving into techniques, let’s explore the different types of hems and when each works best.
Visible vs. invisible hems
The primary decision when hemming pants is between visible and invisible finishes. Visible hems show stitching on the outside of the garment, adding a decorative element or reinforcement. These include double-stitched hems commonly found on jeans and casual pants, providing durability for fabrics subject to heavy wear.
On the contrary, invisible hems (called “blind hems” in professional tailoring) create a nearly undetectable finish from the outside. In French, these are known as “invisible” hems since no stitching appears on the right side of the garment. Blind hems are particularly valuable when a subtle finish is desired, especially for formal wear or couture applications.
The key advantage of invisible hems is their elegant appearance, furthermore, they hang beautifully because they automatically create slack in the stitching. This allows the hem to hang completely flat by eliminating the tightness that straight seams introduce.
Best hem styles for jeans, chinos, and dress pants
For jeans, the double-turned hem or double-stitched hem remains the gold standard. This sturdy, durable option leaves no raw edges exposed, making it ideal for denim that experiences significant wear. However, if you’re shortening designer jeans, consider the “original hem” technique to preserve the factory finish by removing and reattaching it at a new position.
When working with chinos, you have flexibility. A topstitch hem offers durability, though blind hems can give chinos a more formal appearance. Some tailors claim blind hems work better on lighter fabrics, but most medium-weight chinos can accommodate either style.
For dress pants, the blind hem is unquestionably the preferred choice. This nearly invisible finish creates a clean, professional look essential for formal or business attire. Importantly, the stitches disappear into the fabric, maintaining the pants’ smooth, unbroken appearance – perfect for creating that polished look you want in dress slacks.
Step-by-Step: How to Hand Stitch a Hem
Mastering the hand-stitched hem transforms ordinary pants into professionally finished garments. The blind stitch method creates an almost invisible finish that’s perfect for dress pants and formal wear.
How to hand stitch a hem with a blind stitch
The blind stitch creates a nearly invisible hem from both inside and outside of your garment. To begin, prepare your hem by folding the raw edge inward ½ inch, then fold again at your desired hem length (typically 1-1½ inches for pants). Press these folds firmly with an iron for crisp edges.
Thread your needle with matching thread—this is crucial as contrasting thread will make any visible stitches stand out. For thicker fabrics like wool or denim, consider using a stronger needle and potentially double thread for durability.
- Knot your thread end and insert the needle through the folded edge to hide the knot inside the hem.
- Bring the needle up through the top folded edge.
- Take a tiny horizontal stitch in the main fabric, catching only 1-2 threads.
- Return to the fold near where you emerged and continue through the fold horizontally for about ½ inch.
- Repeat this pattern, creating small diagonal stitches that barely show on either side.
Securing thread and starting at the seam
Always begin hemming at a side seam—this provides natural reinforcement and helps conceal where your stitching starts and ends. To secure your thread initially, take 2-3 tiny stitches in the same place at the seam, effectively locking your thread without bulky knots.
When finishing, create a secure knot by passing the needle through a loop of your thread twice before pulling tight. Hide remaining thread by passing the needle horizontally through the fold before cutting.
Spacing stitches for a clean finish
Maintain consistent spacing between stitches for professional results—about ¼ to ½ inch apart works well for most pants. For delicate or formal fabrics, use closer spacing (⅛ inch) for added security. For heavier materials like denim, slightly wider spacing is acceptable.
Keep your tension even—neither too tight (causes puckering) nor too loose (creates gaps). The goal is flat, smooth fabric with stitches that disappear into the weave. When complete, press the hem once more without directly ironing over the stitches to maintain that professional, tailored look.
Step-by-Step: How to Hem Dress Pants with Sewing Machine
Machine hemming offers speed and precision when tailoring dress pants. Unlike hand stitching, a sewing machine creates consistent, durable hems in minutes instead of hours.
Setting up your machine for hemming
First, select the appropriate stitch for your hem type. For dress pants, the blind hem stitch (which looks like a zigzag with occasional straight stitches) creates a nearly invisible finish. Locate this stitch on your machine—it typically resembles “^—-^—-^” in the stitch menu.
Next, attach your blind hem foot, recognizable by the metal guide running along its center. This guide helps align your fabric fold for precise stitching. Adjust your stitch length to medium (around 2-2.5) for most dress pants fabrics. Additionally, set the stitch width to approximately 5, allowing the needle to occasionally catch the folded edge.
Using the free arm for pant legs
The free arm is essential for hemming tubular items like pant legs. To access it, remove your machine’s extension table or accessory box, revealing the narrower sewing surface underneath. This design allows the pant leg to slip around the arm without bunching.
When positioning your pants, turn them inside out first. Subsequently, place the leg around the free arm, ensuring the folded hem edge aligns with your presser foot guide. This arrangement prevents accidentally catching other parts of the garment during sewing.
Sewing close to the folded edge
Essentially, successful machine hemming requires proper fabric positioning. Fold your prepared hem allowance back against itself, creating a small fold where just ¼ to ½ inch of fabric extends beyond the main pant leg.
Start sewing at an inside seam, which provides natural reinforcement. Guide the folded edge alongside your blind hem foot’s center guide as you sew. The machine will primarily stitch along the hem allowance, occasionally catching just a thread or two of the main fabric—creating that nearly invisible finish.
Maintain consistent speed and tension, checking periodically that you’re not catching unwanted fabric. After completing the circle, secure with a few reverse stitches before trimming threads.
Troubleshooting and Final Touches
Even with careful technique, hemming challenges occasionally arise. Fortunately, most problems have straightforward solutions that transform disappointing results into professional finishes.
Fixing uneven hems
For noticeably uneven hems, don’t panic—simply mark multiple points around each pant leg at your desired length. I recommend marking at least three points (inside seam, outside seam, and center) to maintain consistency. Lay your pants flat, pulling legs apart to mark with chalk, ensuring both sides measure identically from the floor.
For precision, use a ruler to measure from existing seams or waistband. Remember that pants naturally hang longer at the back, consequently, professional tailors typically cut the back hem slightly longer than the front. Always check evenness by trying on pants with appropriate shoes—what appears uneven when flat might hang perfectly when worn.
What to do if the hem puckers
Puckering typically stems from three main causes:
- Tension issues – If your hem puckers after stitching, the thread tension might be too tight. Test by cutting a few stitches—if the pucker disappears, tension was the culprit. Reduce thread tension and resew.
- Feed problems – When fabric layers feed unevenly through the machine, puckering results. Try these solutions:
- Adjust presser foot pressure
- Use a walking foot attachment
- Apply fusible hem tape for stabilization
- Fabric structure issues – Dense fabrics may inherently pucker when stitched. Solve this by using finer needles and thread, reducing stitch density, or switching to bias cutting when possible.
For stretched hems, steam thoroughly and press with medium pressure. Alternatively, sandwich the hem between damp cloths and press without moving the iron side-to-side.
Final pressing and trying on
Pressing is crucial—it sets stitches and creates a professional finish. Press the hem thoroughly on both sides, working from the inside first, thereafter flipping to the outside. For wool or delicate fabrics, use a pressing cloth to prevent shine.
Following pressing, always try on the pants with appropriate footwear. Walk around, sit down, and check that the length feels comfortable throughout normal movement. The hem should break slightly over shoes without dragging on the floor. If something doesn’t look right, don’t hesitate to make adjustments before considering the project complete.
Conclusion
Hemming pants remains a valuable skill that saves money and extends the life of your wardrobe. Throughout this guide, we’ve explored different hemming techniques suitable for various types of pants. Certainly, mastering both hand-stitching with the blind stitch method and machine hemming gives you flexibility to tackle any pants alteration project.
Remember, practice makes perfect when learning to sew hems. Your first attempt might not look professional, but each subsequent project will improve your technique. Most importantly, selecting the right hem style dramatically impacts the final appearance of your pants—blind hems for dress pants, double-stitched for jeans, and either style for chinos depending on the desired look.
Many people find hemming intimidating at first glance, yet the process becomes straightforward with proper guidance. The troubleshooting tips should help you overcome common challenges like puckering or uneven hems. Additionally, never underestimate the power of proper pressing—this final step transforms good hemming into great hemming.