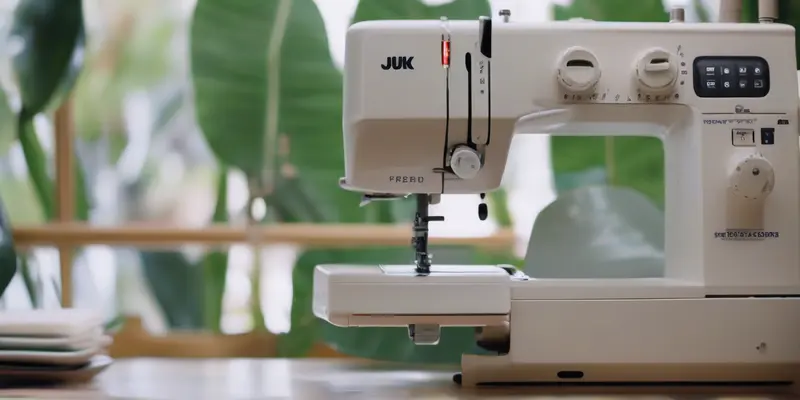
If you just unboxed a Juki serger, you’re probably staring at the tangle of thread guides and loopers wondering how to thread a Juki serger without losing your mind. Juki sergers are workhorses loved by sewists for their reliable stitch quality and durability, but their threading process can feel intimidating at first glance. Whether you’re shopping for top-rated Juki serger models or already own a popular Juki MO-654DE, a budget-friendly Juki MO-50e, or a high-end coverstitch serger, the core threading steps are consistent across most 2/3/4 thread Juki machines. New to sergers? Read our guide to the differences between sergers, overlockers, and coverstitch machines to understand your machine’s core functions before you start. This guide breaks down the process into simple, actionable steps, plus covers common mistakes and fixes to get you serging in no time.
What You Need Before Threading Your Juki Serger
Essential Tools for Threading
You don’t need fancy tools to thread a Juki serger, but a few basics make the process far easier:
- 4 cones of quality serger thread (Juki recommends using polyester or poly-core thread to avoid breakage)
- Small pair of sharp embroidery scissors or thread snips
- Your Juki serger’s manual (download the official copy from the Juki official support portal if you lost yours)
- Tweezers (optional, but helpful for pulling thread through tight looper guides)
- Needle threader (optional, Juki sergers have built-in needle threaders on most modern models)
Prepare Your Serger First
Never try to thread a serger that’s powered on or has the foot pedal pressed. Follow these prep steps first:
- Unplug the serger from the power outlet to avoid accidental starts.
- Raise the presser foot using the lever on the back right of the machine — this releases tension on the thread guides, making threading easier.
- Turn the handwheel toward you (counterclockwise) to raise both serger needles to their highest position. This ensures the needle eyes are aligned with the threading guides.
- Remove any old, tangled thread from previous projects. Cut the thread tails close to the spools, then pull the old thread out of the guides from the needle end to avoid leaving lint buildup.
Step-by-Step: How to Thread a Juki Serger
Juki sergers follow a standard threading order: needle threads first, then loopers. This order is critical — threading loopers before needles can cause tangles and skipped stitches. Most Juki 4-thread sergers use two needle threads (right and left), an upper looper, and a lower looper. If you’re using a 3-thread serger, skip the left needle thread step.
Step 1: Thread the Right Needle (2/3/4 Thread Models)
The right needle is the one closest to the knife (the blade that trims fabric edges). Follow this path for most Juki models:
- Place your first thread cone on the right-most spool pin at the top of the machine.
- Pull the thread through the top thread guide (the small metal loop at the very top of the machine), then down through the first tension disc (marked with a “1” or “R” for right needle on most Juki models). Make sure the thread sits fully inside the tension disc groove — if it’s outside, your stitches will be too loose or tight.
- Guide the thread through the take-up lever (the small metal arm that moves up and down when you turn the handwheel), then down through the remaining thread guides along the front of the machine, following the numbered arrows printed on the serger body.
- Use the built-in needle threader (or tweezers) to pull the thread through the right needle eye from front to back. Leave a 6-inch thread tail hanging out the back of the needle.
Step 2: Thread the Left Needle (3/4 Thread Models Only)
If you’re using a 2-thread serger, skip this step. For 3 or 4 thread models:
- Place your second thread cone on the second spool pin from the right.
- Follow the same path as the right needle, but use the tension disc marked “2” or “L” for left needle. Follow the numbered guides (marked 2) printed on the machine.
- Thread the left needle (the one farthest from the knife) from front to back, leaving a 6-inch tail.
Step 3: Thread the Upper Looper
The upper looper is the metal arm that moves from back to front above the needles. It’s usually marked with a “U” or “3” on Juki sergers.
- Place your third thread cone on the third spool pin from the right.
- Guide the thread through the top looper thread guide, then down through the upper looper tension disc (marked “U” or “3”).
- Turn the handwheel toward you to lower the upper looper fully — this makes it easier to access the looper eye.
- Thread the upper looper from back to front (the eye is on the front of the looper arm). Use tweezers if the eye is hard to reach. Leave a 6-inch tail.
Step 4: Thread the Lower Looper
The lower looper is the metal arm that moves from front to back below the needles, marked “L” or “4” on most Juki models. This is the trickiest part for beginners, so take your time.
- Place your fourth thread cone on the left-most spool pin.
- Guide the thread through the lower looper thread guide at the top of the machine, then down through the lower looper tension disc (marked “L” or “4”).
- Turn the handwheel toward you to lower the lower looper fully — it will swing out toward the front of the machine.
- Thread the lower looper from front to back (the eye is on the back of the looper arm). Juki’s lower looper eyes are slightly larger than needle eyes, but tweezers still help. Leave a 6-inch tail.
Step 5: Test Your Thread Setup
Never start serging on your final project without testing first. Follow these test steps:
- Hold all four thread tails (needle and looper) together behind the presser foot.
- Turn the handwheel toward you 2-3 full rotations to form the first stitch chain. This pulls the thread through all guides and loopers to seat properly.
- Plug in the serger, place a scrap piece of cotton fabric under the presser foot, and serge 6-8 inches of the fabric edge.
- Check the stitch: the loopers should wrap around the fabric edge, with no loose loops on the front or back. Adjust tension if needed per your manual’s guidelines.
Common Juki Serger Threading Mistakes to Avoid
Even experienced sewists make these threading errors — avoid them to save time and frustration:
- Threading loopers before needles: Juki sergers are designed to be threaded needle-first. Threading loopers first often leads to tangled thread under the stitch plate.
- Skipping tension discs: Every thread must pass through its assigned tension disc. If the thread slips out, your stitches will be uneven or the thread will break.
- Not raising the presser foot: The presser foot lever releases tension on the guides. If you leave it down, threading will feel stiff and the thread won’t seat properly in the tension discs.
- Using regular sewing thread: Sewing thread is thinner than serger thread and can break under the high speed of a Juki serger. Always use cone thread designed for sergers.
- Forgetting to raise needles fully: If the needles aren’t at their highest position, the needle eyes won’t align with the threading guides, making threading impossible.
Troubleshooting Juki Serger Threading Issues
If your serger skips stitches, breaks thread, or produces messy seams after threading, try these fixes:
Thread Breaks Immediately After Threading
This is usually caused by thread not seating in the tension discs, or a burr on the needle or looper. Re-thread the affected thread path, check the needle for nicks (replace if damaged), and make sure the thread is not caught on any sharp edges of the spool.
Loops on the Wrong Side of Fabric
If you see loose looper threads on the front of your fabric, your looper tension is too loose. If loops are on the back, needle tension is too loose. Adjust tension dials in small increments (1/4 turn at a time) until the stitch is balanced. Refer to your manual for default tension settings for different fabrics.
Skipped Stitches After Threading
Skipped stitches usually mean the needle thread is not passing through the looper loop correctly. Re-thread the entire machine in the correct order, make sure the needles are inserted fully (flat side facing back on Juki sergers), and replace dull or bent needles.
Frequently Asked Questions About Threading Juki Sergers
Is threading a Juki serger different from other brands?
Most sergers follow the same needle-first, looper-second order, but Juki places their tension discs and guides in slightly different spots than Brother or Singer models. Always refer to your Juki manual for model-specific guide placements, even if you’ve threaded other sergers before.
Can I use regular sewing thread on my Juki serger?
We don’t recommend it. Regular sewing thread is wound on small spools that can’t keep up with the high speed of a Juki serger, and the thinner thread is more likely to break. Use cone-shaped serger thread for best results.
How often should I re-thread my Juki serger?
Re-thread your serger every time you change thread colors, switch between 3 and 4 thread modes, or if you notice uneven stitches. Leaving old thread in the guides for weeks can lead to lint buildup that affects tension.
Does my Juki serger have an air threading feature?
Most home Juki sergers require manual threading. Juki’s industrial sergers and high-end home models like the Juki MO-2000QVP have air threading, which uses compressed air to pull thread through loopers automatically. Check your manual to see if your model has this feature.
Conclusion
Learning how to thread a Juki serger takes practice, but once you memorize the order (needles first, then loopers) and follow the printed guides on your machine, it becomes second nature. Always keep your manual handy, use quality serger thread, and test your stitches on scrap fabric before starting projects. Juki sergers are built to last for decades, so taking the time to thread them correctly will keep your machine running smoothly for years of sewing projects. If you get stuck, don’t force the thread — re-thread the entire path from the spool down to avoid hidden tangles.