To sew an original hem in your jeans, start by gathering your materials—denim that matches, a sewing machine, thread, and tools. Measure and mark your desired length, then cut the excess fabric with sharp scissors. Fold the hem and pin it in place, ensuring it’s even. Next, sew with a straight stitch, backstitching for durability. Finally, press the hem for a polished look. Want to keep your jeans looking fresh? Check out the next steps for more tips!
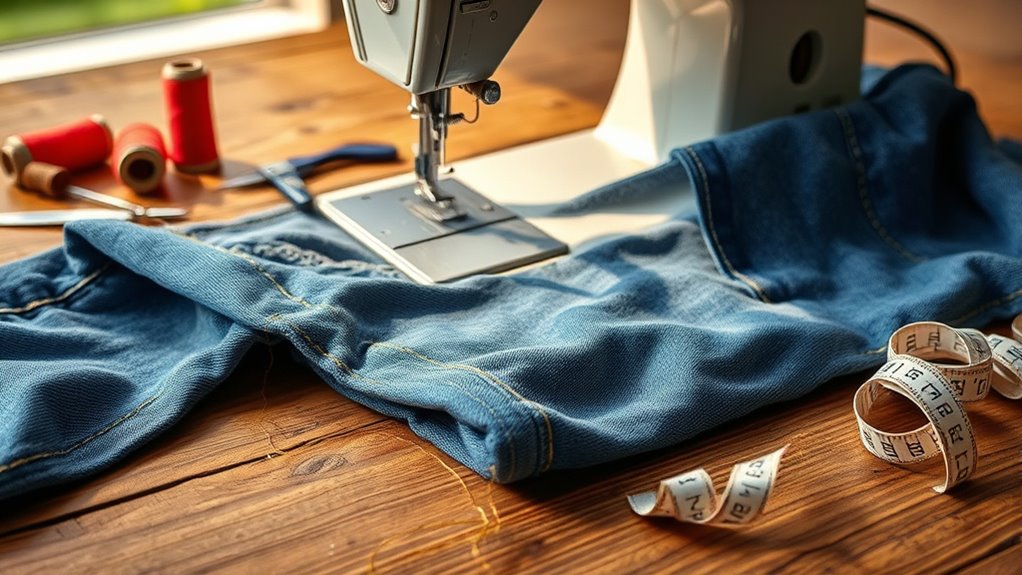
Gather Your Materials
Before diving into your sewing project, you’ll want to gather a few essential materials. First off, think about your fabric selection. Choose a denim that matches the original color and weight of your jeans for a seamless look.
You’ll also need a sewing machine with a needle suitable for thicker fabrics, like a denim or universal needle. Don’t forget quality thread that complements your fabric; this is key for durability!
A seam ripper can save you from any mistakes, and some fabric clips or pins will help secure your work. Finally, have your scissors and measuring tape handy! With the right materials in place, you’ll be ready to explore some fun sewing techniques and create that perfect original hem.
Measure and Mark the Desired Length
Now that you’ve got your materials, it’s time to measure and mark the perfect length for your jeans. Grab a measuring tape and some fabric chalk, then stand tall to find that sweet spot. Trust us, getting this step right is key to rocking those newly hemmed jeans!
Gather Necessary Tools
To create that perfect original hem in your jeans, you’ll need to gather a few essential tools, ensuring you’re ready to tackle the task with confidence. Here’s a quick list of what you’ll want by your side:
| Tool | Purpose |
|---|---|
| Measuring Tape | To measure the desired length accurately |
| Tailor’s Chalk | For marking your measurements on the fabric |
| Sewing Machine | To apply various sewing techniques seamlessly |
With these tools, you’ll be equipped to explore different hemming methods that suit your style. Grab your tools, and let’s plunge into the fun of altering your jeans! You’ll soon see that mastering these skills can elevate your wardrobe in ways you never thought possible.
Determine Accurate Length
How can you guarantee your jeans hit just the right spot? Start by measuring and marking your desired length with precision. Here’s how to nail those length adjustments using fitting techniques:
- Stand straight in your favorite shoes for an accurate view.
- Use a measuring tape to find the perfect inseam.
- Mark the desired length with fabric chalk or a pin.
- Double-check your measurements by sitting and walking around.
- Don’t forget to factor in the hem allowance!
Cut the Excess Fabric
Grab your fabric scissors, because it’s time to cut the excess fabric from your jeans! First, confirm you’re working with the right fabric types; denim can be thick and tricky, so sharp scissors are a must.
Start by laying your jeans flat, following the length you determined earlier. Use cutting techniques like a straight cut or a slight curve, depending on your desired hem style.
Remember, keep your cuts clean and even for a polished look! Avoid cutting too much—better to take off a little at a time. Once you’ve snipped away the excess, you’re one step closer to achieving that perfect original hem. Let’s move on to preparing that hem for sewing!
Prepare the Original Hem
Now that you’ve snipped away the excess fabric, it’s vital to prepare the original hem for sewing. This step is important for achieving a polished look. Here are some original hem techniques to keep in mind during your fabric preparation:
- Press the hem: Use an iron to create a crisp edge.
- Align the edges: Make sure the original hem aligns perfectly with the new edge.
- Check the length: Try the jeans on to confirm the desired length.
- Trim any frayed edges: Cut away any loose threads for a clean finish.
- Use fabric glue: A little dab can help keep everything in place before sewing.
With these tips, your jeans will look like they’ve just come off the rack!
Pin the Hem in Place
Pinning the hem in place is an essential step that guarantees your hard work pays off with a professional finish. Start by folding your hem to your desired length, confirming the hem placement looks just right. Use effective pinning techniques to secure it—this will prevent any shifting while you sew.
Here’s a quick guide to help you pin effectively:
| Step | Action | Tip |
|---|---|---|
| 1. Measure | Fold to desired length | Use a measuring tape |
| 2. Pin | Insert pins every 2-3 inches | Keep pins parallel to hem |
| 3. Check | Stand and adjust if needed | Confirm even hem placement |
| 4. Smooth | Iron before sewing | Flatten any creases |
With this, you’re ready to create that flawless finish!
Sew the Hem
It’s time to bring your hem to life by sewing it in place! Grab your sewing machine and let’s lock in that perfect fit. Depending on your fabric types, you can choose from various hem techniques to achieve a polished look.
Here’s what to keep in mind while you sew:
- Use a straight stitch for sturdy fabrics like denim.
- Opt for a zigzag stitch on stretchier materials to maintain elasticity.
- Adjust your stitch length for a clean finish.
- Don’t forget to backstitch at the beginning and end for durability.
- Keep your fabric taut but not stretched to avoid puckering.
With these tips, you’ll have a professional-looking hem that’s ready to show off!
Finish the Hem Edges
To achieve a polished finish on your jeans, you’ll want to focus on the hem edges. Start by choosing the right hem finishing techniques. A simple zigzag stitch can help prevent fraying, or you might opt for a serger if you have one handy. Another trendy option is using bias tape for a chic fabric edge treatment; it adds durability and a pop of color.
Whichever method you choose, make sure to trim any excess fabric neatly. You can also consider using pinking shears for a decorative touch while keeping those edges secure. By paying attention to these details, you’ll elevate your jeans from basic to bespoke, ensuring they look fabulous for years to come. Happy sewing!
Press and Finalize the Hem
Once you’ve finished sewing the hem, pressing it is essential for achieving a professional look. Use the right pressing techniques to guarantee your jeans look polished and chic. Here’s how to finalize that hem with style:
- Set your iron to the appropriate fabric setting for denim.
- Use steam sparingly, as too much can distort the fabric.
- Press from the inside of the hem to avoid shine on the outside.
- Use a pressing cloth to protect the fabric and maintain its integrity.
- Let the hem cool completely before wearing to set the shape.
Frequently Asked Questions
Can I Use This Method for Different Types of Fabric?
Yes, you can use this method for various fabric types! Just adjust your sewing techniques accordingly for each fabric’s weight and stretch. Experimenting will help you achieve a perfect finish, no matter what you’re working with.
How Do I Prevent Fraying After Cutting the Fabric?
To prevent fraying after cutting, use edge finishing techniques like zigzag stitching or serging. A fabric treatment with fray check can also help. These methods keep your fabric looking fresh and stylish for your project!
Is It Possible to Alter the Hem Without Cutting the Jeans?
Yes, it’s totally possible! You can use alternative techniques like fabric manipulation to create a new hem without cutting. Try folding and tacking the fabric in place for a fresh look that’s stylish and functional!
What Type of Thread Should I Use for Denim?
Did you know that 50% of denim enthusiasts prefer using 100% cotton denim thread? When choosing thread weight, opt for a heavier weight like 30 or 40 for durability, making your seams strong and stylish.
Can I Sew the Hem by Hand Instead of Using a Machine?
Absolutely, you can sew the hem by hand! Try hand sewing techniques like whip stitch or slip stitch for a polished finish. Explore hem stitching options to guarantee your jeans look stylish and well-crafted. Happy sewing!